Part 2: Liquid in Treepl CMS
In this part of the course we’ll explore how Liquid is implemented in treepl CMS and the overall concepts on using it to harness your website data.
Total time for completion: 30 mins
While Liquid is an open-source development started by the team at Shopify, it can be implemented in a variety of ways in different applications.
The base Liquid library, as used in Shopify, has been implemented in Treepl CMS. So it follows very closely to the same constructs and methods documented on the Liquid website.
There are 3 core aspects in understanding Liquid in Treepl CMS.
1. Tags/Components
Time for completion: 5 mins
Component Tags are your connection to the back-end data within your Treepl CMS site instance, bringing that data into the Liquid scope so that you can manipulate it in your website development as needed.
Whenever you are coding with Liquid you’ll often be using Tags.
Tags are defined by a curly bracket and percentage character which wraps additional Liquid methods, like so:
{% … %}
There are a variety of Liquid Tags that we’ll look at but first of all we’ll discuss the Component Tag.
Component Tags will contain a variety of parameters that define exactly what data is retrieved from the CMS. These parameters are in a ‘Name/Value’ pair format, meaning they consist of a name (which signifies the type of parameter) and a value (the variable data being assigned to that parameter). An example of this format is:
name: "value"
Multiple parameters are separated with a comma, for example:
name1: "value1", name2: "value2"
Components usually consist of a type parameter and one or more reference parameters - identifying the dataset required.
Using our Menu example from earlier the Component Tag might look like this:
{% component type: "menu", alias: "main_nav" %}
Can you identify the name/value parameter pairs in the above component?
They are: type: "menu" and alias: "main_nav"
So, this Component Tag instructs the CMS to retrieve a dataset of type "menu" and then further identifies which menu by passing an alias parameter with the system name of the menu required, in this case "main_nav".
Sometimes an alias or name like this is used, or a system ID number is used. And sometimes either can be used interchangeably.
Many more parameters can be added to most Component Tags in order to build more complex and/or specific requests to the CMS. For example, the Menu component above also needs to know which Liquid layout to use for rendering the data into. To do this, you’d add the layoutGroup parameter with the name of your layout group as the value (remembering to separated additional parameters with a comma):
{% component type: "menu", alias: "main_nav", layoutGroup: "My Layout Group" %}
That’s the basis for all Component Tags in Treepl CMS and there are a variety of component types for all the CMS data that is accessible.
The Components Manager, built into the admin editor, will help you construct your Component Tags so you don’t always have to code these by hand.
Plus, all Component Tags and their parameters are fully documented under the ‘Liquid Components’ section of the documentation - so for advanced users, you can get hands-on and explore the full capabilities for each component.
The beginning of this course will mainly focus on Component Tags. We’ll look at other Liquid specific Tags as we discuss more advanced topics.
Using the Editor for Liquid
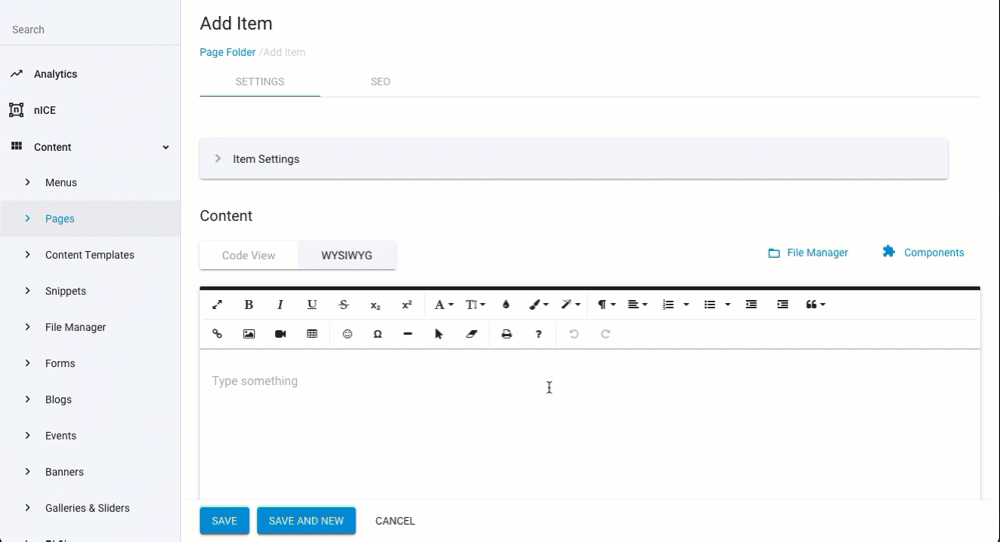
When inserting these types of components and other single-line Liquid code, you can generally use the editor in ‘WYSIWYG’ mode. However, it’s recommended that you use the ‘Code View’ as you work more with Liquid. Especially when you start manipulating the HTML markup and constructing multiple lines of Liquid code, as the ‘WYSIWYG’ editing mode will not work well for this style of development.
Afterall, Liquid is a ‘markup’ language so it’s intended to be implemented directly in the markup.
2. Layouts
Time for completion: 2 mins
Layouts are the ‘templating’ part of the ‘templating language’, providing the markup for the data to populate into.
Most modules in Treepl CMS provide a list layout and a detail layout by default, but you can add as many additional layouts as needed. For example, an eCommerce site might list out product on a page, using the list layout, and then have an individual product page, using the detail layout. But let’s say you also want to list some products on a specials page in a totally different way. You can simply add another list layout with the desired markup and instruct your component tag to use this new layout for the specials listing.
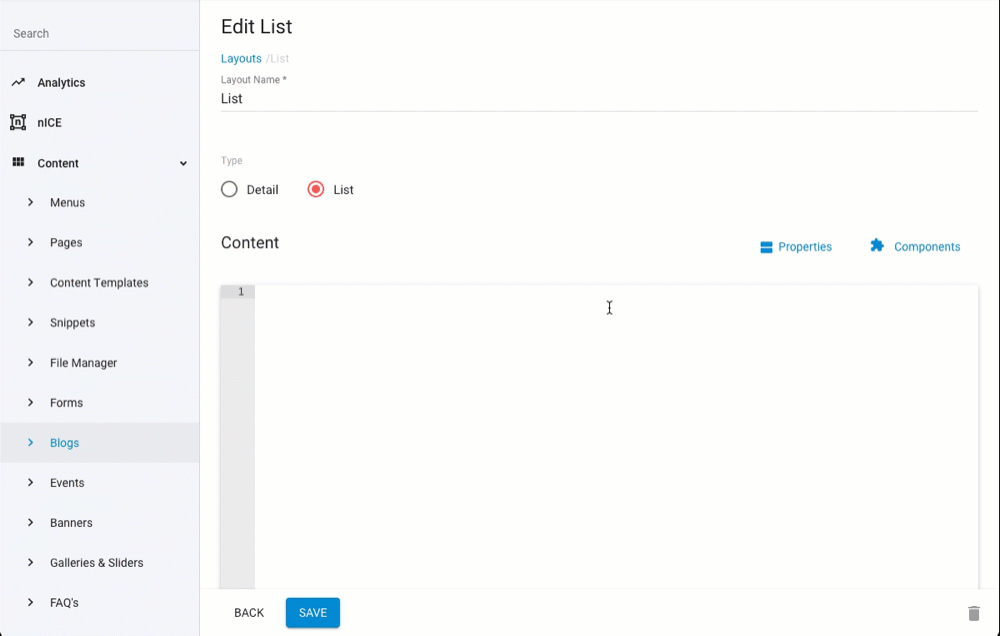
Accessing Layouts, for most modules, can be done via editing the modules settings:
Layouts can also be created directly on a page and within your Liquid code, outside of the CMS layout management system. More on this later though.
Some components have different layout structures as well, depending on the module functionality. Like in our menu example from above, Menus actually use Layout Groups, whereby a set of nested layouts are used to better render menus with multiple levels.
Menu Layouts are accessed under the 'Layouts' tab when editing a menu:
Layouts can contain very simple HTML markup or they can consist of complex Liquid code, even incorporating further component tags that reference additional layouts. So the flexibility you have with Liquid and layouts can be very powerful.
3. Objects
Time for completion: 20 mins
Objects are digital goblets full of fresh juicy data, generously squeezed from the Amozonian servers… Oh, sorry, got distracted there by my love of Objects...
More technically speaking, Objects are how the data is structured and output within the Liquid scope and in turn provides the method for referencing that data to be rendered.
At its simplest level, a Liquid Object reference will most commonly look like the below sample code (which is referencing an items name):
{{this['name']}}
On the front-end this might render something like:
Main Menu
Often you’ll find Objects like these ready to copy and paste from the Properties Manager at the top right of the CMS editor in most module Layouts.
The Menu module doesn’t have the Properties Manager for its grouped Layouts, however, most other modules throughout the CMS do.
Liquid Syntax Simplification
You’ll notice in the example above that ‘name’ has square brackets and single quotes wrapping it, ie: ['name']. Normally, in Liquid, this syntax allows for names with spaces in them. However, in Treepl CMS we’ve made things a little simpler for you and all property names are referenced as one word (spaces removed), and so this syntax can be simplified using a dot notation (more on this below). For example:
{{this.name}} (instead of {{this['name']}})
We’ll be using this simplified syntax throughout the rest of these tutorials as it’s easier to write and understand.
Other Treepl CMS Liquid Objects
Along with outputting data Objects relating to specific modules that you’ve requested, there are also some special Liquid Objects relating to Treepl CMS functionality.
This might be for retrieving global information about your site instance or data right from the URL, or even for use under certain conditions like when someone is logged in, or after certain events like a form being submitted.
(there are several other available Objects in Treepl CMS that you can explore as well which are documented here)
Ok, so that’s the 3 main Liquid concepts covered; Tags/Components, Layouts, and Objects.
But Objects need a little more love, so let’s pour over this Liquid stuff in more detail (yes, pun intended).
Object Data: Structure
If you’re wanting to get the full use out of Liquid you’ll want to dig a little deeper into the Object data structure, so let’s do that now.
The structure of the Object data is basically in JSON format (JavaScript Object Notation) and consists of attribute/value pairs - much like our name/value pairs in our Component Tags. But JSON data can be much more complex, consisting of nested objects and arrays, and uses a slightly different syntax.
Using our syntax simplification as noted above, Objects in Liquid are accessed using a form of the ‘dot’ notation, or the ‘object-oriented’ method, whereby to access the data values you use dots (.) to traverse the relevant object parameters.
It’s a bit like referencing a directory path of nested folders on your website, where you use a forward slash (/) to denote the change in directory, eg:
root/images/gallery/
But instead, you are referencing nested parameters within your data Object, and with dots (.) instead of forward slashes, eg:
root.menu.name
But just like referencing a file on your website, the path you use is relative to where you are, or in the case of Liquid, it’s relative to what Layout you are in or how you are accessing the data Object (this is often referred to as the Liquid scope).
This is probably the hardest part for beginners to get their head around. So let’s start with some basic examples, again using the Menu module from above as our sample data.
So you’ve successfully requested your main navigation menu using the constructed Component tag from the earlier example and referenced a layout group called "My Layout Group":
{% component type: "menu", alias: "main_nav", layoutGroup: "My Layout Group"%}
Now, within a layout of the "My Layout Group" you can start using Liquid to output data relating to your menu. Such as the menu item’s name, link, alt text, classes, etc…
In Liquid, whenever you want to output something you start with double curly brackets, like so:
{{ ... }}
But how do you know what data is available, and how do you reference it in Liquid code?
Enter; Liquid Objects and object notation syntax.
Viewing Available Object Data
To answer the first part of the question; "how do you know what data is available", you can do one of three things.
1 If you are editing a Layout within the Treepl CMS admin, you’ll have access to the Properties Manager at the top right of the editor window. Many available data points have been pre-configured here for you to copy and paste.
The Menu module doesn’t have the Properties Manager for it’s layouts, however, most other modules throughout the CMS do.
2 You can reference the documentation for the data output available for your specific component and construct your Liquid syntax manually from there.
For example, the Menu output documentation can be found here.
3 You can temporarily output all the data to your layout and reference it directly on the front-end in your browser.
To do this, you simply reference the root Object of your Liquid layout, which is referred to as this, like so:
{{this}}
This Liquid Object will output the Layout’s complete available dataset in JSON format and when viewed in your browser will render the data to the page.
Although, simply being rendered in your browser window won’t be very readable. So there are two things we can do here to help.
One, wrap the {{this}} Object in an HTML pre element (which is an HTML element that preserves preformatted code), like so:
<pre>{{this}}</pre>
This will help your browser format the JSON in a more readable format.
Alternatively, to get this output off your page and into your browser’s developer console (which is probably a better way to inspect the data) you can use a little bit of JavaScript in your layout, like so:
<script>
  console.log({{this | strip_html}});
</script>
You might notice the addition of | strip_html. This is a Liquid filter that removes HTML markup and it can be handy to add here otherwise any HTML code included in your this output can break the Javascript and cause errors.
Either way, you should get a data structure something like the below sample:
{
"Name": "Main Nav",
"LayoutGroup": "My Layout Group",
"Alias": "main_nav",
"Items": [
{
"Id": 123,
"ItemName": "Home",
"ItemUrl": "/home",
"ItemClass": null,
"ItemEnabled": true,
"Items": []
},
{
"Id": 124,
"ItemName": "About",
"ItemUrl": "/about",
"ItemClass": null,
"ItemEnabled": true,
"Items": []
},
{
"id": 125,
"ItemName": "Contact",
"ItemUrl": "/contact",
"ItemClass": null,
"ItemEnabled": true,
"Items": []
}
]
}
This sample data has been reduced for the simplicity of this tutorial.
With any Object output, we first encounter an open curly bracket { which is then closed at the very end of the output with a closing curly bracket }.
These curly brackets represent Objects and this first (root) curly bracket is always the Object you referenced in your Liquid code, whether it was {{this}} or {{this.Items}} or some other Liquid Object like {{this.formSubmissionData.fields.system}} (which we’ll explore later). The Object data will be output from that level onwards.
Nested data within the Object (as defined by indented lines of code) you’ll see as name/value pairs, for example:
"LayoutGroup": "My Layout Group"
The first part, LayoutGroup, is the property name and the second part, My Layout Group, is the property value. This is the name/value pair.
The value is typically the piece of data you want to render out and the name is the label you’ll use to reference it.
Accessing Available Object Data
Before we dive too far into this intimidating waterfall of data, let’s just get our toes wet and fish out a little tidbit of data. Just to get the feel of how this works.
Let’s say you want to render onto the page the menu’s name. You know the root Object is referenced as this, and nested under that you can see a property called "name" which has the value you want to render out.
So using the dot notation to traverse the Object data you can simply do this:
{{this.Name}}
Which, on the front-end, will render the following:
Main Nav
By the way, referencing Liquid properties here is NOT case sensitive. So {{this.Name}} is the same as {{this.name}} or even {{tHIs.naME}}. Although, it’s probably best practice to match the Title Case syntax used here, as in some cases, particularly when working directly with JSON and JavaScript code, property names ARE case sensitive.
Let’s look at one more example using another piece of Object data, made available in the root level Liquid Object, after a form submission is made. The new Object is called formSubmissionData and you can access it just as we accessed the menu name above. Although, in this case we are no longer in the ‘scope’ of a Menu Layout - instead we might be on a standard web page, so the root Liquid Object is the page itself, but it is still referenced as this, like so:
{{this.formSubmissionData}}
In this example, the output from this Object has several nested Objects defining three system fields (First Name, Last Name, and Email) and one custom field (Enquiry).
Let’s say you want to render the users first name and their enquiry as a thank you/confirmation message on the page - these properties are bolded in the below sample:
{
"submissionid": 123,
"form_name": "Contact Form",
"form_alias": "contact_form",
"fields": {
"system": {
"firstname": {
"id": "FirstName",
"name": "First Name",
"value": "Alex"
},
"lastname": {
"id": "LastName",
"name": "Last Name",
"value": "Smith"
},
"email": {
"id": "Email",
"name": "Email",
"value": "asmith@example.com"
}
},
"custom": {
"enquiry": {
"id": "Enquiry",
"name": "Enquiry",
"value": "Hi. This is a test message."
}
}
},
"error": 0,
"errormessages": []
}
This sample data has been reduced for the simplicity of this tutorial.
Let’s look at how to render that thank you message, accessing data several levels deep.
Starting at the top (root) you already know that the Object is referenced at this.formSubmissionData, so this is your starting point from the very first open curly bracket ({). Then you need to follow the nested ‘path’ all the way down to your desired piece of data, traversing through the properties fields > system > firstname > value, to get to the first name value.
Using the dot notation you’ll end up with something like this:
{{this.formSubmissionData.fields.system.firstname.value}}
Which will render:
Alex
And likewise for the enquiry value:
{{this.formSubmissionData.fields.custom.enquiry.value}}
Which will render:
Hi. This is a test message.
If it’s easier, you can instead work backwards and traverse up the Object data path. Starting at your desired piece of data and referencing each parent property until you reach the root Object.
Finally, let’s code this into our layout along with some HTML:
<p>Thank you {{this.formSubmissionData.fields.system.firstname.value}}!</p>
<p>One of our team members will get back to you regarding your enquiry:</p>
<blockquote>
  {{this.formSubmissionData.fields.custom.enquiry.value}}
</blockquote>
It’s like Mail Merge in Microsoft Word… but for the web and way cooler.
Ok, so that was easy. Now let’s really geek-out and take a deeper look at all this Object data to understand all the different parts you might encounter.
Object Data: Types
To quickly recap the concept of name/value pairs in the data you are working with; the name is the reference you use in your Liquid code to render its corresponding value. Eg:
{
"name": "Value"
}
All property names are wrapped in double quotes as they are represented as strings (a length of characters). However, while the property values are often strings and wrapped in double quotes, this is not always the case. The property value can also be a number, a boolean (true/false), another Object (with name/value pairs), an array, an array of further nested Objects, or it can be empty or null.
Ok, ok, that was a bit much to take in... let's look at each type of value you might encouter in more detail.
Strings
As mentioned above, Strings are simply a line of characters that form the value of the property. They are defined by being wrapped in double quotes and generally are handled as plain text.
{
"name": "I am a String - just plain old text."
}
Numbers and Booleans
Numbers and Boolean values are shown without being wrapped in quotes.
For this example let’s refer back to the sample Object data for the Menu. Here it is again for reference:
{
"Name": "Main Nav",
"LayoutGroup": "My Layout Group",
"Alias": "main_nav",
"Items": [
{
"Id": 123,
"ItemName": "Home",
"ItemUrl": "/home",
"ItemClass": null,
"ItemEnabled": true,
"Items": []
},
{
"Id": 124,
"ItemName": "About",
"ItemUrl": "/about",
"ItemClass": null,
"ItemEnabled": true,
"Items": []
},
{
"id": 125,
"ItemName": "Contact",
"ItemUrl": "/contact",
"ItemClass": null,
"ItemEnabled": true,
"Items": []
}
]
}
Let’s take the item’s ID to illustrate a number value:
"Id": 123
And an example of a true/false boolean (which can only ever have a true or false keyword):
"ItemEnabled": true
How you render these data types doesn’t change and you can still use the dot notation like so:
{{this.Id}}
Rendering the ID value of:
123
However, working with these different data types in advanced Liquid logic does have some slight variations, which we’ll cover later. But for now you just want to be aware of, and able to recognise, these different data types.
Nested Objects
The previously mentioned formSubmissionData Object is a good example of nested Objects:
{
"submissionid": 123,
"form_name": "Contact Form",
"form_alias": "contact_form",
"fields": {
"system": {
"firstname": {
"id": "FirstName",
"name": "First Name",
"value": "Alex"
}
...
}
...
}
...
}
Looking at the property name of fields, where you would expect to see a value, you instead see the start of another Object (defined by the open curly bracket {). And within that Object, more names with Objects as their values and so on.
And just to illustrate again how you traverse through these Objects:
{{this.formSubmissionData.fields.system.firstname.value}}
Which will render:
Alex
Arrays and Array Objects
If the value of a property is an array it will be wrapped in square brackets, for example:
"Items": [ … ]
A simple array might just be a comma separated list of values, which might look like this:
"Items": [
"Dog",
"Cat",
"Watermelon"
]
Attempting to render the Items property, like this:
{{this.Items}}
Would give you the value of all array items head-to-tail:
DogCatWatermelon
Which typically isn’t much use and you’d instead want to process each array item in turn, or perhaps selectively render out just one item. Both are possible.
To selectively render, let’s say "Cat", assuming we know the position in the array (which is called its index), we can write the following:
{{this.Items[1]}}
An array’s index always starts at 0, so in this case "Cat" has an array index of 1, so you’d place 1 in square brackets directly after the Items reference. This will pick out just the array item at index 1, giving us:
Cat
But what if you don’t know the index, or you want to render all array items in a more meaningful way. This is where you’d employ the use of a for Tag which will iterate over each array item, one after the other, allowing you to process each item in turn.
We’ll look at the for Tag later in this course when we explore Advanced Liquid Tags.
Furthermore, the value or an array might be more Objects, so the curly brackets will again be present inside the square brackets of the array. For example, this is a 3 Object array:
"Items": [
{ ... },
{ ... },
{ ... }
]
Again, you’d use a for Tag to access these Objects, but we’ll get to that later.
The important thing here is being able to identify the type of data needing to be accessed so you know which tools to use to reference it.
Empty or null
Often a property will exist within a dataset but has not yet had any data saved against it. In this case the data will be null, eg:
"ItemClass": null
This is a special Liquid keyword, much like a true/false boolean has a true or false keyword, null signifies that there is absolutely no data present for this property and that there never has been any data present. Although, unlike true/false booleans which will render a string of either "true" or "false", null will not render anything to the page.
This is similar to, but not to be confused with, an empty property value, which is literally defined as an empty set of double quotes, eg:
"ItemClass": ""
This differs from the null value as it implies the property value has been saved along with the dataset but just doesn’t have any strings or numbers included. Or that a string or number was previously the value but has since been removed.
For this section of the course we don’t need to go much further with this concept, it’s just to be aware of this difference in data type and how to recognise them.
<<< Part 1: Introduction to Liquid Part 3: Using Liquid Filters >>>
Related Articles
- Liquid Objects & Usage
Working with Liquid
Treepl has implemented the full standard Shopify Liquid library. See the External Resources below for... - Liquid Objects & Usage
Liquid Filters
Liquid Filters allow you to modify the output of a Liquid object, whether that's adding something to it, removing something from it, executing a calculation, creating an array, or a wide variety of other powerful functions. - Liquid Objects & Usage
{{ this }} object
This Liquid object is globally accessible in every liquid template or layout and outputs specific... - Liquid Objects & Usage
{{ request }} object
This Liquid object is globally accessible in every liquid template or layout and outputs various... - Liquid Objects & Usage
{{ liquidContext }} object
This Liquid object is globally accessible in every liquid template or layout and outputs a... - Liquid Objects & Usage
{{ siteglobals }}
This liquid object will output any custom configure Site Information data (found in the Admin's main menu under 'Settings' > 'Site Information'). - Liquid Objects & Usage
{{ member }} object
This liquid object will output the Member's details of whom submitted a Form. You can... - Liquid Objects & Usage
{{ workflow }} object
This liquid object will output the Workflow details of a submitted Form. You can use... - Learning Liquid
Part 1: Introduction to Liquid
This free online course covers every aspect of using the Liquid templating language in Treepl CMS - from the very basics right through to advanced implementations.
You’re welcome. - Learning Liquid
Part 3: Using Liquid Filters
In this part of the course we’ll explore using Liquid Filters to transform and manipulate the display of your Treepl CMS website data. - Learning Liquid
Part 4: Advanced Liquid Tags - Liquid Components
domain_settings
This module component retrieves settings associated with the current domain, or optionally from another specified domain configured in the site instance. - Liquid Components
json
This component parses JSON data for use in Liquid, either from a remote source, a local file, or string. - Extras
Migrating from Liquid 2.0 to 3.0
This article describes differences and possible required actions for migrating from the Liquid rendering engine v2.0 to v3.0.
External Resources
There are currently no external resources available.
Please let us know if you have any other contributions or know of any helpful resources you'd like to see added here.
Questions?
We are always happy to help with any questions you may have.
Visit the Treepl Forum for community support and to search previously asked questions or send us a message at support@treepl.co and we will consult you as soon as possible.