Abandoned Cart Recovery
With Abandoned Cart Recovery functionality, you can automatically send email reminders to customers who add products to their cart (while logged in) and leave without completing the order.
According to statistics, about 80% of customers abandon purchases, for different reasons, after adding items to their shopping carts. With Treepl Abandoned Cart Recovery you can automatically email users after a cart or checkout is abandoned to stay top-of-mind with them while their purchase intent is still high.
Multiple reminder emails can be sent at adjustable timeframes and can include all the details of their shopping cart session.
This extension is available on the ECOMMERCE plan only.
Enabling
Abandoned Cart Recovery is installed as a site extension and can therefore be enabled from your reseller Portal, via the site instance settings, then under the ‘Extensions’ tab.
Clicking the “Install” button will move the extension to the ‘Installed Extensions’ section and activate it for that site.
Once installed, the extension will be available for use via the site admin as detailed below.
Uninstalling
From your reseller Portal, via the site instance settings, then under the ‘Extensions’ tab, clicking the trash can () icon next to the Abandoned Cart Recovery extension will uninstall the extension from the site and move it back to the ‘Available Extensions’ section.
Shop Settings
When the Abandoned Cart Recovery extension is enabled an additional setting for “Abandoned Cart Time in Hours” will become available on the standard Ecommerce settings page, found under: ‘eCommerce’ > ‘Settings’.
This setting is a time interval determining when a cart session is recorded as abandoned. Once the cart session no longer experiences any updates (changes to the cart) for the number of hours specified in the settings, the CMS will record the cart session for use by the Abandoned Cart Recovery extension.
The minimum value allowed in this setting is 1 hour and the maximum is 876000 hours.
The companion setting of “Shopping Cart Life Time in Hours” will determine how long the cart session can remain saved in the CMS, after which, it will not be recoverable. So, ensure your cart lifetime is appropriately timed to allow your abandoned cart time to function adequately.
When the extension is enabled the “Abandoned Cart Time in Hours” will be set to a default of 4 hours, unless the “Shopping Cart Life Time in Hours” is equal or less than 4, in which case the setting will be adjusted to 1 hour less than the “Shopping Cart Life Time in Hours” to a minimum of 1 hour.
The “Abandoned Cart Time in Hours” value should always be less than the “Shopping Cart Life Time in Hours” for the logical functioning of the Abandoned Cart Recovery extension.
Abandoned Cart Email Notifications also need to have a sending interval set to less than the “Shopping Cart Life Time in Hours” otherwise, the shopping cart object will no longer exist at the time of the notification being sent.
Abandoned Cart Emails
Here you can create your emails for the Abandoned Cart notifications to the user. This allows you to build customised emails for any stage of the Abandoned Cart process that you define via the Abandoned Cart interface.
Abandoned Cart functionality is available for ECOMMERCE plans via the Abandoned Cart extension.
You can create any number of Abandoned Cart emails and they’ll be displayed in the table where you can further search, edit or delete those emails.
Apart from giving the email a descriptive name, editing options for the emails are the same as for most system emails (found in the ‘System Emails’ section). More information on these fields can be found here.
Dynamic content can be added to the email body, rendering information from the Shopping Cart and the CRM contact, as well as inserting most other Liquid components and logic (suitable for email content).
Also available in these emails are the this.TrackingURL and this.RestoreCartURL which provide a 1px X 1px tracking image and a link for the customer to restore their cart session.
The tracking pixel will be added automatically to the email while the Restore Cart link would need to be added within your email content.
For example; you could render information about the cart and products via the this.ShoppingCart Liquid object, or information about the customer via the this.member object and provide a link for the customer to restore/view their abandoned shopping cart.
Some Sample Data
To render the total items count:
{{ this.ShoppingCart.TotalItemsCount }}
3
For more information about rendering Product data, including looping through all the Product line items, see the Shopping Cart object documentation here.
To render the contact's first name:
{{ this.member['firstname'] }}
Alex
For more information about rendering Member data, see the Member object documentation here.
Rendering the tracking pixel image:
<img src="{{this.trackingURL}}" height="1" width="1">
This tracking pixel will be added to your emails automatically. You do not need to manually add this.
To render the Restore Cart link:
{{this.RestoreCartURL}}
https://[siteDomain]/public/api/track-email/abandoned-cart/open?id=[ShoppingCartid]¬ificationId=[idOfAbandonedCartNotificationStep]&guid=[guid]
Once you’ve created your Abandoned Cart email you can assign it to a notification rule via the Abandoned Cart extension interface.
Admin Interface
From the website admin, the extension can be accessed from the main menu under ‘Extensions’ > ‘Abandoned Cart Recovery’.
Notifications
Here you can view a list of all Abandoned Cart Notification rules that are currently set up or you can configure new rules that define which notification emails get sent and when, based on the abandoned cart time interval.
This allows you to build up a custom, automated email campaign to further engage with otherwise lost purchases.
Either, “CREATE NEW NOTIFICATION” to add a notification rule to the abandoned cart logic, or edit an existing rule by clicking the pencil () item on the far right.
This list of notifications are sorted by ‘Send Email After’ interval - showing the emails in order of when they’ll be sent - but you can also re-sort the table by the other column headers - which display statistics for those email.
The table can also be filtered by enabled/disabled items.
The table column headers are described below:
When creating, or editing, a notification you can configure the following options:
The minimum value allowed in this setting is 1 hour and the maximum is 876000 hours.
Abandoned Carts
Here you can view a list of all current and viable abandoned cart sessions able to be restored along with key information about the session such as the customer’s name and email address, the total cost of the cart, the length of time the cart session has been active for (lifetime), and the created, last updated and expiry date of the cart session.
This table view is sorted by ‘Lifetime’ (longest timeframe to shortest) by default, but you can sort the data by any of the other column headers as needed.
Cart sessions can also be deleted (preventing them from being restored) by clicking the trash can icon () to the far left of the item row, or you can view further details about the cart and its products by clicking the view icon (), as further described below.
DETAILS
The Details tab provides key information about the session such as a link to the customer’s CRM record, the total cost and currency of the cart, and the created, last updated and expiry date of the cart session.
PRODUCTS
The Products tab displays the cart contents with each product line (quantities, tax and totals) along with any selected shipping option, discount code or gift voucher entered.
Reports
The Reports tab displays various statistics from past and present abandoned and recovered carts providing insightful data about your customer behaviour and ecommerce store conversion performance.
Analytical data is recorded for the full duration of the Abandoned Cart Recovery extension being installed on the site.
Each report chart can be configured for custom date ranges with levels consolidated by day, week, or month views.
Abandoned and recovered carts
This chart shows the number of abandoned carts in comparison to the recovered carts for the configured time scale.
Abandoned and recovered carts amounts
This chart shows the total value (including taxes) of abandoned carts in comparison to the recovered carts for the configured time scale.
Abandoned and recovered carts report
This chart shows a consolidation of the 2 charts above in a tabular report format to compare abandoned carts with recovered carts for the configured time scale.
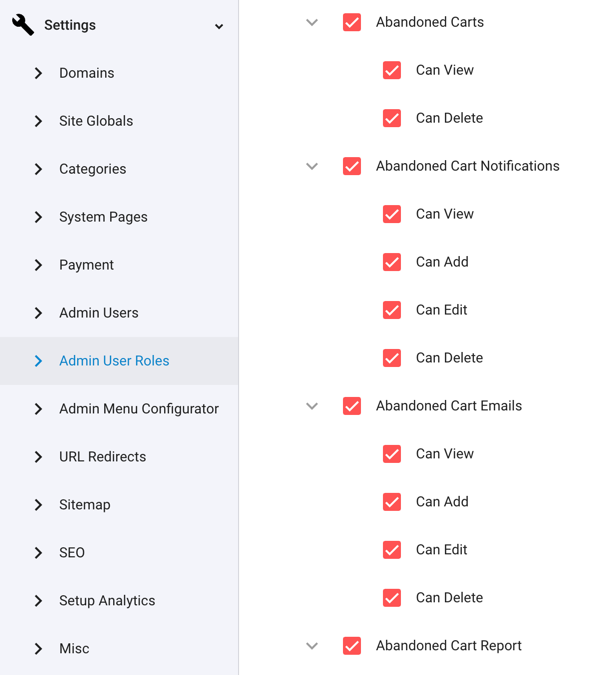
Admin Users
Admin user permissions for the Abandoned Cart Recovery extension can be adjusted via the ‘Admin User Roles’ to configure fine-grain control for how admin users can use and access the extension.
Related Articles
- Site Settings & Management
Domains
The Treepl CMS Domain settings allow you to control default domain, landing pages, domain authentication for system emails along with country and cultural settings like number and currency formatting. - Site Settings & Management
Payment Settings
Integrate various payment gateways, for multiple countries and currencies, into Treepl CMS for form payments, subscriptions and eCommerce workflows. - CRM
Orders
Orders store accounts of any payments made via the website and provide management for additional payments, invoices, order statuses, tracking info, the products purchased within the order and the details of the form submission used to take the order. - CRM
Advanced CRM Groups
Advanced CRM Groups allow you to extend the data fields within multiple areas of the CRM, either globally or on a per-record basis. - OpenAPI (Admin)
CRM Orders API
Retrieve and Update Order Items via the public API endpoint using "where" filtering. - OpenAPI (Admin)
CRM Order Lines API
Create, Retrieve, Update and Delete CRM Order Lines within an Order via the public API endpoint. - Liquid Objects & Usage
{{ order }} object
This liquid object will output the order details of a submitted payment. ... - OpenAPI (Admin)
CRM Order Assets API
Create CRM Order Assets, such as Discount Codes, Gift Vouchers, Shipping Options and Tax Codes via the public API endpoint. - OpenAPI (Admin)
CRM Order Payments API
Create, Retrieve, Update and Delete CRM Order Payments within an Order via the public API endpoint using "where" filtering. - OpenAPI (Admin)
CRM Order Statuses API
Retrieve CRM Order Statuses via the public API endpoint using "where" filtering. - OpenAPI (Admin)
Print API
Retrieve the print version of an Order asset via the public API endpoint by type. - Liquid Components
module (Catalogs)
This module component fetches data relating to eCommerce Catalogs and can be used to render Catalog structures and Products within them. - Liquid Components
module (Products)
This module component fetches data relating to eCommerce Products and can be used to render Product information. - Liquid Components
ecommerce_add_to_cart
This component renders an anchor element allowing the javascript function to add the item to the shopping cart. - Liquid Components
ecommerce_buy_now
This component renders an anchor element allowing the javascript function to add the item to the shopping cart and then proceeding directly to the shopping cart page. - Liquid Components
ecommerce_item_quantity
This component renders a form input element allowing a quantity to be set for when the source item is added to the shopping cart. - Liquid Components
item_attributes
This component fetches all attributes/options for a specified product. By default, each attribute group is rendered, with its options and any prices, according to their specified form inputs. - Liquid Components
related_items
This component fetches related items of a specific source item, such as a Product that has had Related Products assign to it. - Liquid Components
grouped_items
This component fetches grouped items of a specific source item, such as a Product that has been Grouped with other Products and allows the ability to navigate between grouped items. - Liquid Components
currencies
This component renders a form select element of all currency names, codes and symbols by default, and can also be used to output currency data to a Liquid collection. - OpenAPI (Admin)
Ecommerce Discount Codes API
Create, Retrieve, Update and Delete Ecommerce Discount Codes via the public API endpoint using "where" filtering. - OpenAPI (Admin)
Ecommerce Gift Vouchers API
Create, Retrieve, Update and Delete Ecommerce Gift Vouchers via the public API endpoint using "where" filtering. - Liquid Components
shopping_cart
This component fetches data relating to the shopping cart, such as any products added, order totals, tax, shipping, etc. - OpenAPI (Admin)
Ecommerce Shipping Options API
Create, Retrieve, Update and Delete Ecommerce Shipping Options via the public API endpoint as well as return external shipping providers and settings. - Liquid Components
shipping_options
This component renders a form select element of all shipping options configured on the site, and can also be used to output shipping option data to a Liquid collection. - Liquid Components
shippingProviderFields
This component provides a placeholder for populating additional Shipping Provider options to the user. - OpenAPI (Admin)
Ecommerce Taxes API
Create, Retrieve, Update and Delete Ecommerce Taxes via the public API endpoint using "where" filtering. - Liquid Components
tax_codes
This component renders a form select element of all tax codes configured on the site, and can also be used to output tax code data to a Liquid collection. - Liquid Components
payment_form_fields
This component is used to render payment fields, and payment related validation errors, within a form using the capabilities provided by your configured payment gateway. - Liquid Components
orders
This component fetches Orders from the CRM, either owned by the logged-in user or for all customer Orders. - eCommerce
Getting Started
To get started with the eCommerce module there are some overall settings to configure that provide eCommerce with further context in order to function appropriately for your situation. - eCommerce
Products
Products are one of the most powerful and flexible modules in Treepl CMS. Create customised product schemas with multiple price points, catalogs, inventory tracked attributes/variables, SEO optimisation and more. - eCommerce
Catalogs
When organising any eCommerce store, Catalogs are crucial to your Products structure and browserbility. Easily create and customise unlimited product catalogs for your online store. - eCommerce
Discount codes
Provide discount code functionality for your Treepl CMS shopping cart. Ideal for promotions, customer loyalty and conversions or to help move more stock. - eCommerce
Gift vouchers
Gift vouchers can be issued to your customers or purchased by them online via the shopping cart. - eCommerce
Taxes
Create any number of required tax codes specific to the shipping country selected in your Treepl CMS shopping cart. - Liquid Components
countries
This component renders a form select element of all country names and country codes by default, and can also be used to output country codes/names to a Liquid collection. - Liquid Components
domain_settings
This module component retrieves settings associated with the current domain, or optionally from another specified domain configured in the site instance. - eCommerce
Shipping Options
Treepl CMS provides the ability to configure both custom shipping options and integrated shipping providers based on a variety of conditions during the shopping cart stage. - eCommerce
Settings
These various eCommerce settings allow you to further control and customise the way your website functions, both in the admin and on the front-end, in terms of eCommerce functionality. - eCommerce
eCommerce Javascript
This is the provided javascript options for further controlling/customising the ecommerce javascript provided by the CMS. - Extras
Migrating to Advanced Payment Flow
This article describes differences and possible required actions for migrating to the Advanced Payment Gateway flow.
External Resources
There are currently no external resources available.
Please let us know if you have any other contributions or know of any helpful resources you'd like to see added here.
Questions?
We are always happy to help with any questions you may have.
Visit the Treepl Forum for community support and to search previously asked questions or send us a message at support@treepl.co and we will consult you as soon as possible.