Treepl CMS Hosted Email
Managing Hosted Email Accounts with Treepl CMS
Hosted email accounts can be managed via your Treepl Portal.
After clicking the edit/pencil () icon against the desired site in your ‘Live Sites’ list, you’ll see the ‘Email Accounts’ tab.
Here you’ll find controls to manage existing email accounts, create new accounts or set up new email hosting altogether.
Starting New Hosted Email Service
To start a new hosted email service (when none is currently set up), click the “Get Started” button to begin the process.
Select the primary domain you’ll be using for email from the dropdown list available (you’ll be able to add domain aliases later).
Clicking “Save” will provision the email service for that domain.
Email Domain Alias
Clicking the “+ Add domain alias” link under the primary domain listed for hosted email, you’re able to add additional domains that will be used as email domain aliases. That is, other domains that will also be mapped to ALL other email address you create here.
Once added, you’ll need to ensure MX and SPF records are in place as per this article.
Domain aliases create additional email addresses for ALL email users, although they don’t create additional email inboxes or count towards your site plan’s email user limit. They simply allow secondary domain/s to be used to deliver email messages to all existing email user’s inboxes (as an alias address).
Adding Email Addresses
Clicking the “Add New Email” button under the ‘Email Accounts’ heading allows you to set up new email users/inboxes for your domain/s, within the email limit of your site plan (shown in this sections heading, ie: ‘Email Accounts (0/3)’ indicates zero users added out of 3 available).
Upon creating a new email address, you’ll be prompted to enter the username portion of the address (preceding the ‘@yourdomainname.com’) and to set and confirm an account password.
Managing Email Accounts
Once you have email addresses added to your Treepl hosted email service you’ll be able to manage most aspects of the user accounts.
At a glance, you’ll see a list of existing addresses along with the storage quota used.
Clicking the 3 dots () context menu at the far right of the user address, allows you to reset the email account password for that address or delete the email account completely - removing that users inbox and all emails stored online for that address.
Expanding the email address listing, via the arrow icon on the far left, reveals the “+ Add email alias” link where you can create alternative email names that can be used to deliver email messages to this users inbox. Email aliases don’t create additional email inboxes or count towards your site plan’s email user limit.
Ensure your DNS records are in place for all domains used for Treepl hosted email, particularly for MX and SPF records, as per this article.
Configuring your Email Client
As there are many different email clients across various operating systems and devices, we will not detail steps on adding or editing email accounts. However, below are all the connection details all email clients require in order to connect to your email service.
For further assistance with setting up accounts in your email client, refer to the programs help documentation, its support channels, or Google your email client name and version number for instructions.
Username:
[your full email address]
Password:
[your email account password]
Incoming and Outgoing mail server:
mail.b.hostedemail.com or mail.mailconfig.net
Incoming port settings:
Both IMAP and POP3 protocols are supported
IMAP 993 (SSL enabled) | 143 (SSL disabled)
POP3 995 (SSL enabled) | 110 (SSL disabled)
Authentication Password
Outgoing port settings:
SMTP 465 (SSL enabled) | 25 or 587 (TLS) | 8025 (SSL disabled)
Webmail
You can access your email accounts via a browser, without the need of an email client with the Webmail facility.
Using your email address and password log into Webmail here: https://mail.b.hostedemail.com or here: https://mail.mailconfig.net/.
Alternatively, you could set up a subdomain for accessing Webmail. For example 'mail.yourdomain.com' could be used to direct you to the Webmail address above specific to your domain.
See below for details on setting up CNAME Records to achieve this.
MX Records
If you are newly setting up hosted email accounts with Treepl CMS you will need to have the relevant MX record in your DNS.
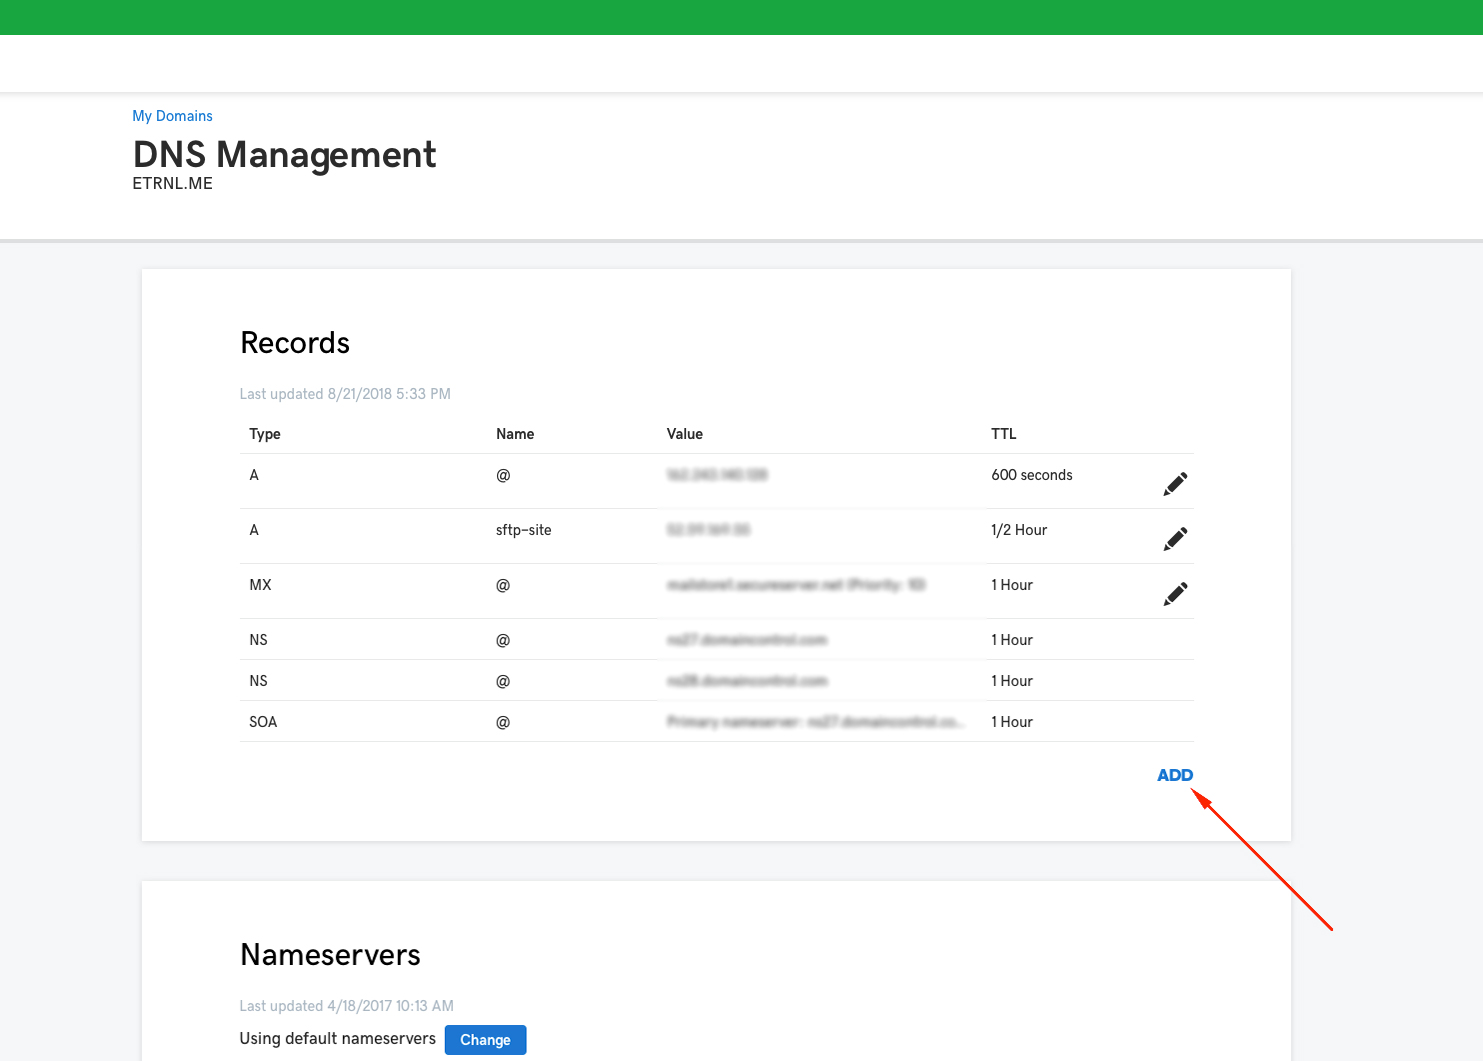
Once logged into your DNS service, locate the DNS settings option.
If you have any existing MX records listed you’ll need to remove these.
Removing any existing MX records will stop that email service form working and you’ll likely lose access there. So be sure you have finished up with prior email accounts before proceeding.

Locate an option to add additional records.
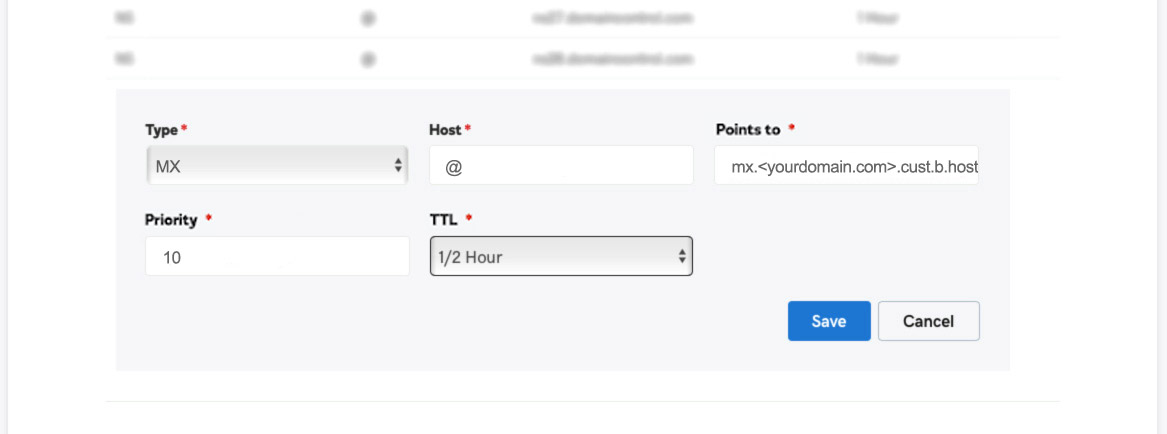
Choose a record type of “MX” and add @ to the Host/Name field (or leave it blank, depending on how your DNS service prefers it).
In the Value/Address field add mx.yourdomain.com.cust.b.hostedemail.com (replacing yourdomain.com with your actual domain name).
For example: if your domain was mycooldomain.com.au, then the MX record would be formatted like so:
mx.mycooldomain.com.au.cust.b.hostedemail.com
For the Priority field, you can leave any default value there or if no value exists add a priority of 10.
You can usually leave the "TTL" (Time To Live) set at the default. Generally though, the accepted value is 24 hours (86,400 seconds).
Be sure to save/apply any changes and confirm you receive a successful message and no errors have occurred.
If unsure, or to double check, refresh the page or revisit the DNS settings to confirm your changes have applied.
Once the MX record has successfully propagated, you’re emails should then begin working.
Changes to your DNS may take an hour or two to become fully available on the internet.
CNAME Records for Webmail Access
Optionally, you may also like to set up a subdomain for a convenient way to log into the webmail service.
You can do this by adding a “CNAME” record type with a Host/Name of mail and a Value/Address of mail.yourdomain.com.cust.b.hostedemail.com
Then, when you visit mail.yourdomain.com you’ll be directed to the webmail login screen.
SPF Records
An SPF record is a TXT record that defines which authorised parties can send email on behalf of (in the name of) your own domain name.
There are various cases where Treepl CMS can send out emails in which you would want to appear as though they originated from you or your clients email address. Such as web form notifications, autoresponders, system messages, etc.
So that Treepl CMS can do this in an authorised, non-spam risk way, it is strongly advised that you add the following 'SPF' record to any domain name's DNS that will be used with Treepl CMS. The 'SPF' record would have @ as the Host/Name field (or left blank, depending on how your DNS service prefers it).
Use the SPF Generator to easily construct your SPF record, or to understand more about these values, or to manually construct your SPF record, see further details below.
Instructions for manually creating, or updating, your SPF Record
For any domain name added to a Treepl CMS website that will utilise system email messages, you'll need to add include:_spf.trustedemail.co to your SPF Record, or create one if an SPF Record does not already exist.
Example:
v=spf1 include:_spf.trustedemail.co ~allIf your DNS services doesn't list 'SPF' as a record type choose 'TXT' as the record type instead.
Additionally, if you have Treepl hosted email (OpenSRS), your SPF record must also have include:_hosted.trustedemail.co.
So building on the example above we'd now have:
v=spf1 include:_spf.trustedemail.co include:_hosted.trustedemail.co ~allIt may be the case that you already have other 3rd parties sending emails on behalf of your domain and therefore already have an SPF record in place. In which case you'd need to add to this record and combine any existing entries with Treepl CMS values above.
Below is an example including an existing domain name of a 3rd party service (Google) plus Treepl CMS includes for both system emails and hosted emails:
v=spf1 include:_spf.trustedemail.co include:_hosted.trustedemail.co include:_spf.google.com ~allFor more information regarding SPF Record syntax refer to the official specification here.
And to check your SPF record syntax is valid you can use a service such this SPF Syntax Validator
Related Articles
- Treepl Portal
Trial Sites
Trial Sites are your Treepl CMS development environments for starting new site projects, before you publish to a custom domain name. - Treepl Portal
Live Sites
Live sites are your published Treepl CMS instances that have been activated, have commenced a billing subscription and/or have a custom domain name assigned to them. - Treepl Portal
My Settings
This section provides access to various Partner related settings and information for your account and site management, such as branding, commissions, portal users, and more. - Treepl Portal
My Invoices
All Treepl CMS site plan invoices (including past and deleted sites) will be listed here for your reference with the ability to download a copy of the invoice or have one emailed to your reseller email address. - Treepl Portal
Treepl Services
A dashboard for your Treepl Services projects directly in your reseller portal along with information on Treepl Service offerings and pricing. - Treepl Portal
Leadership Team
Resellers on the PARTNER or AGENCY levels have access to the Leadership Team page, listing key team members and their contact information for direct messaging/questions. - Treepl Portal
Support
Treepl Support Support Tickets Support Ticketing is fully integrated with your Treepl Portal and is... - Treepl Portal
Trial Site Activation (Going Live)
Site activation (aka going live) is done once your site is ready to go public or if you need to have a custom domain name to finish your testing. - Treepl Portal
Two-Factor Authentication (2FA)
Treepl CMS provides the option of enabling Two-Factor Authentication for your Partner level access as well as for admin users on a per-site basis. - Treepl Portal
Portal & Admin Login Troubleshooting
In some cases you may experience an infinite redirect loop after logging into your Treepl Portal or the Admin area for any Treepl site. - Website Templates
*Bikes - Website Templates
*Clothing Store - Website Templates
Coffee - Website Templates
*Coworking - Website Templates
Digital Agency - Extensions
Direct Billing
Allow your customer to pay Treepl CMS directly for their site plan from the admin, as well as activating the site and assign their primary domain name (if the site is still in Trial Site mode). - Website Templates
Furniture - Website Templates
*Hair Salon - Website Templates
Max
External Resources
Please let us know if you have any other contributions or know of any helpful resources you'd like to see added here.
Questions?
We are always happy to help with any questions you may have.
Visit the Treepl Forum for community support and to search previously asked questions or send us a message at support@treepl.co and we will consult you as soon as possible.