Set Up Analytics
Treepl CMS allows you to integrate Google Analytics views into the Admin Dashboard. This guide will help you configure your Google Analytics and your Treepl CMS site, so that the data is pulled from Google Analytics into the Admin area.
Requirements
In order to configure the integration you, or your client, will need to have:
- A Google Account and valid Google Analytics property set up for the site
- A website instance on Treepl CMS
Configuring the Google Analytics dashboard will automatically add Google's tracking code to the included Google Tag Manager script output to your site. So you do not need to manually add the tracking code yourself. However, if you would like to add your own Google Tag Manager script you can do so as described further below.
Google Analytics API Project
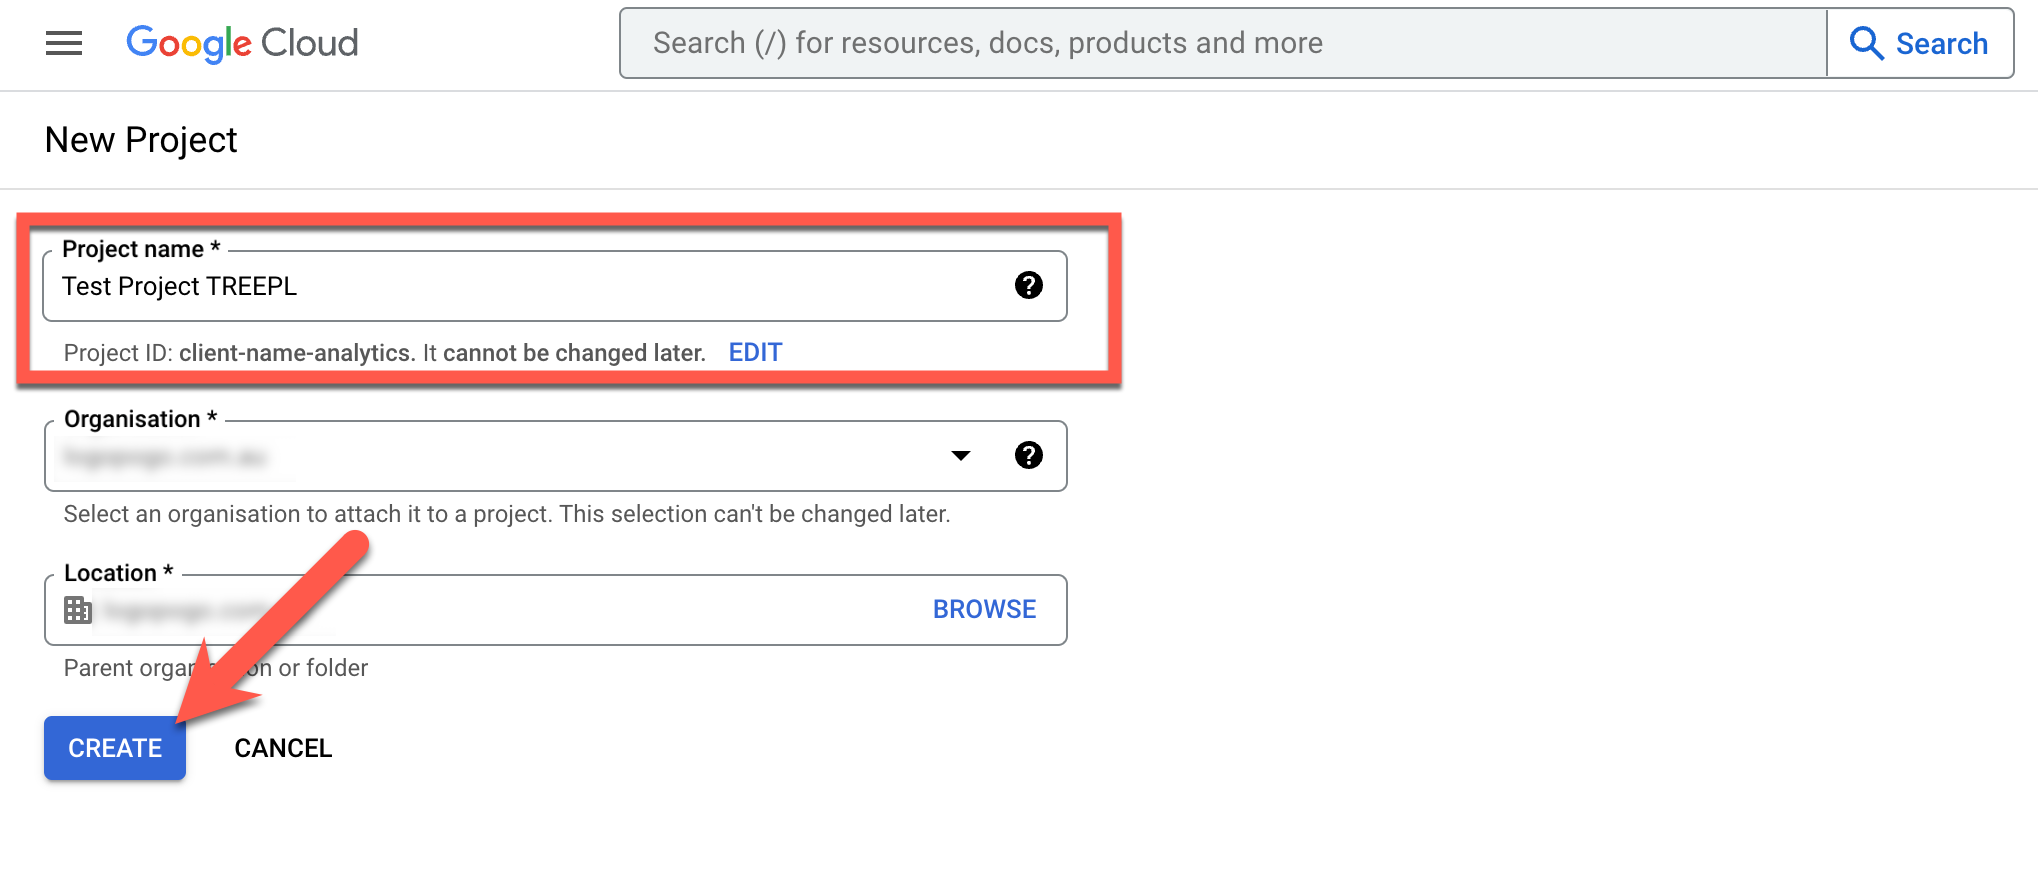
To create a Google API project visit https://console.cloud.google.com/projectcreate
Set a name for your project.
Depending on your account, you may also be asked to assign a 'Billing account'.
'Organization' and 'Location' can be left as the default in most cases.
Click 'Create'.
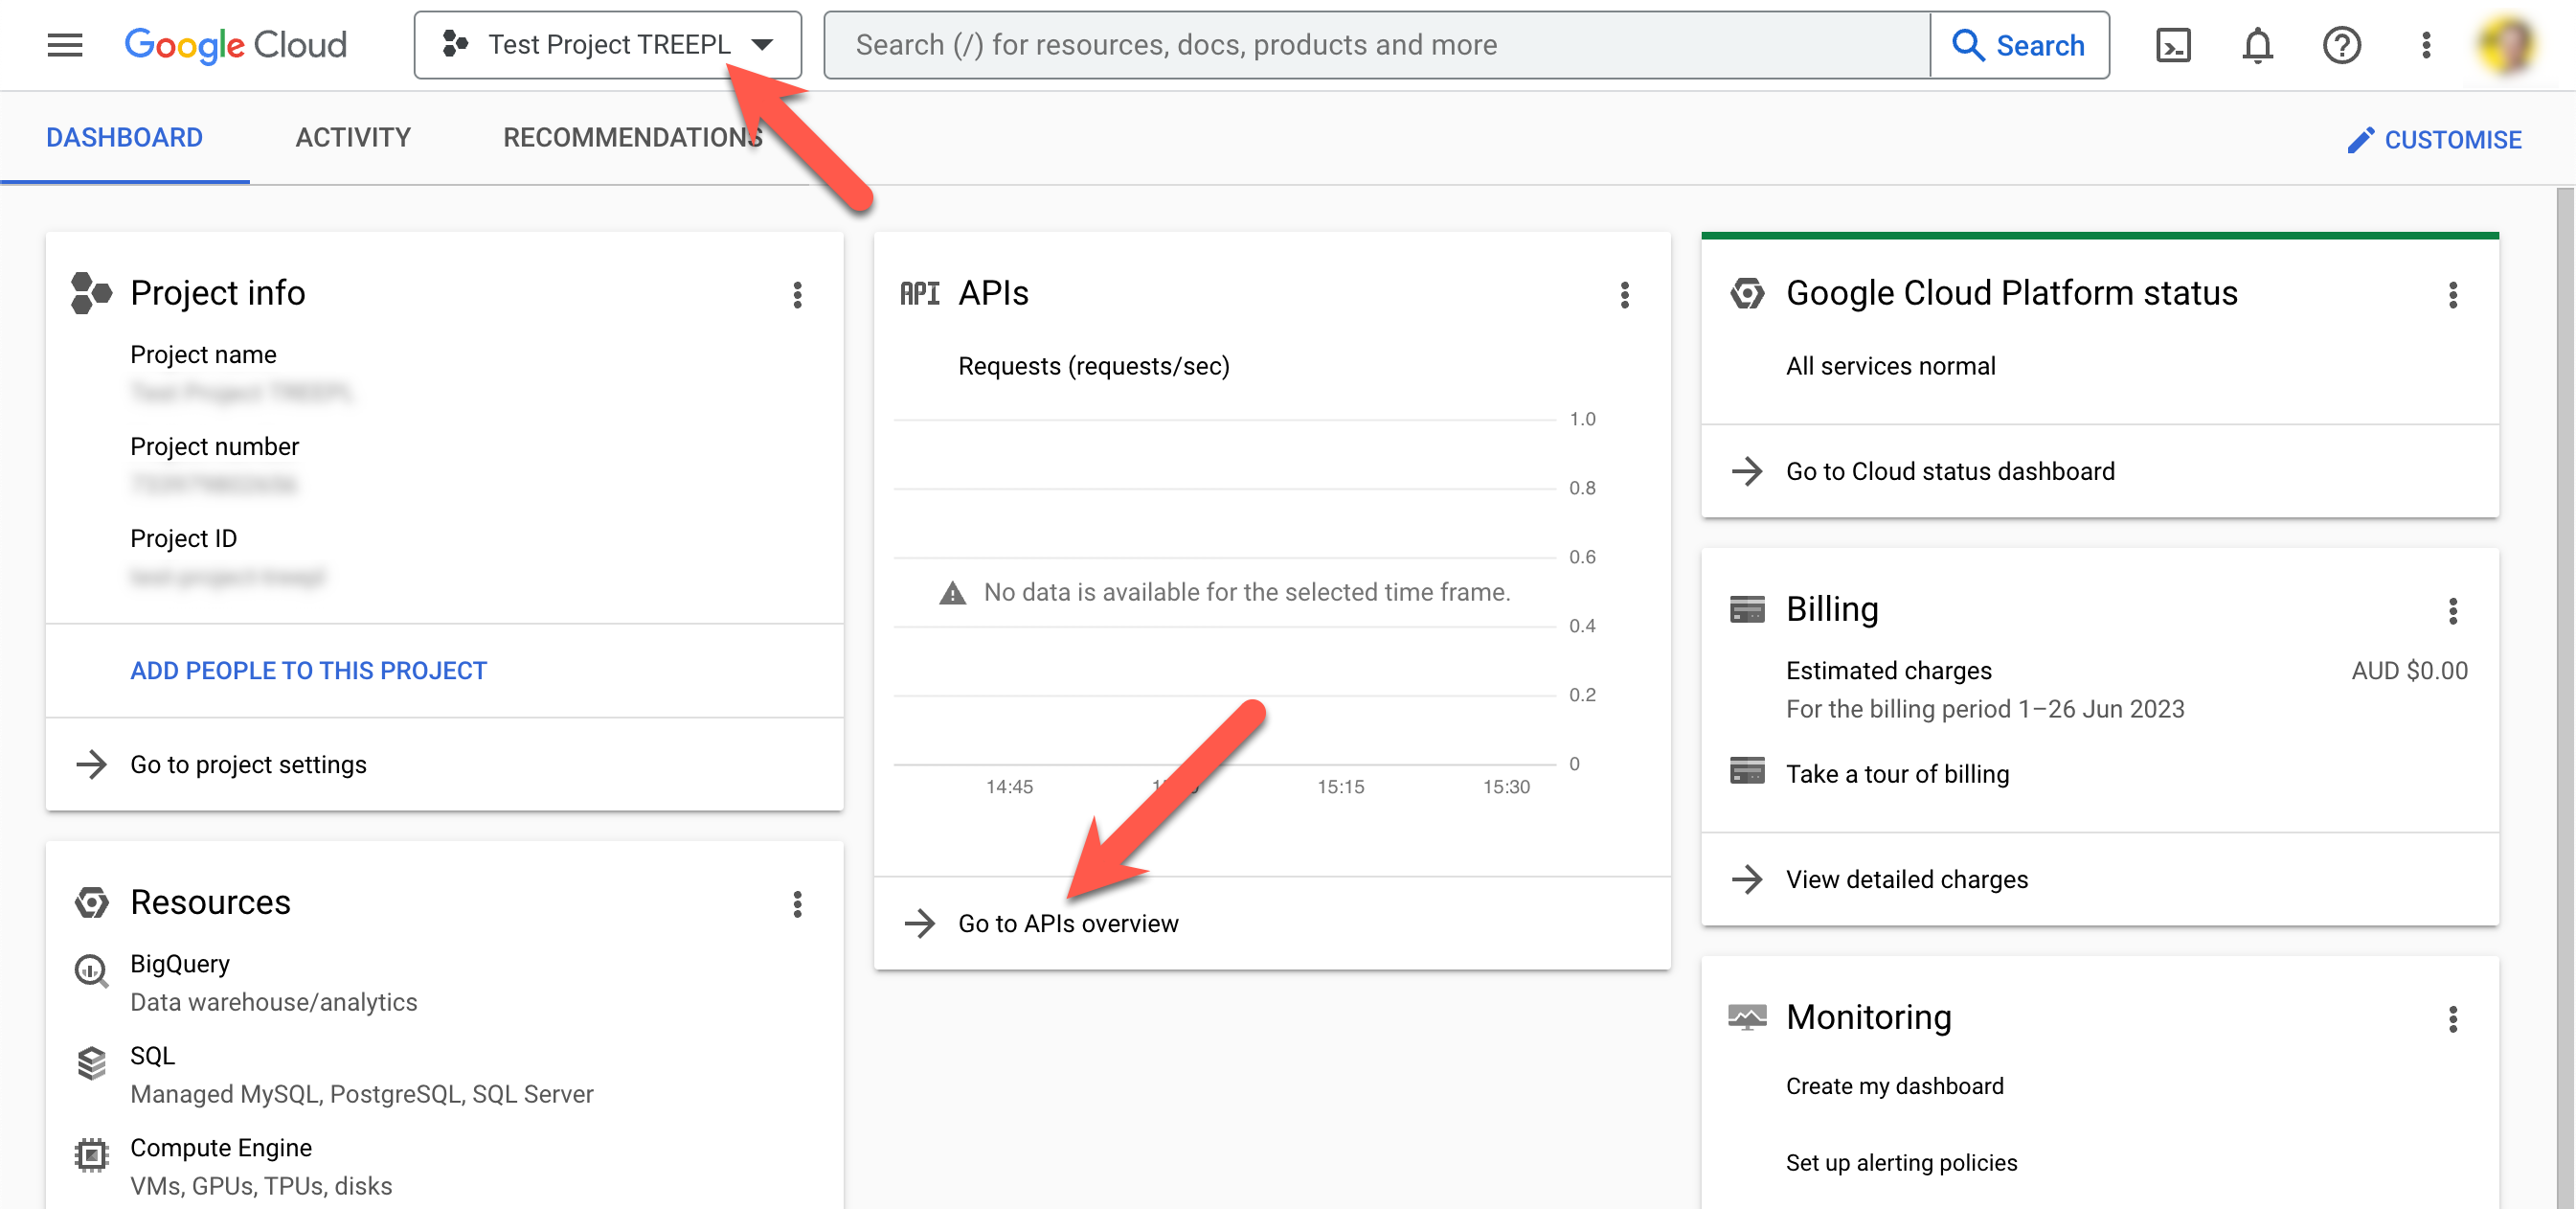
Once created you should see a notification popup with the new project listed.
Click on this project to further configure it.
In the absence of the notification link, you can navigate to the project using the project name dropdown at the top of the screen.
Once inside the project, click on the "Go to APIs overview" link.
Click "Enable APIs and Services" at the top of the screen.
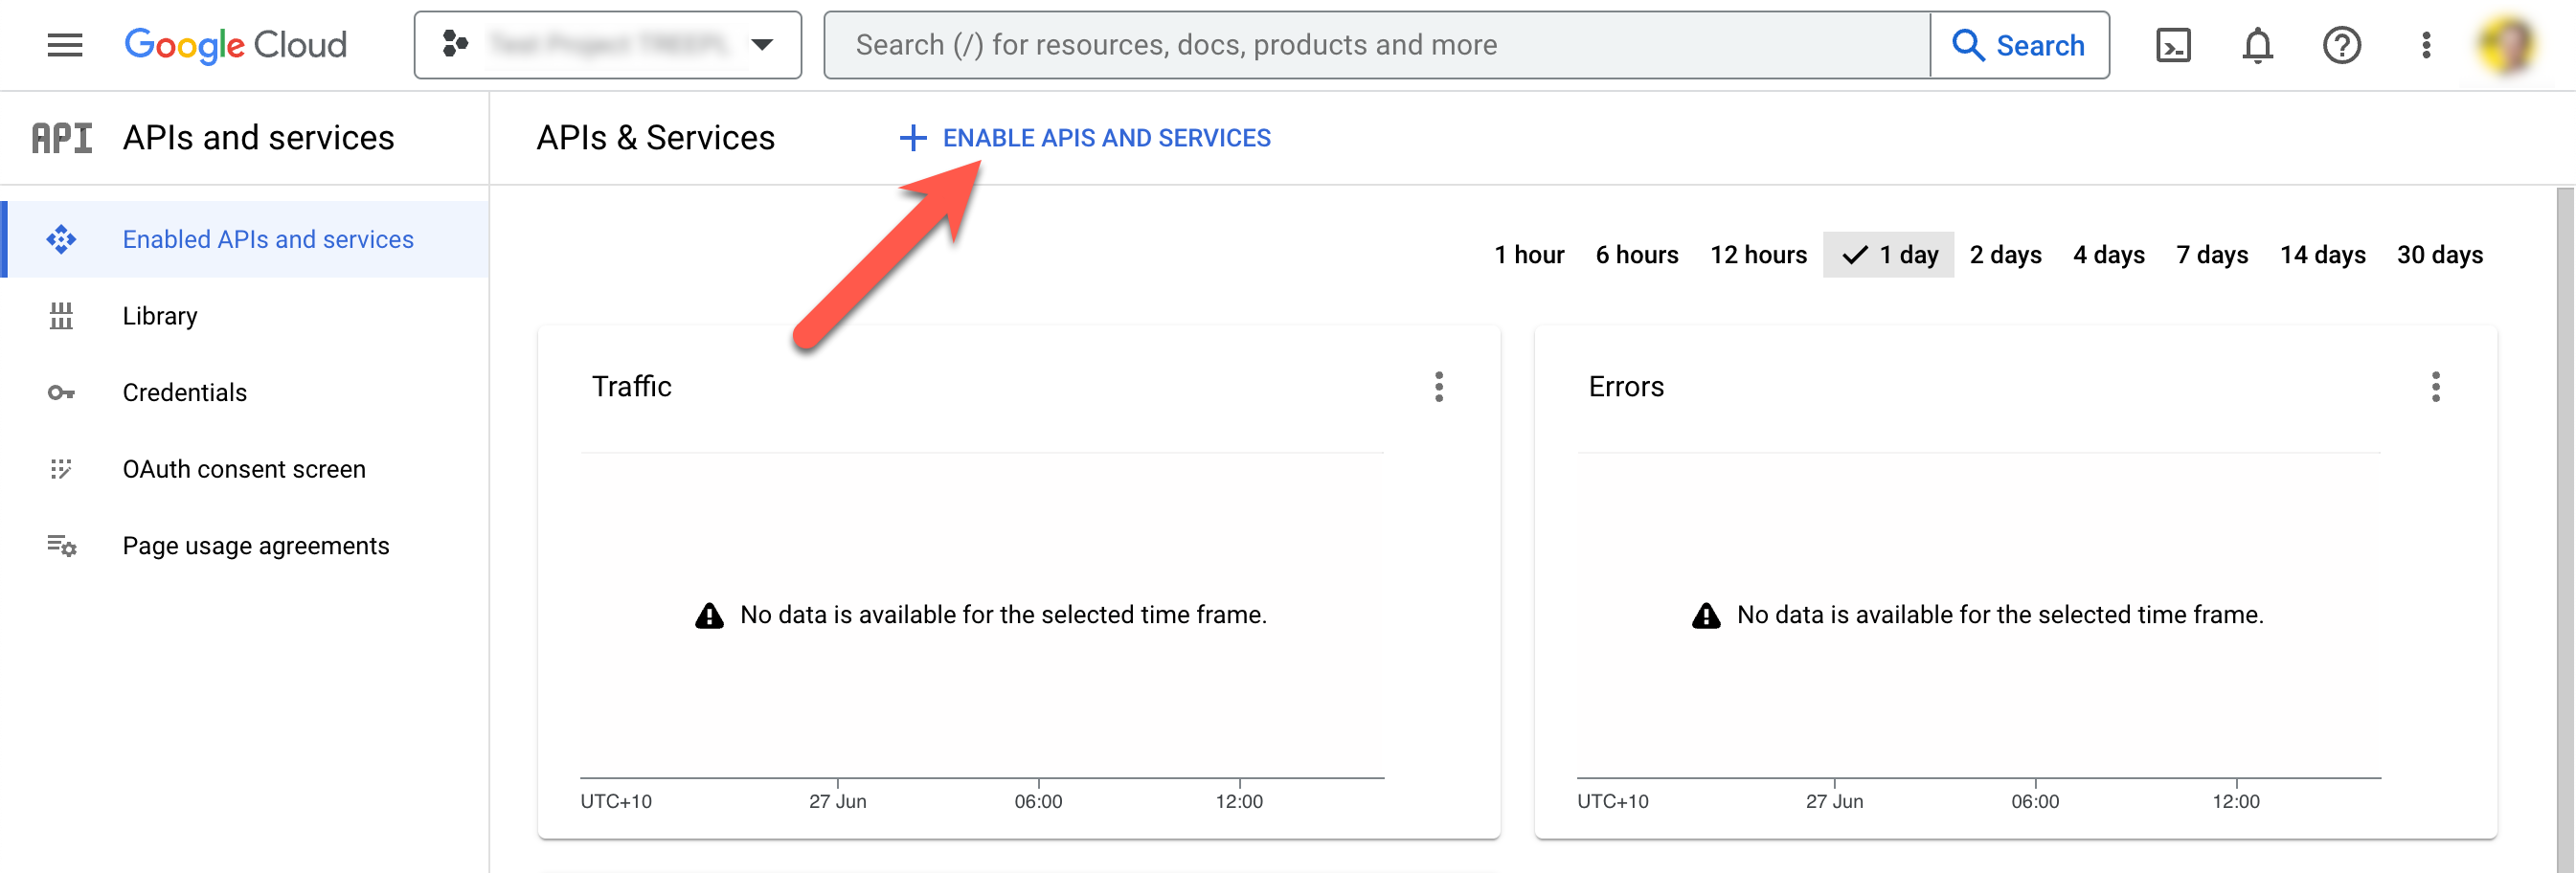
In the search field, type 'Analytics' to filter the list of APIs available.
You should see results for an API called "Google Analytics Data API".
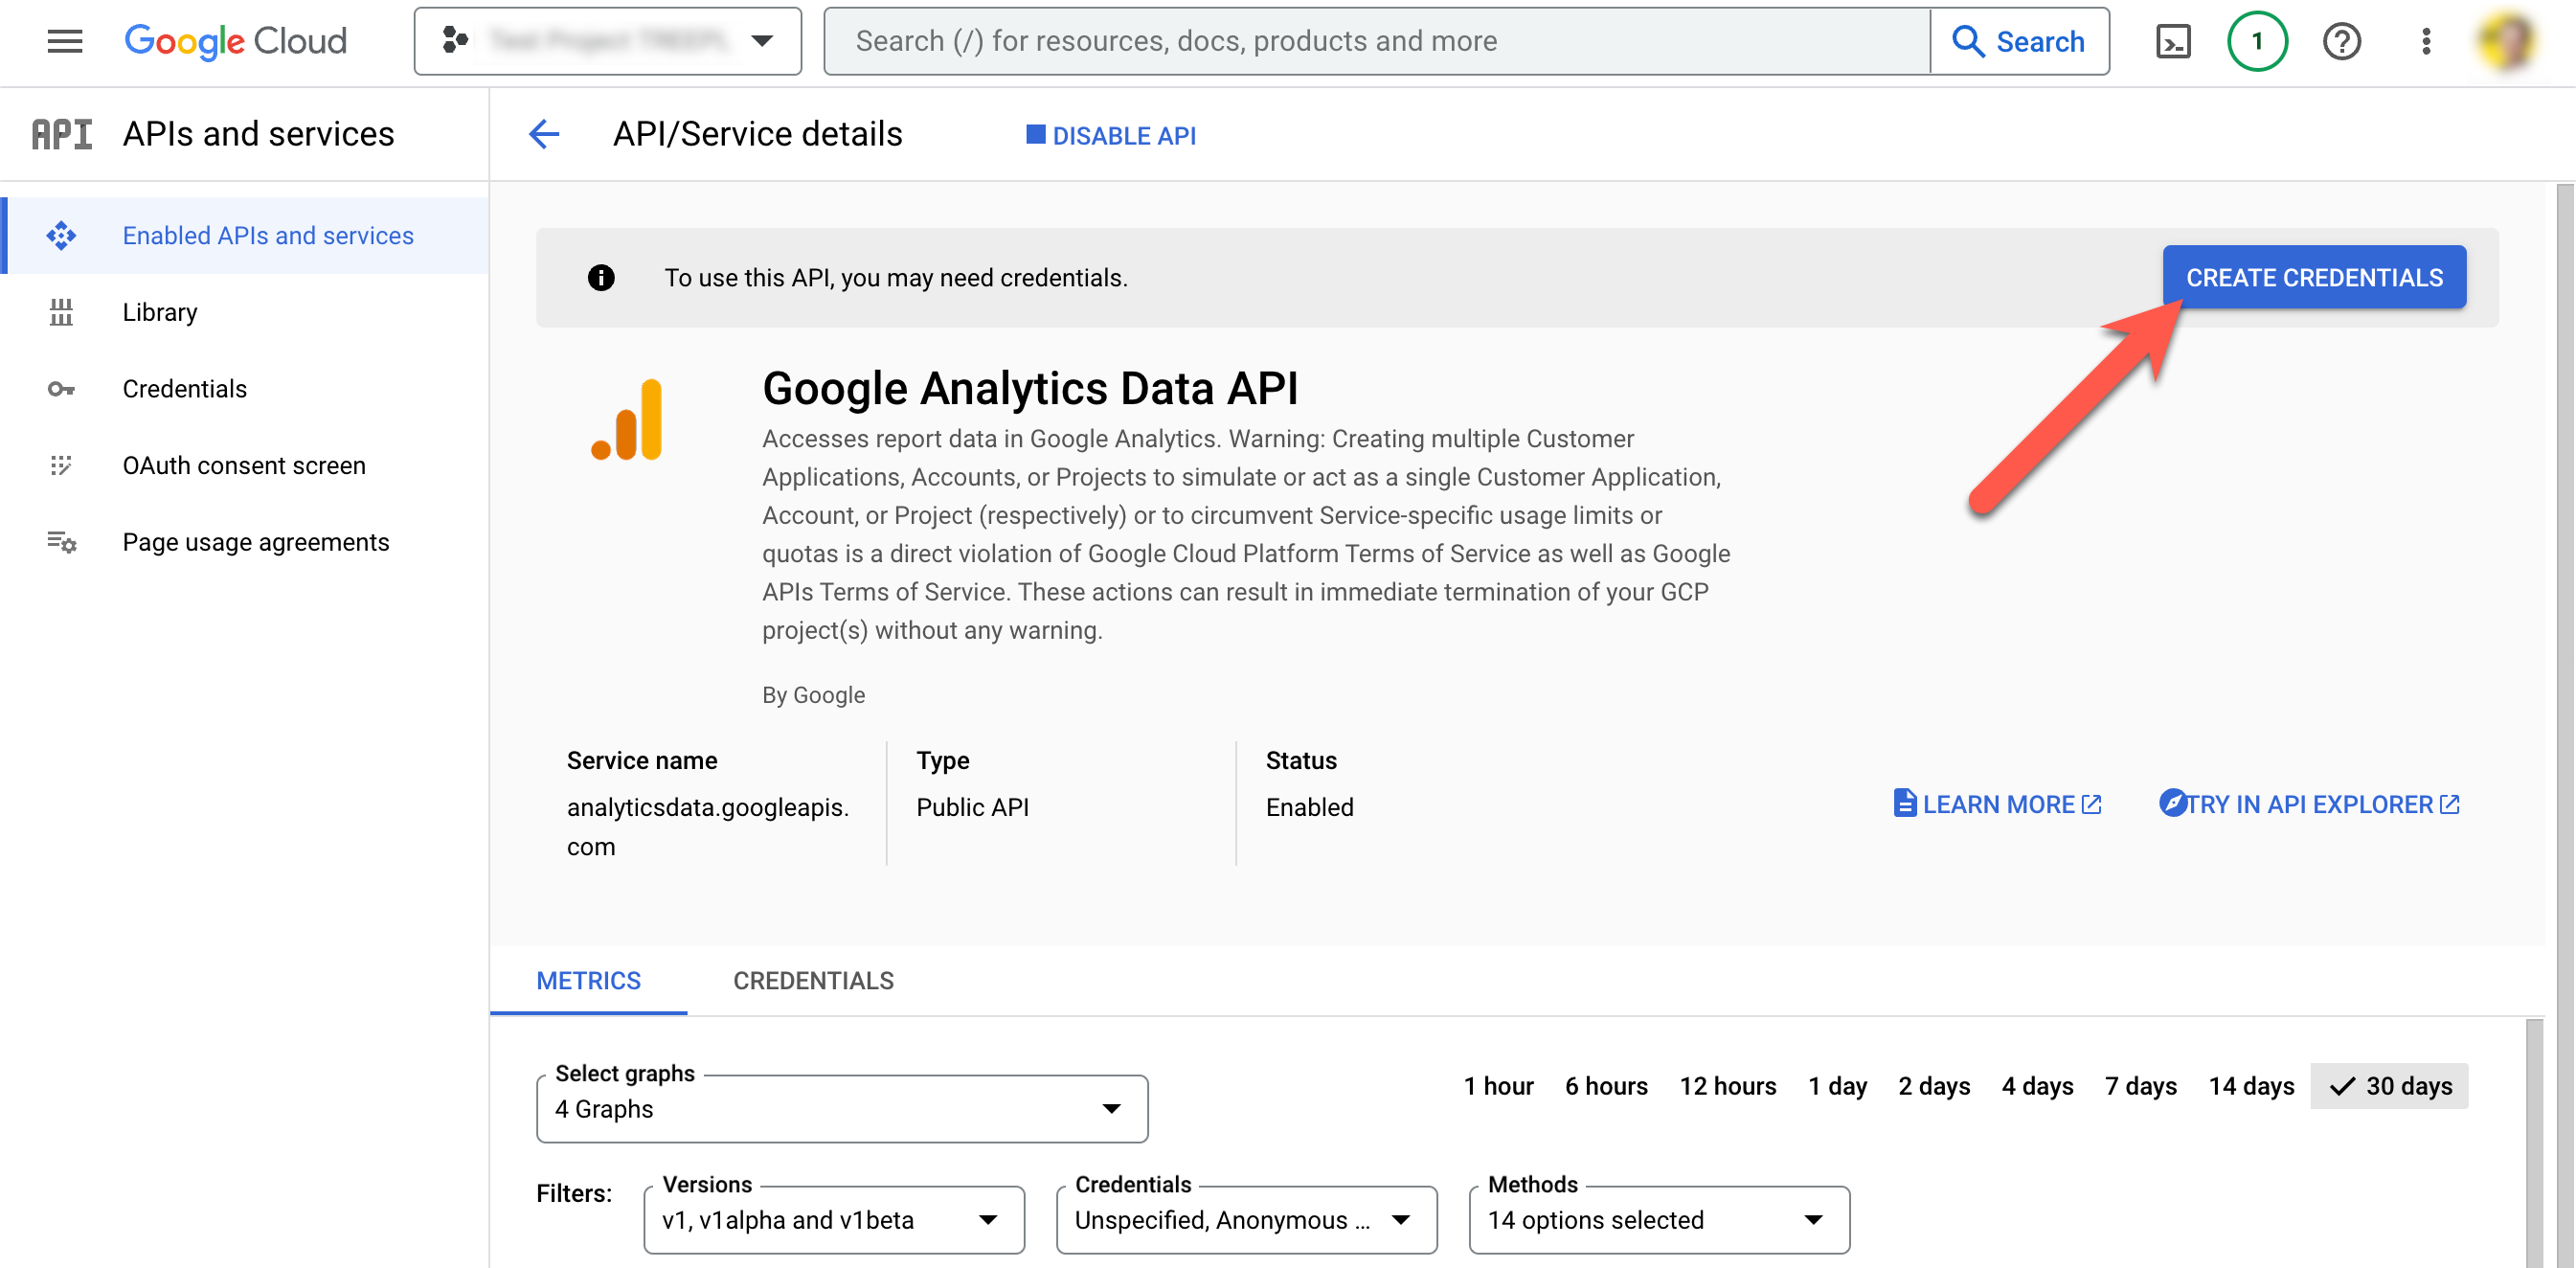
We'll need to enable this API so click on it to navigate to the API's detail page.

From here, click "Enable".

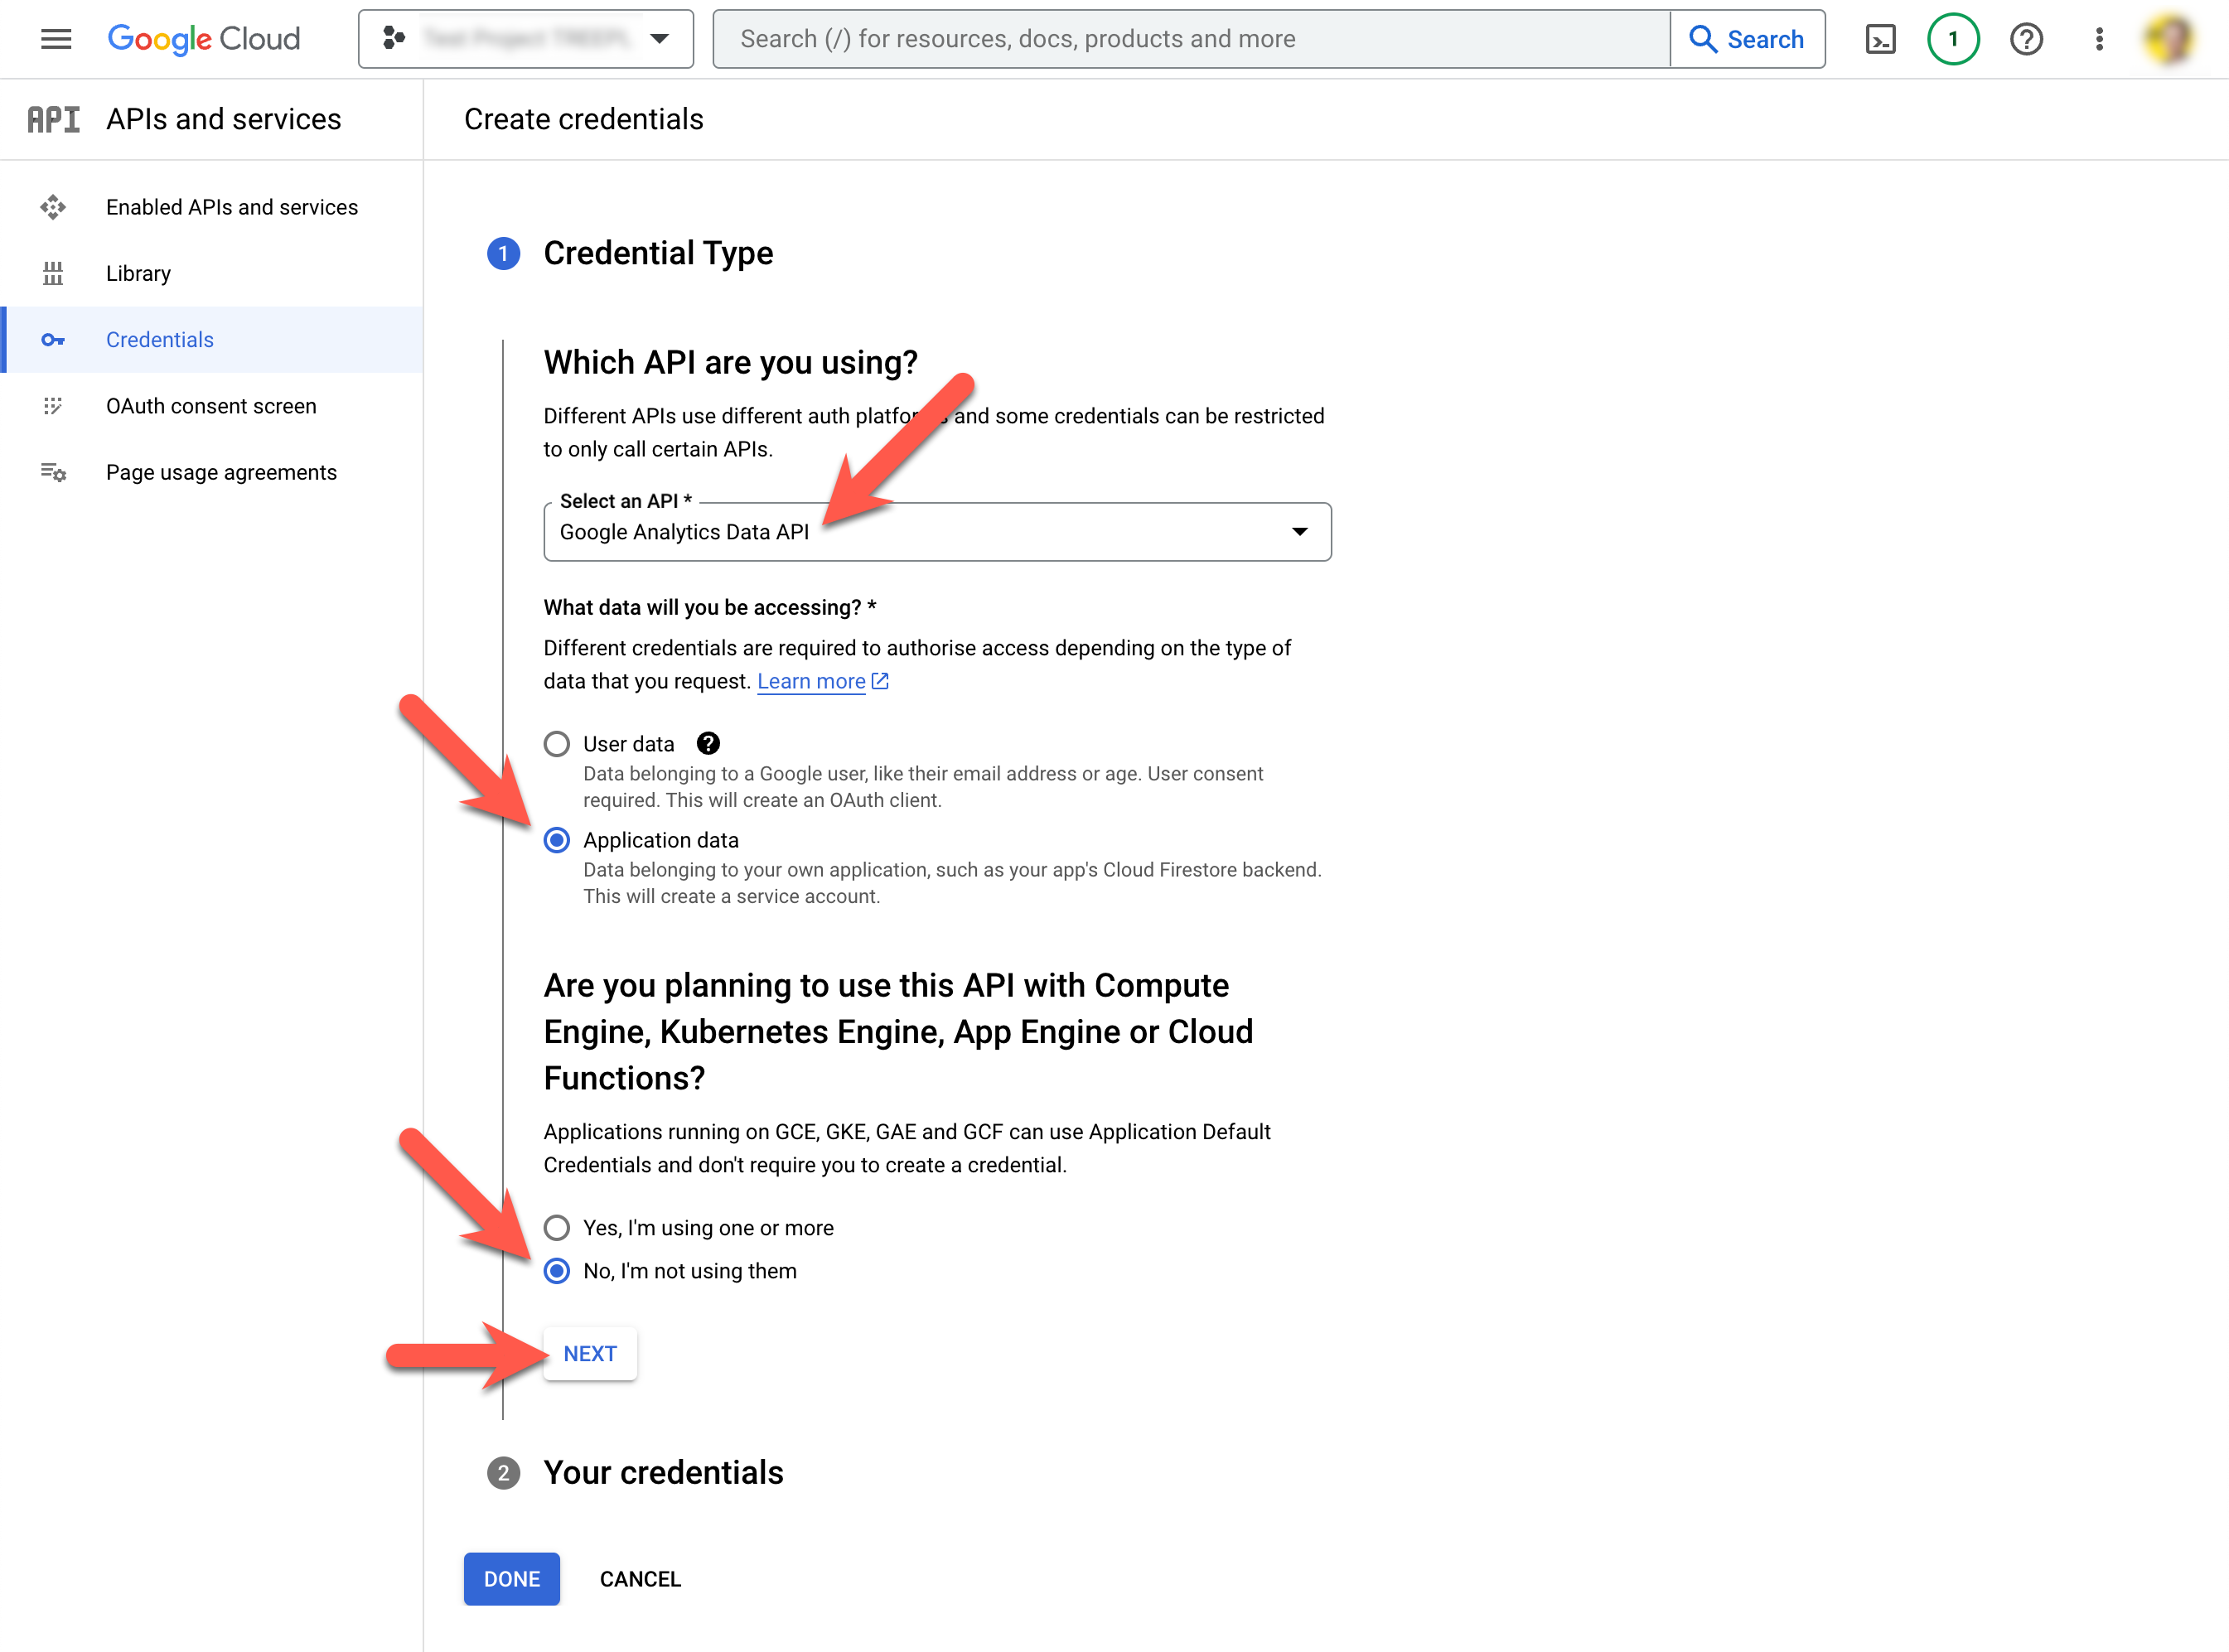
Once enabled, you should be brought to that APIs page where you can click "Create Credentials".
Ensure the "Google Analytics Data API" is selected as the API you are using, choose "Application Data" for the type of data being accessed and choose "No" for using other Google products/services.
Then click "NEXT"
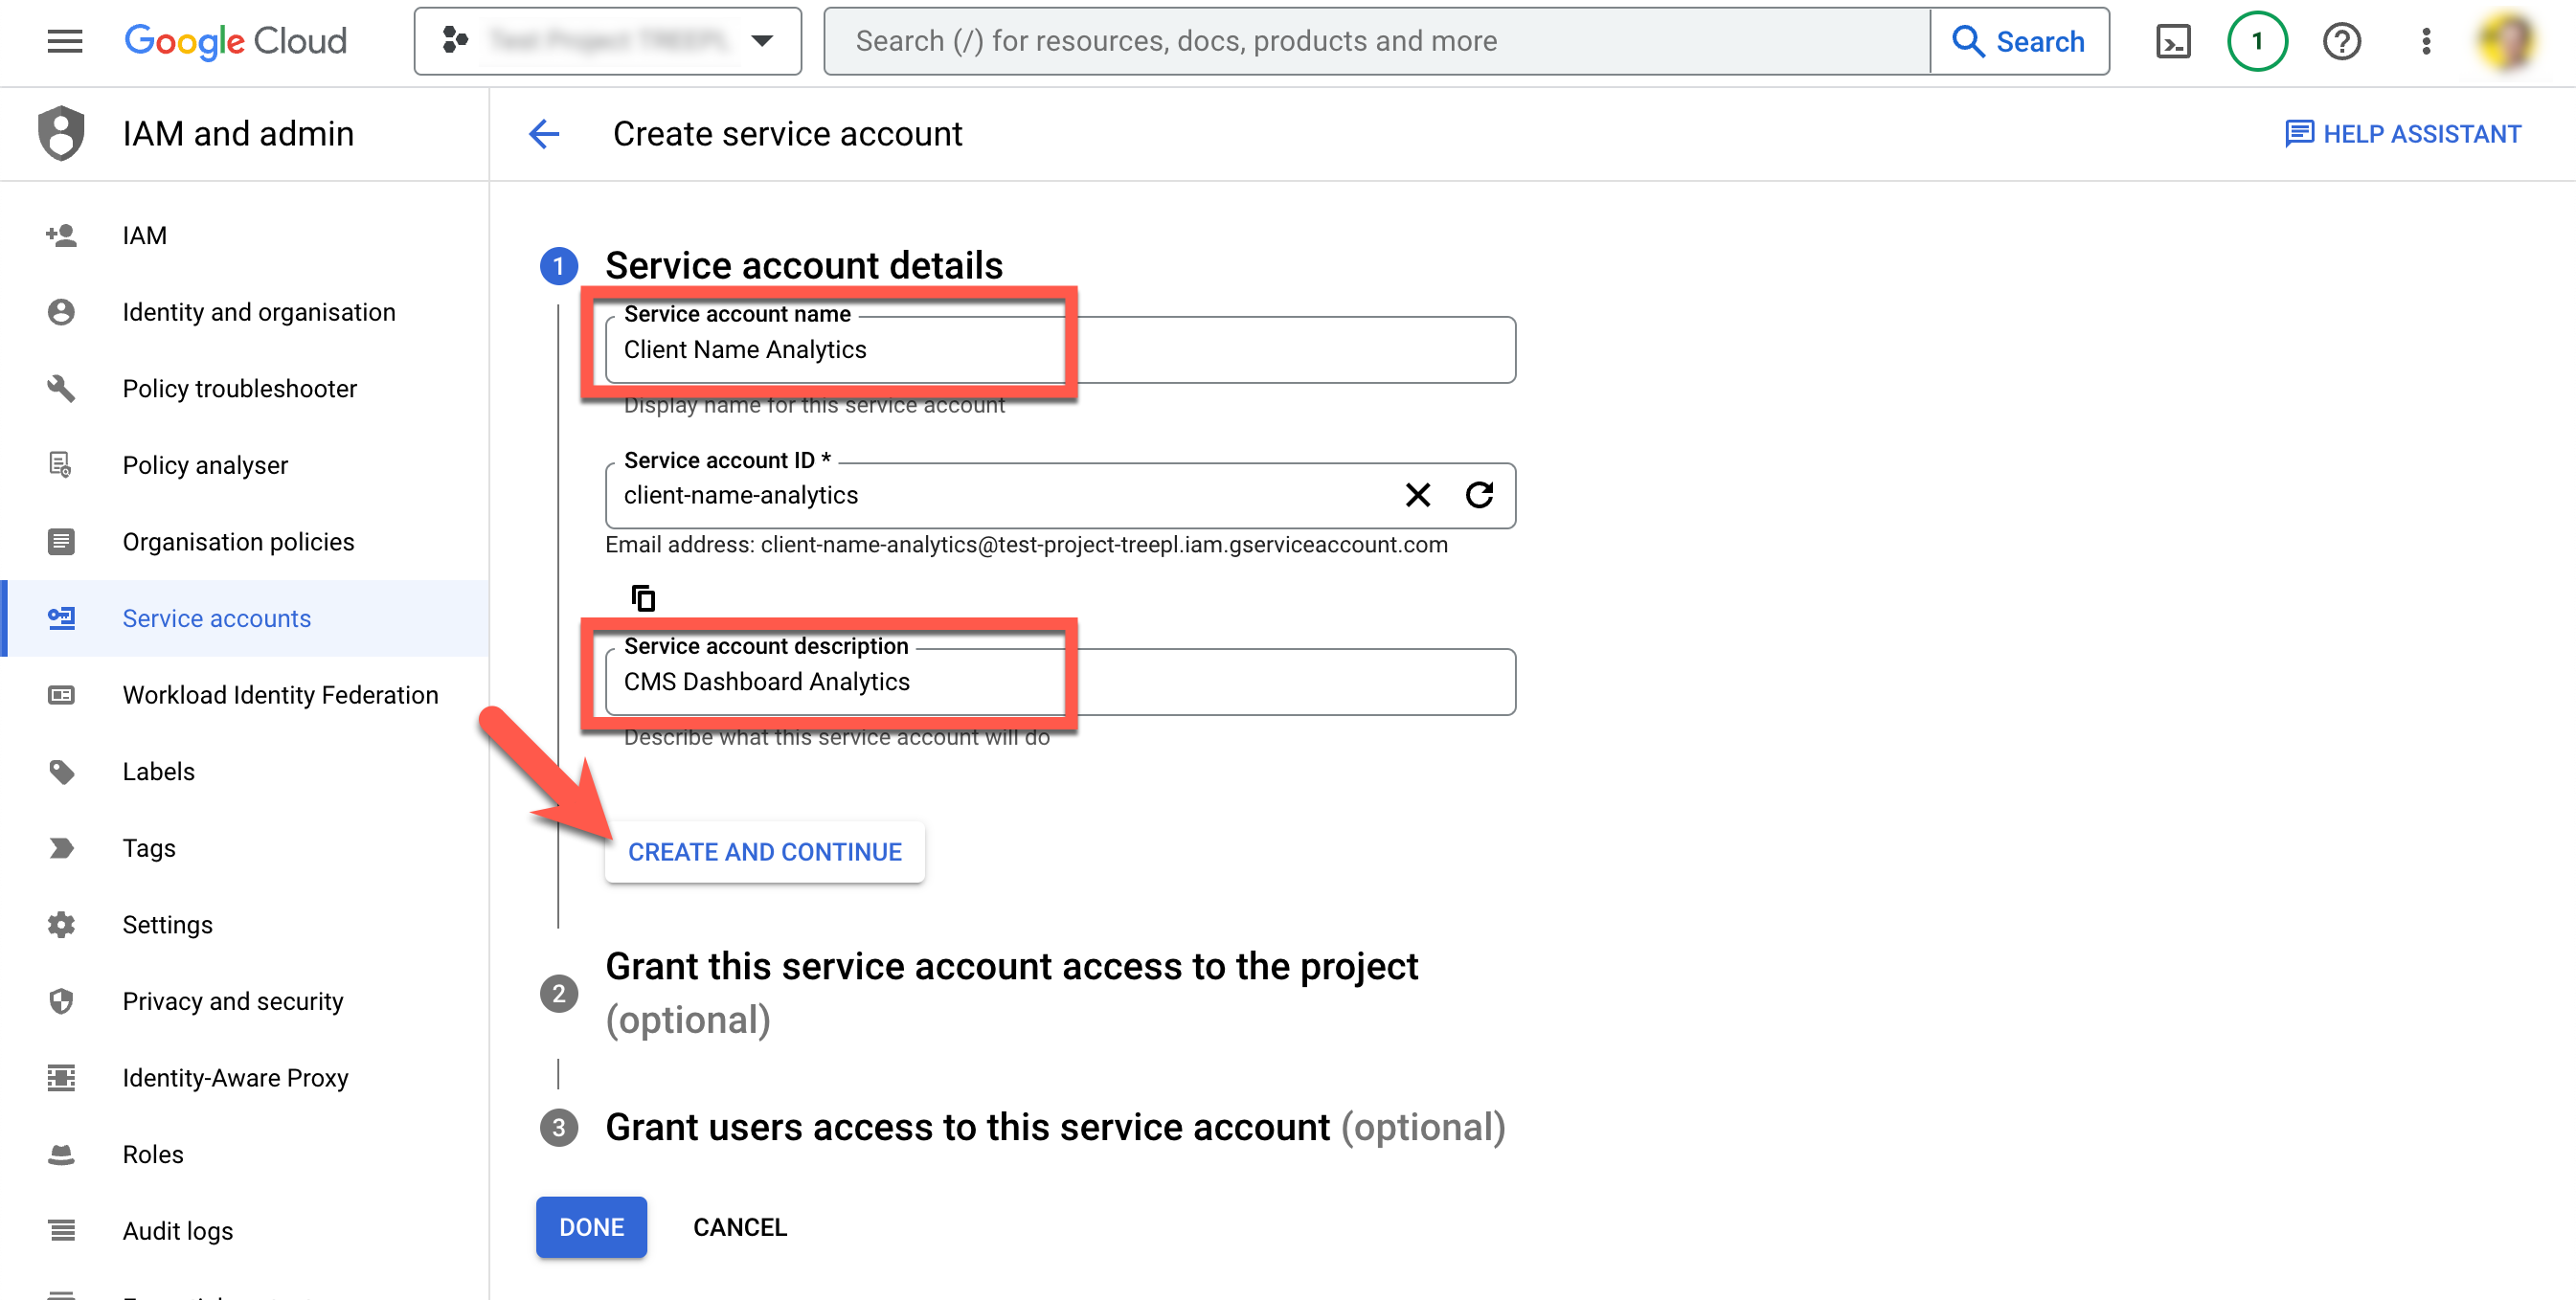
Provide a Service account name and description then click "Create and Continue".
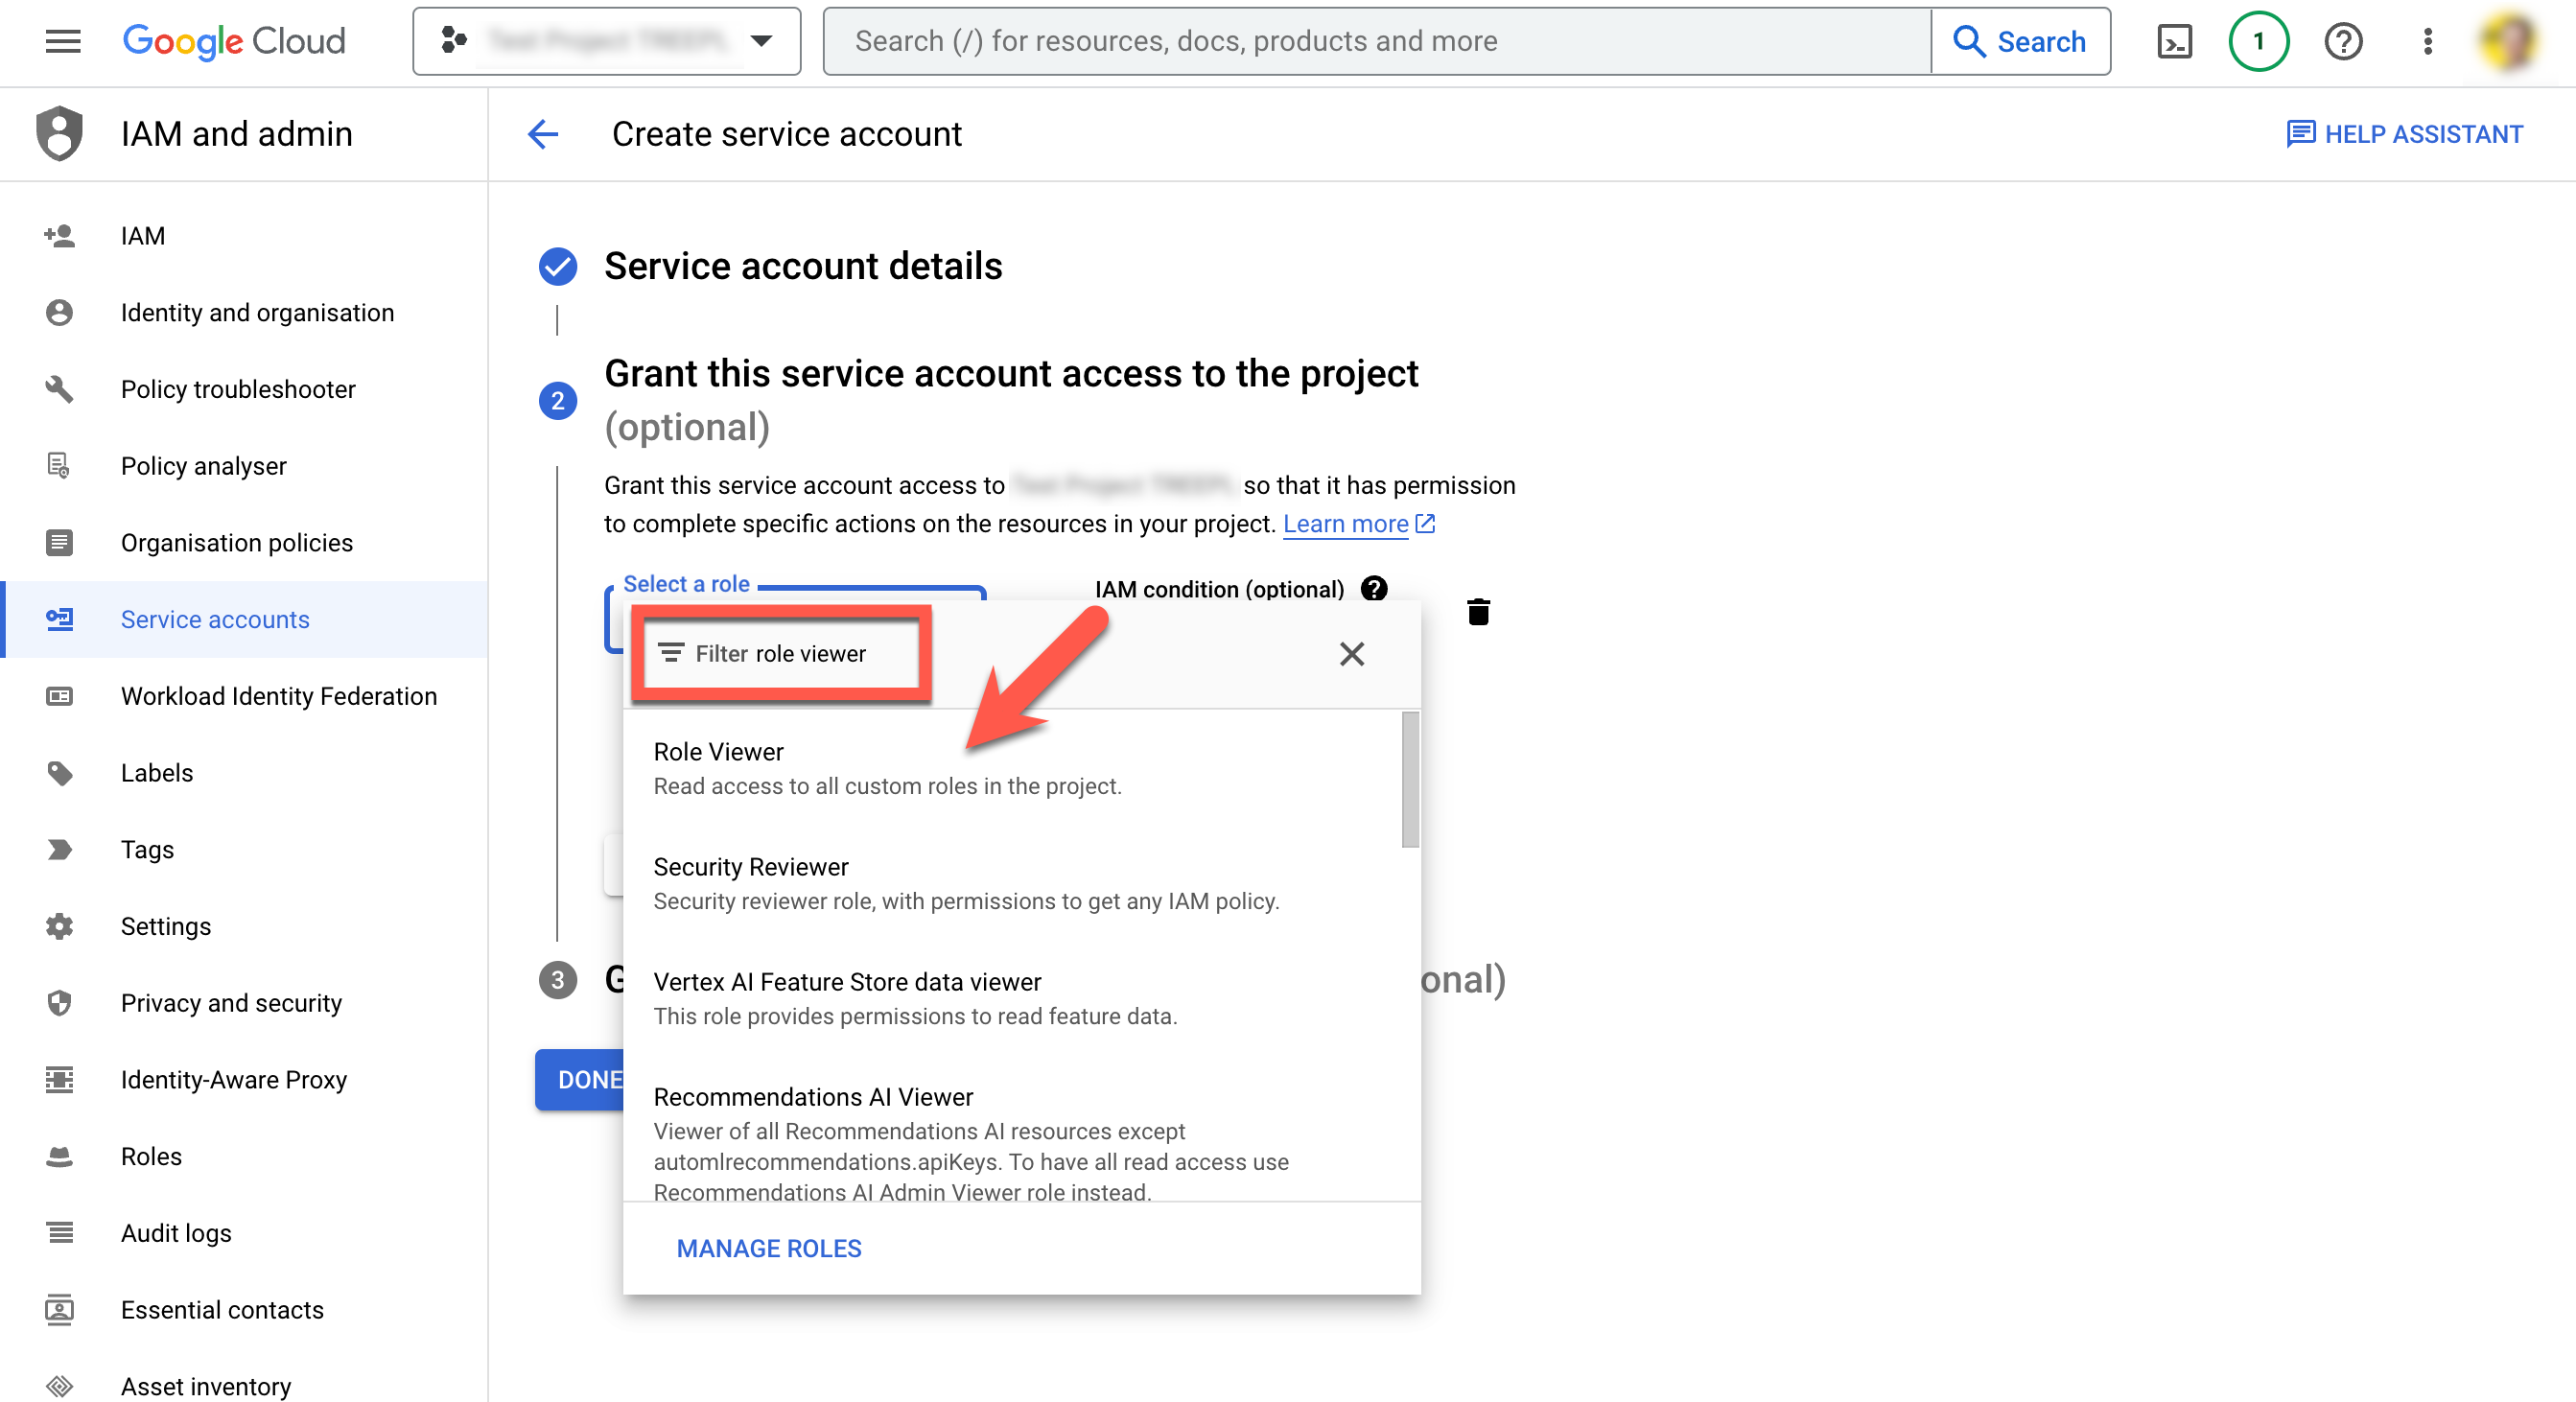
Open the 'Select a role' dropdown and type "role viewer" in the filter/search field.
Choose "Role Viewer" from the results list.
Click "DONE" (skipping step 3).
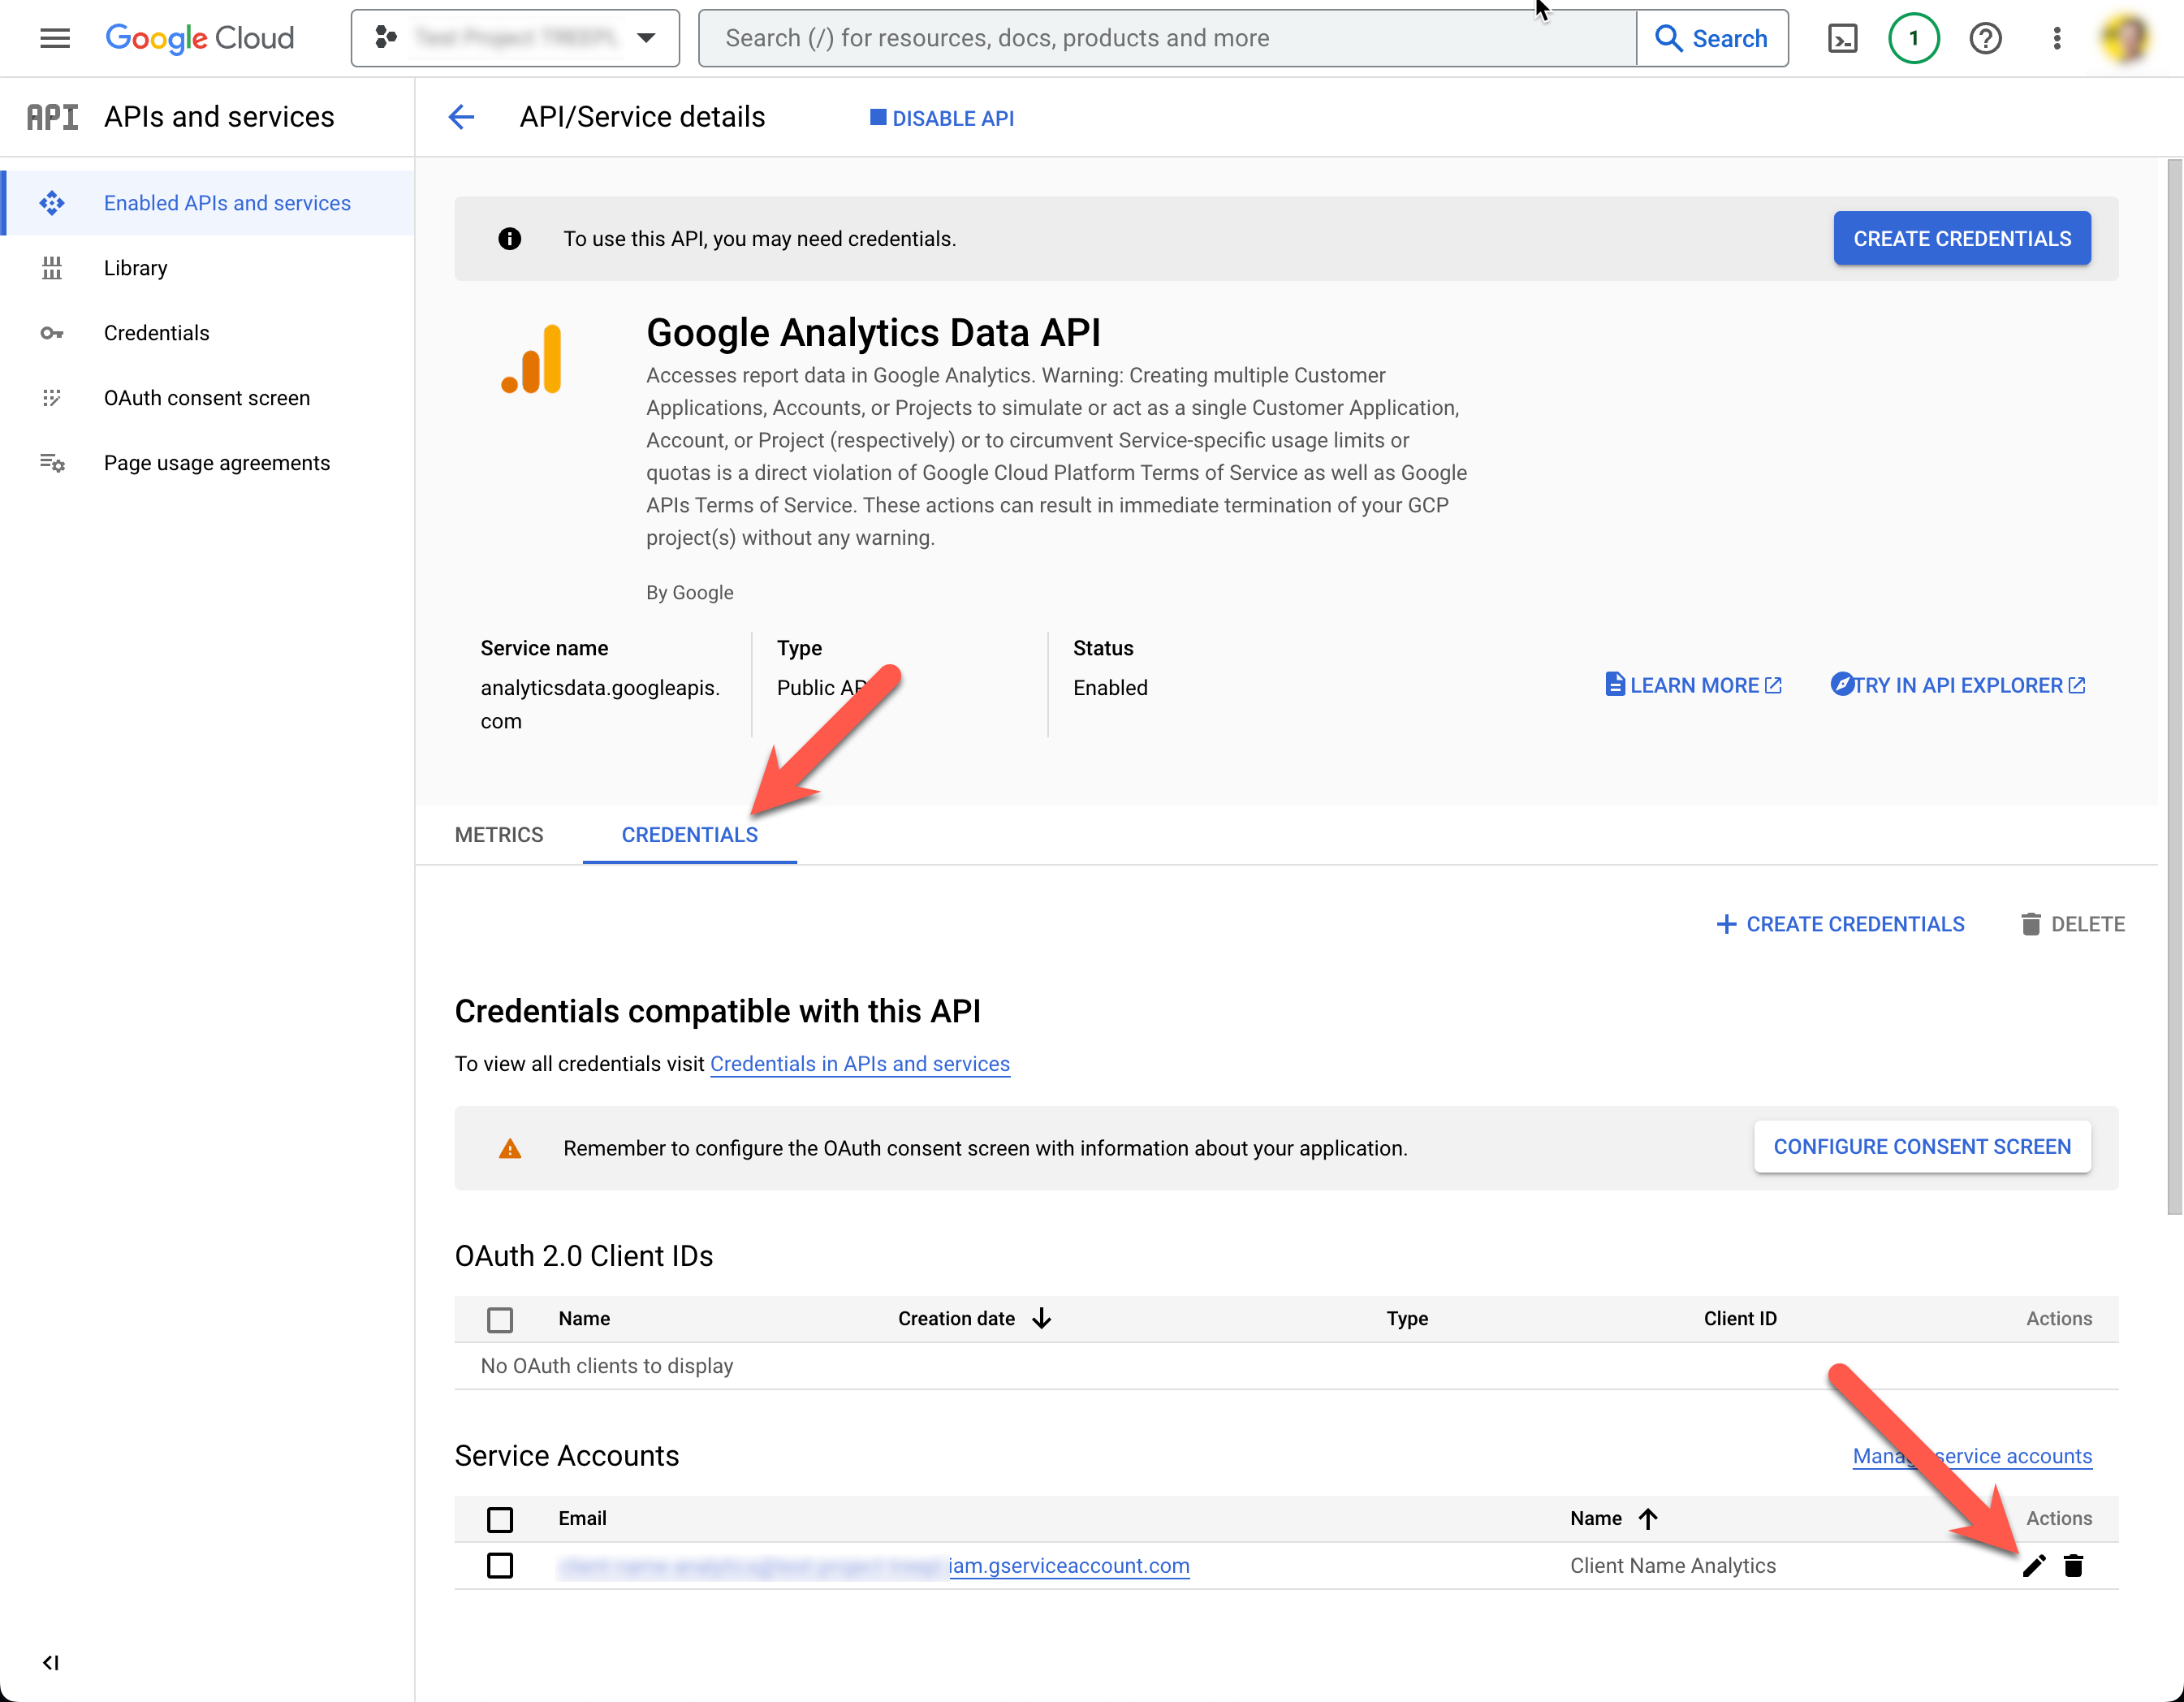
Select the 'CREDENTIALS' tab and then click the pencil icon next to the service account.
Switch to the "KEYS" tab and click the "ADD KEY" dropdown and choose "Create new key" from the options.
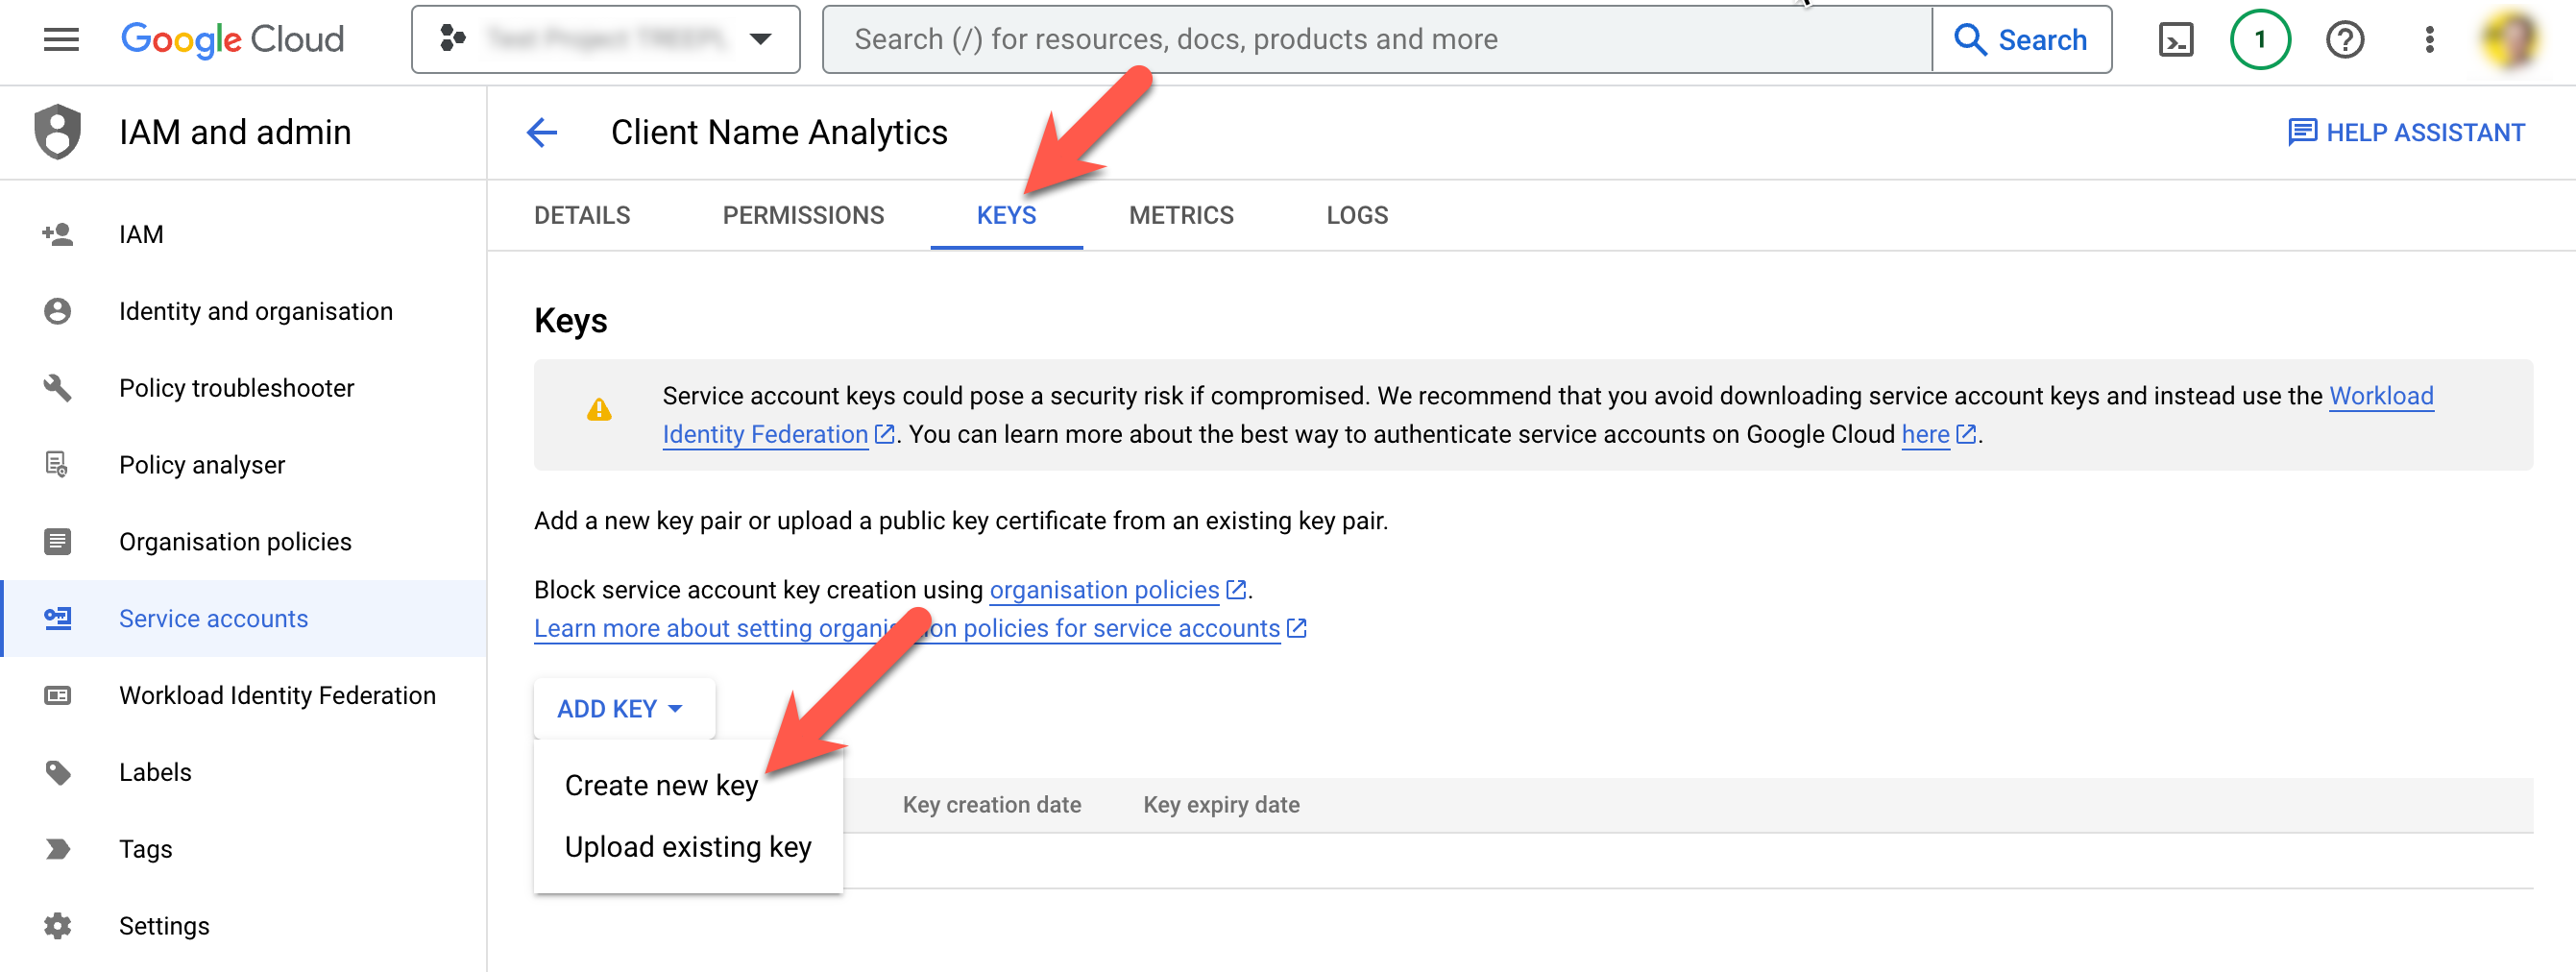
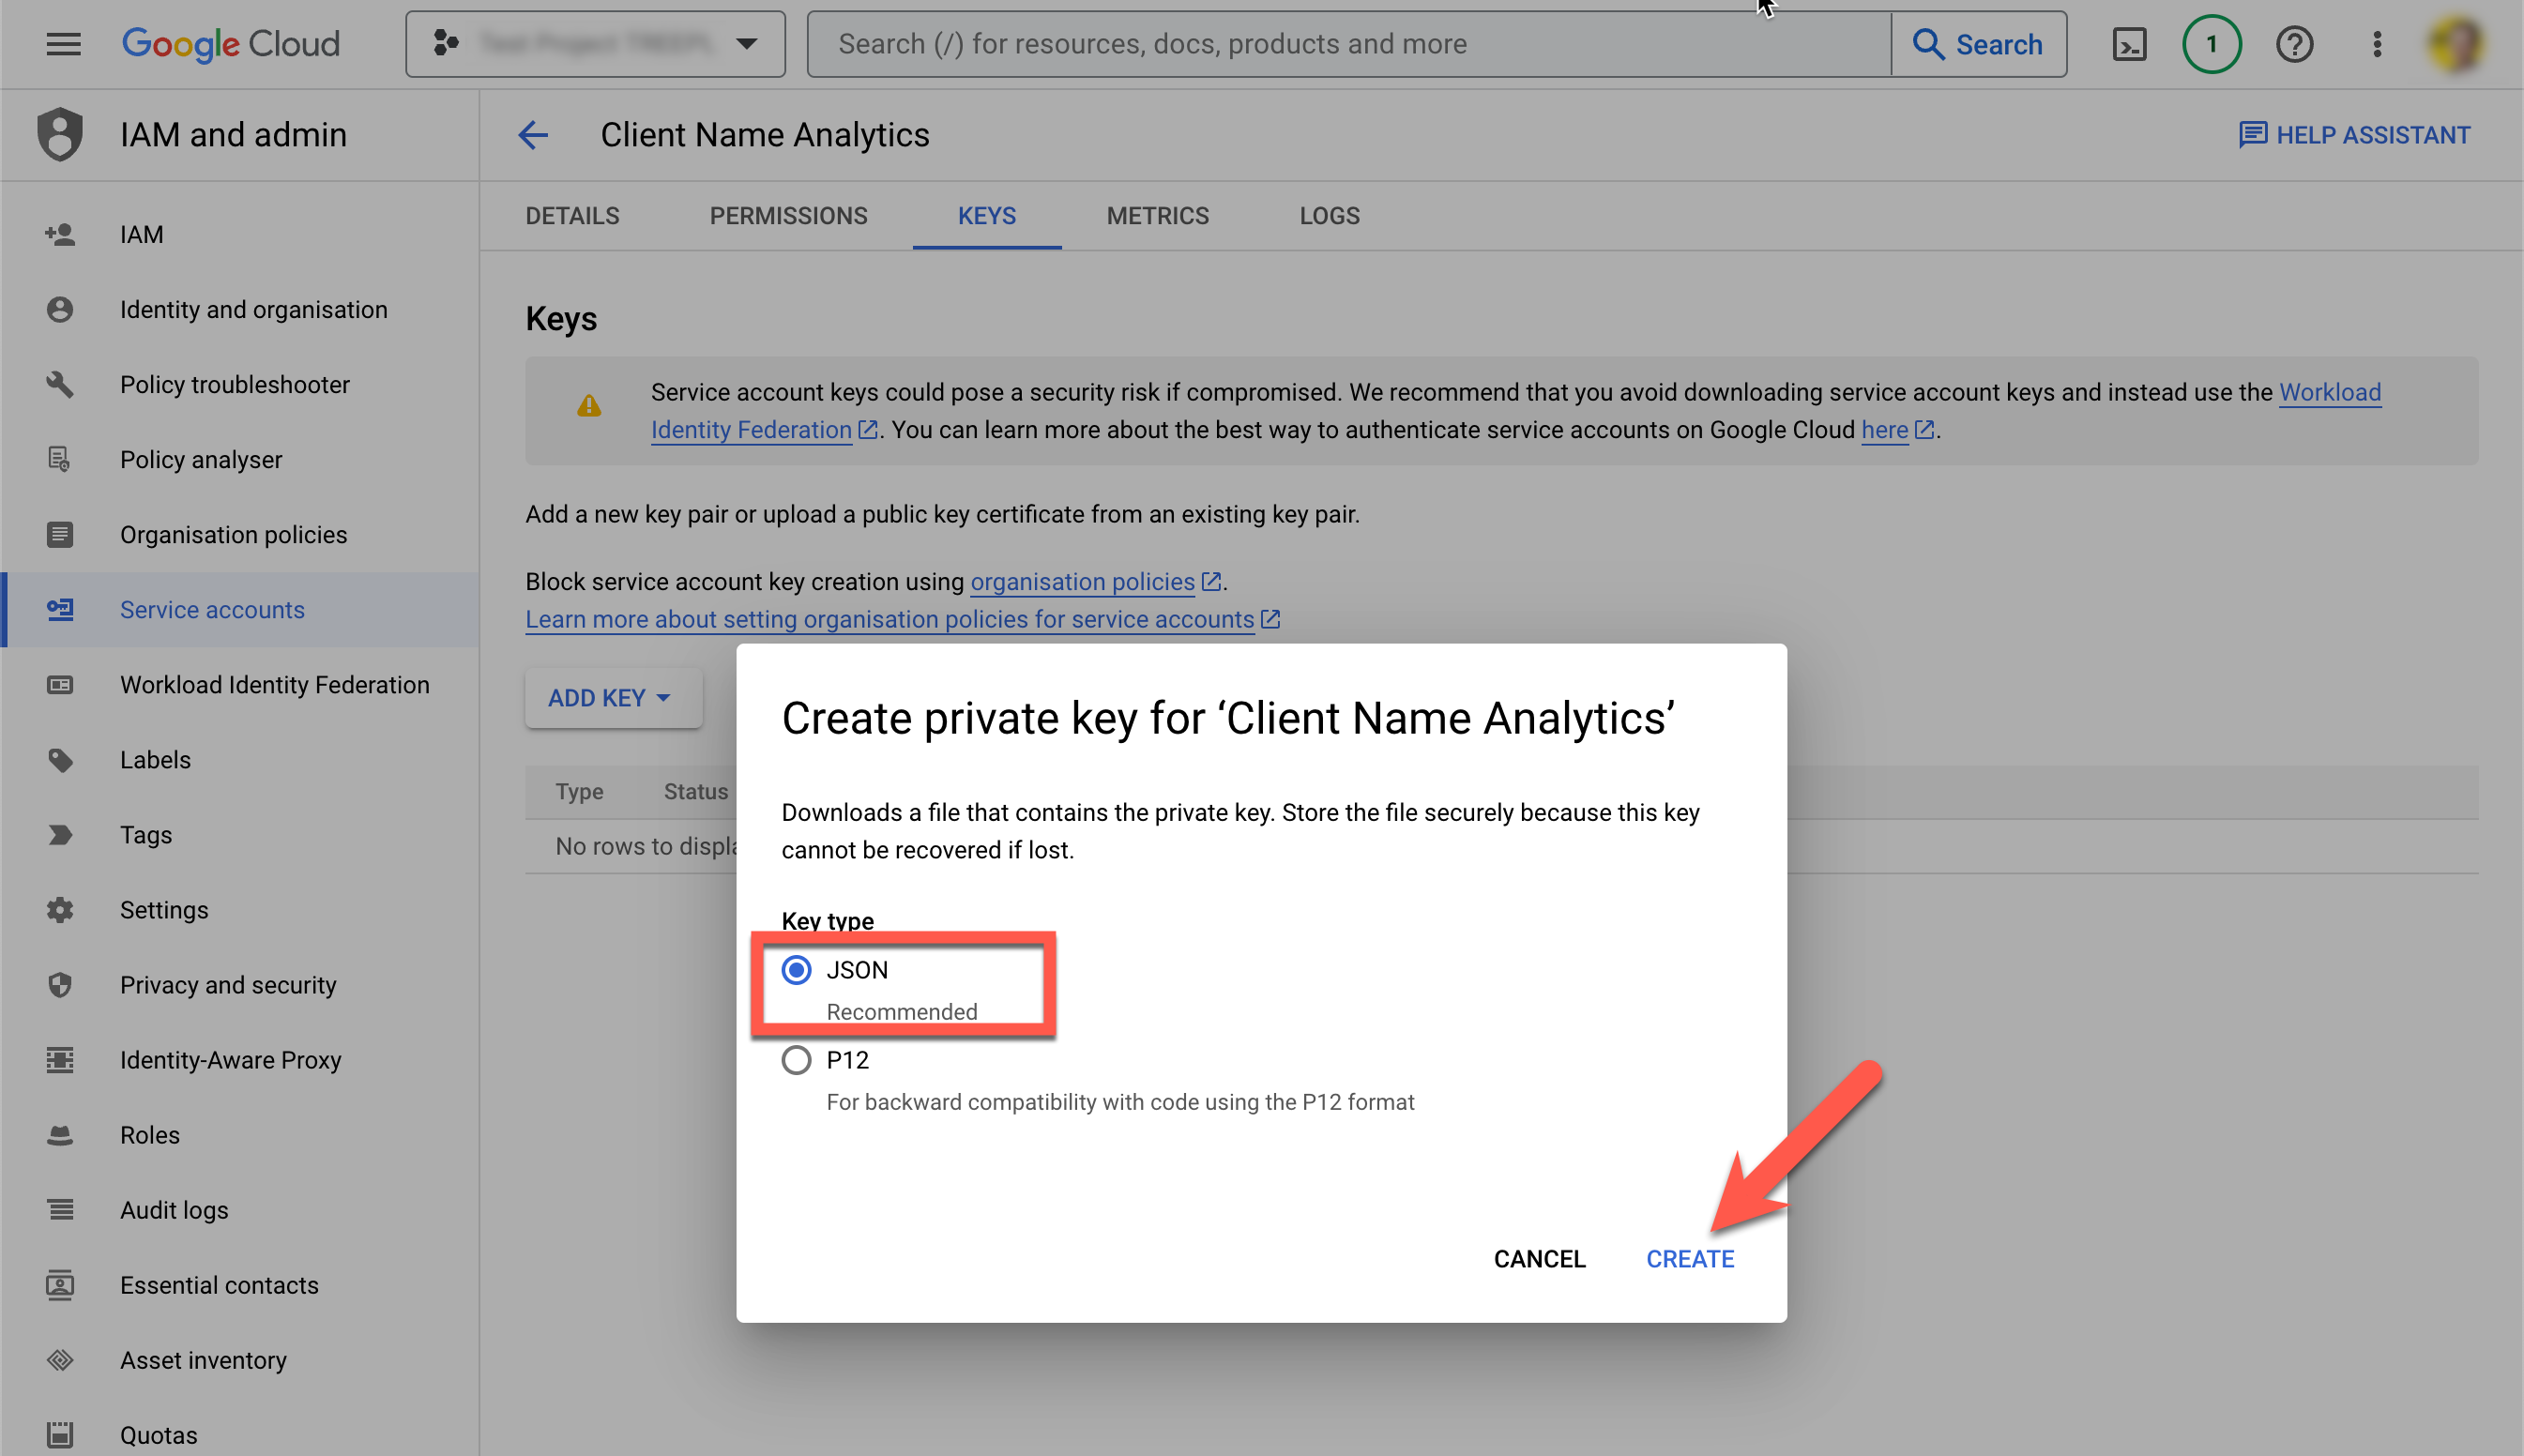
Leave "JSON" key type selected and click "Create".
Your Key will be generated and will either save to your downloads folder on your computer or you'll be asked where you'd like to save it (depending on your browser settings).
You'll need this file to upload to your Treepl CMS admin later, so keep it handy and file it in a safe place.
Close the confirmation dialog that appears after download, then navigate back to the Service Accounts list usign the back arrow.
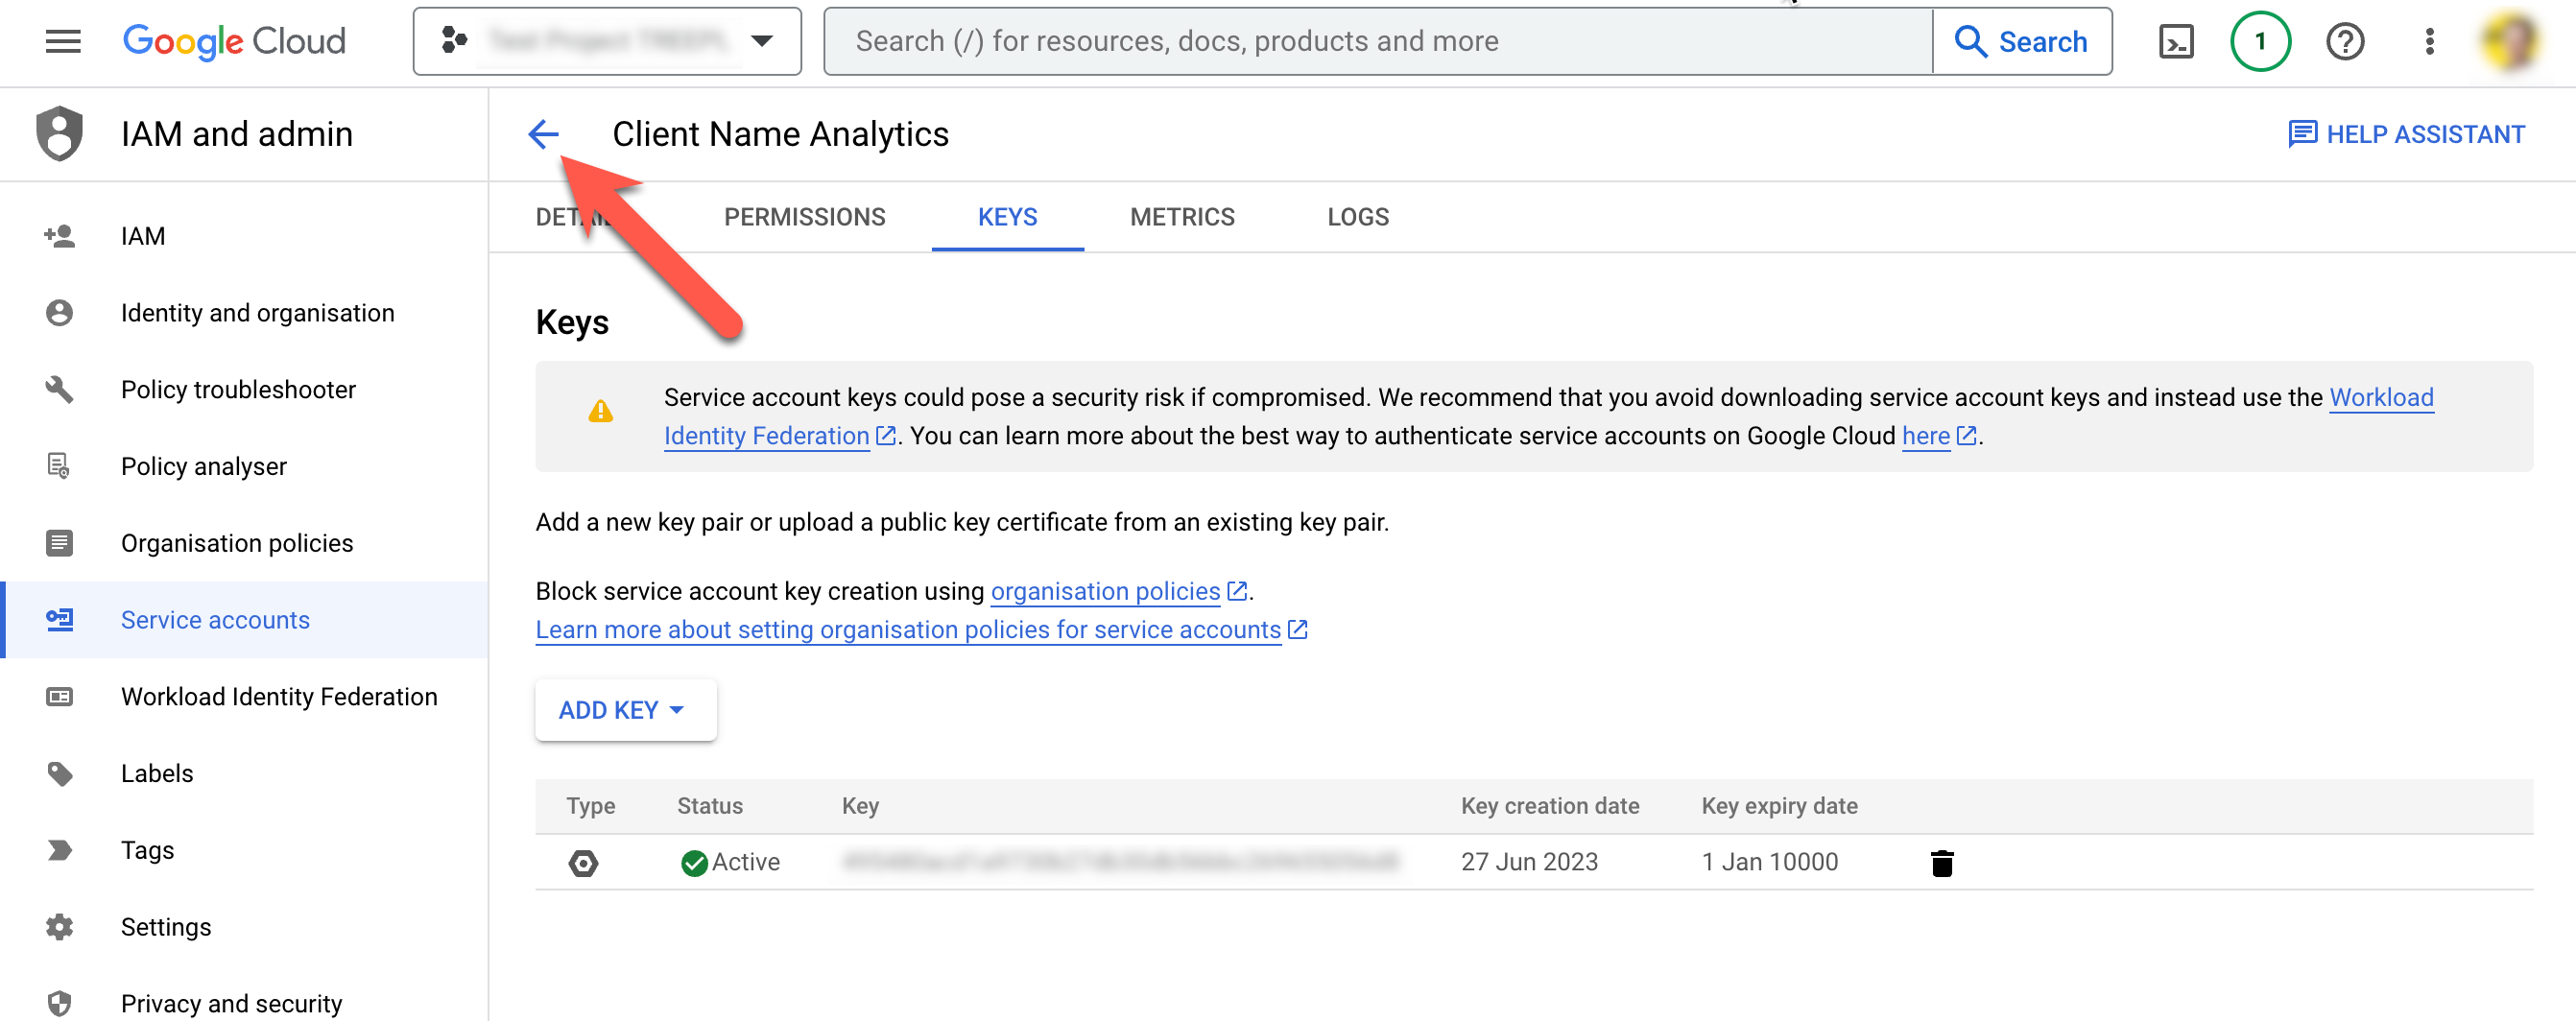
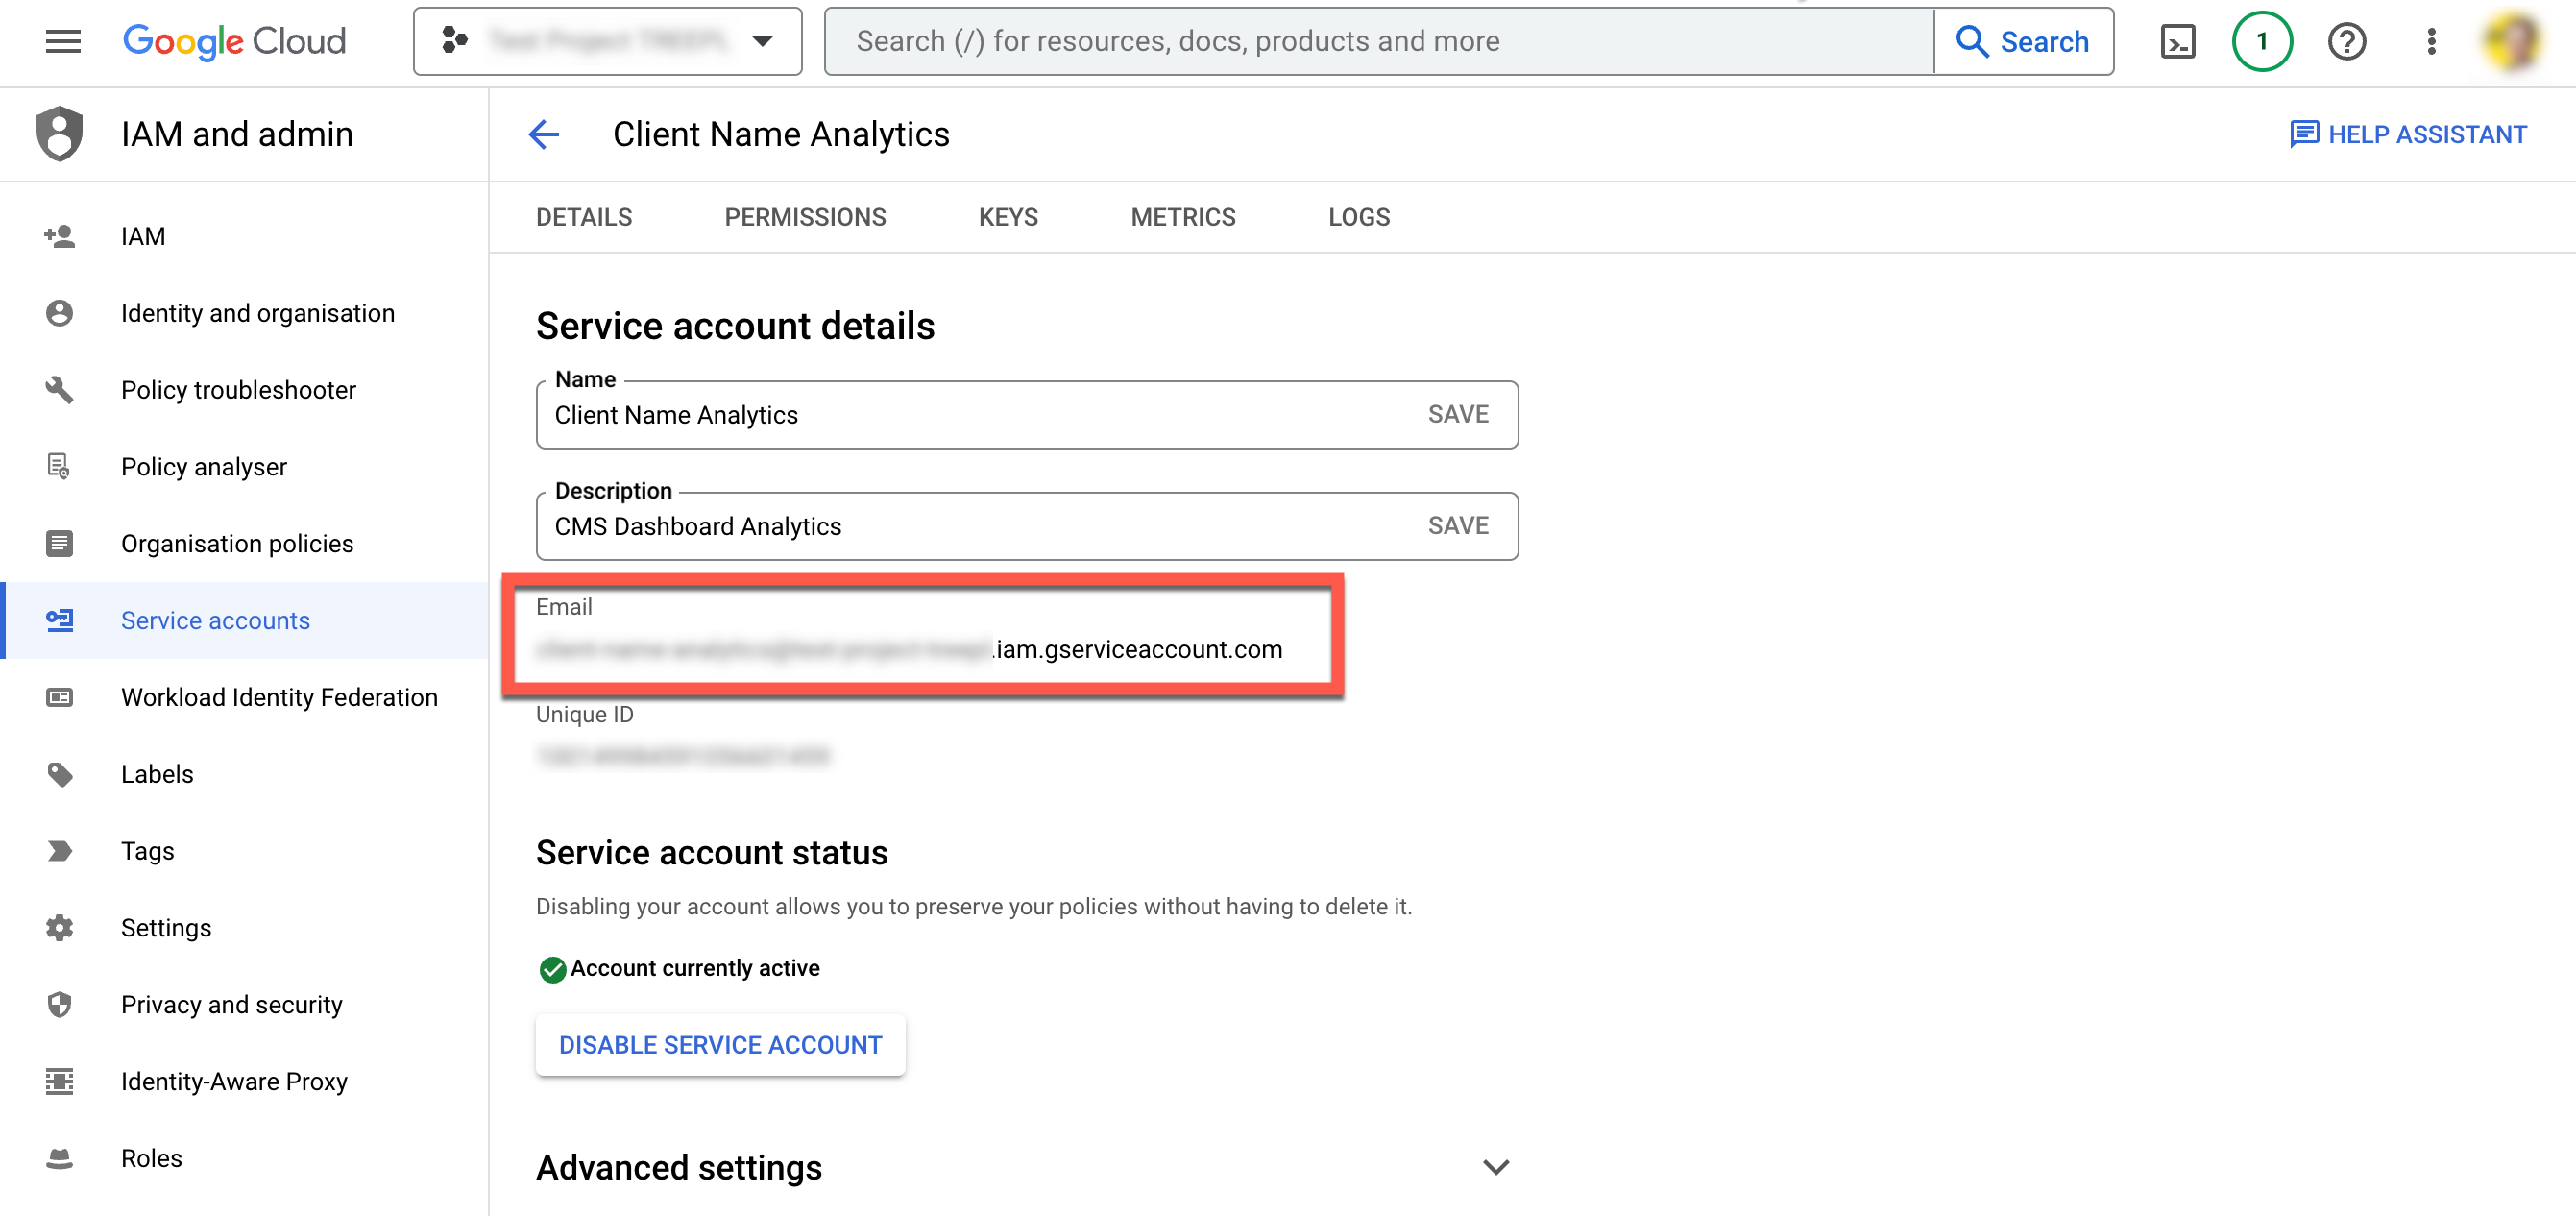
Your new key will be listed with a long email address.
Copy this email address and paste it to a blank text document, or somewhere temporary. You'll need this in the following steps when configuring your Google Analytics property.
You can close out of the Google APIs page and continue to configuring your Google Analytics property with the following instructions.
Google Analytics configuration
This step requires that you, or your client, have a valid Google Analytics account set up. A free account can be created here if needed.
Log into your Google Analytics account https://analytics.google.com/.
If you are using an existing Google Analytics account that has not been upgraded to the new GA4 version, you'll need to do so for this integration. UA to GA4 Migration instructions can be found here.
The following steps are for new or existing GA4 Google Analytics accounts.
Creating a New Account
Once logged into your Google Analytics account, click on the "Admin (gear icon)" in the bottom left of screen. Then click on the "Create Account" button at the top of the 'Account' column.
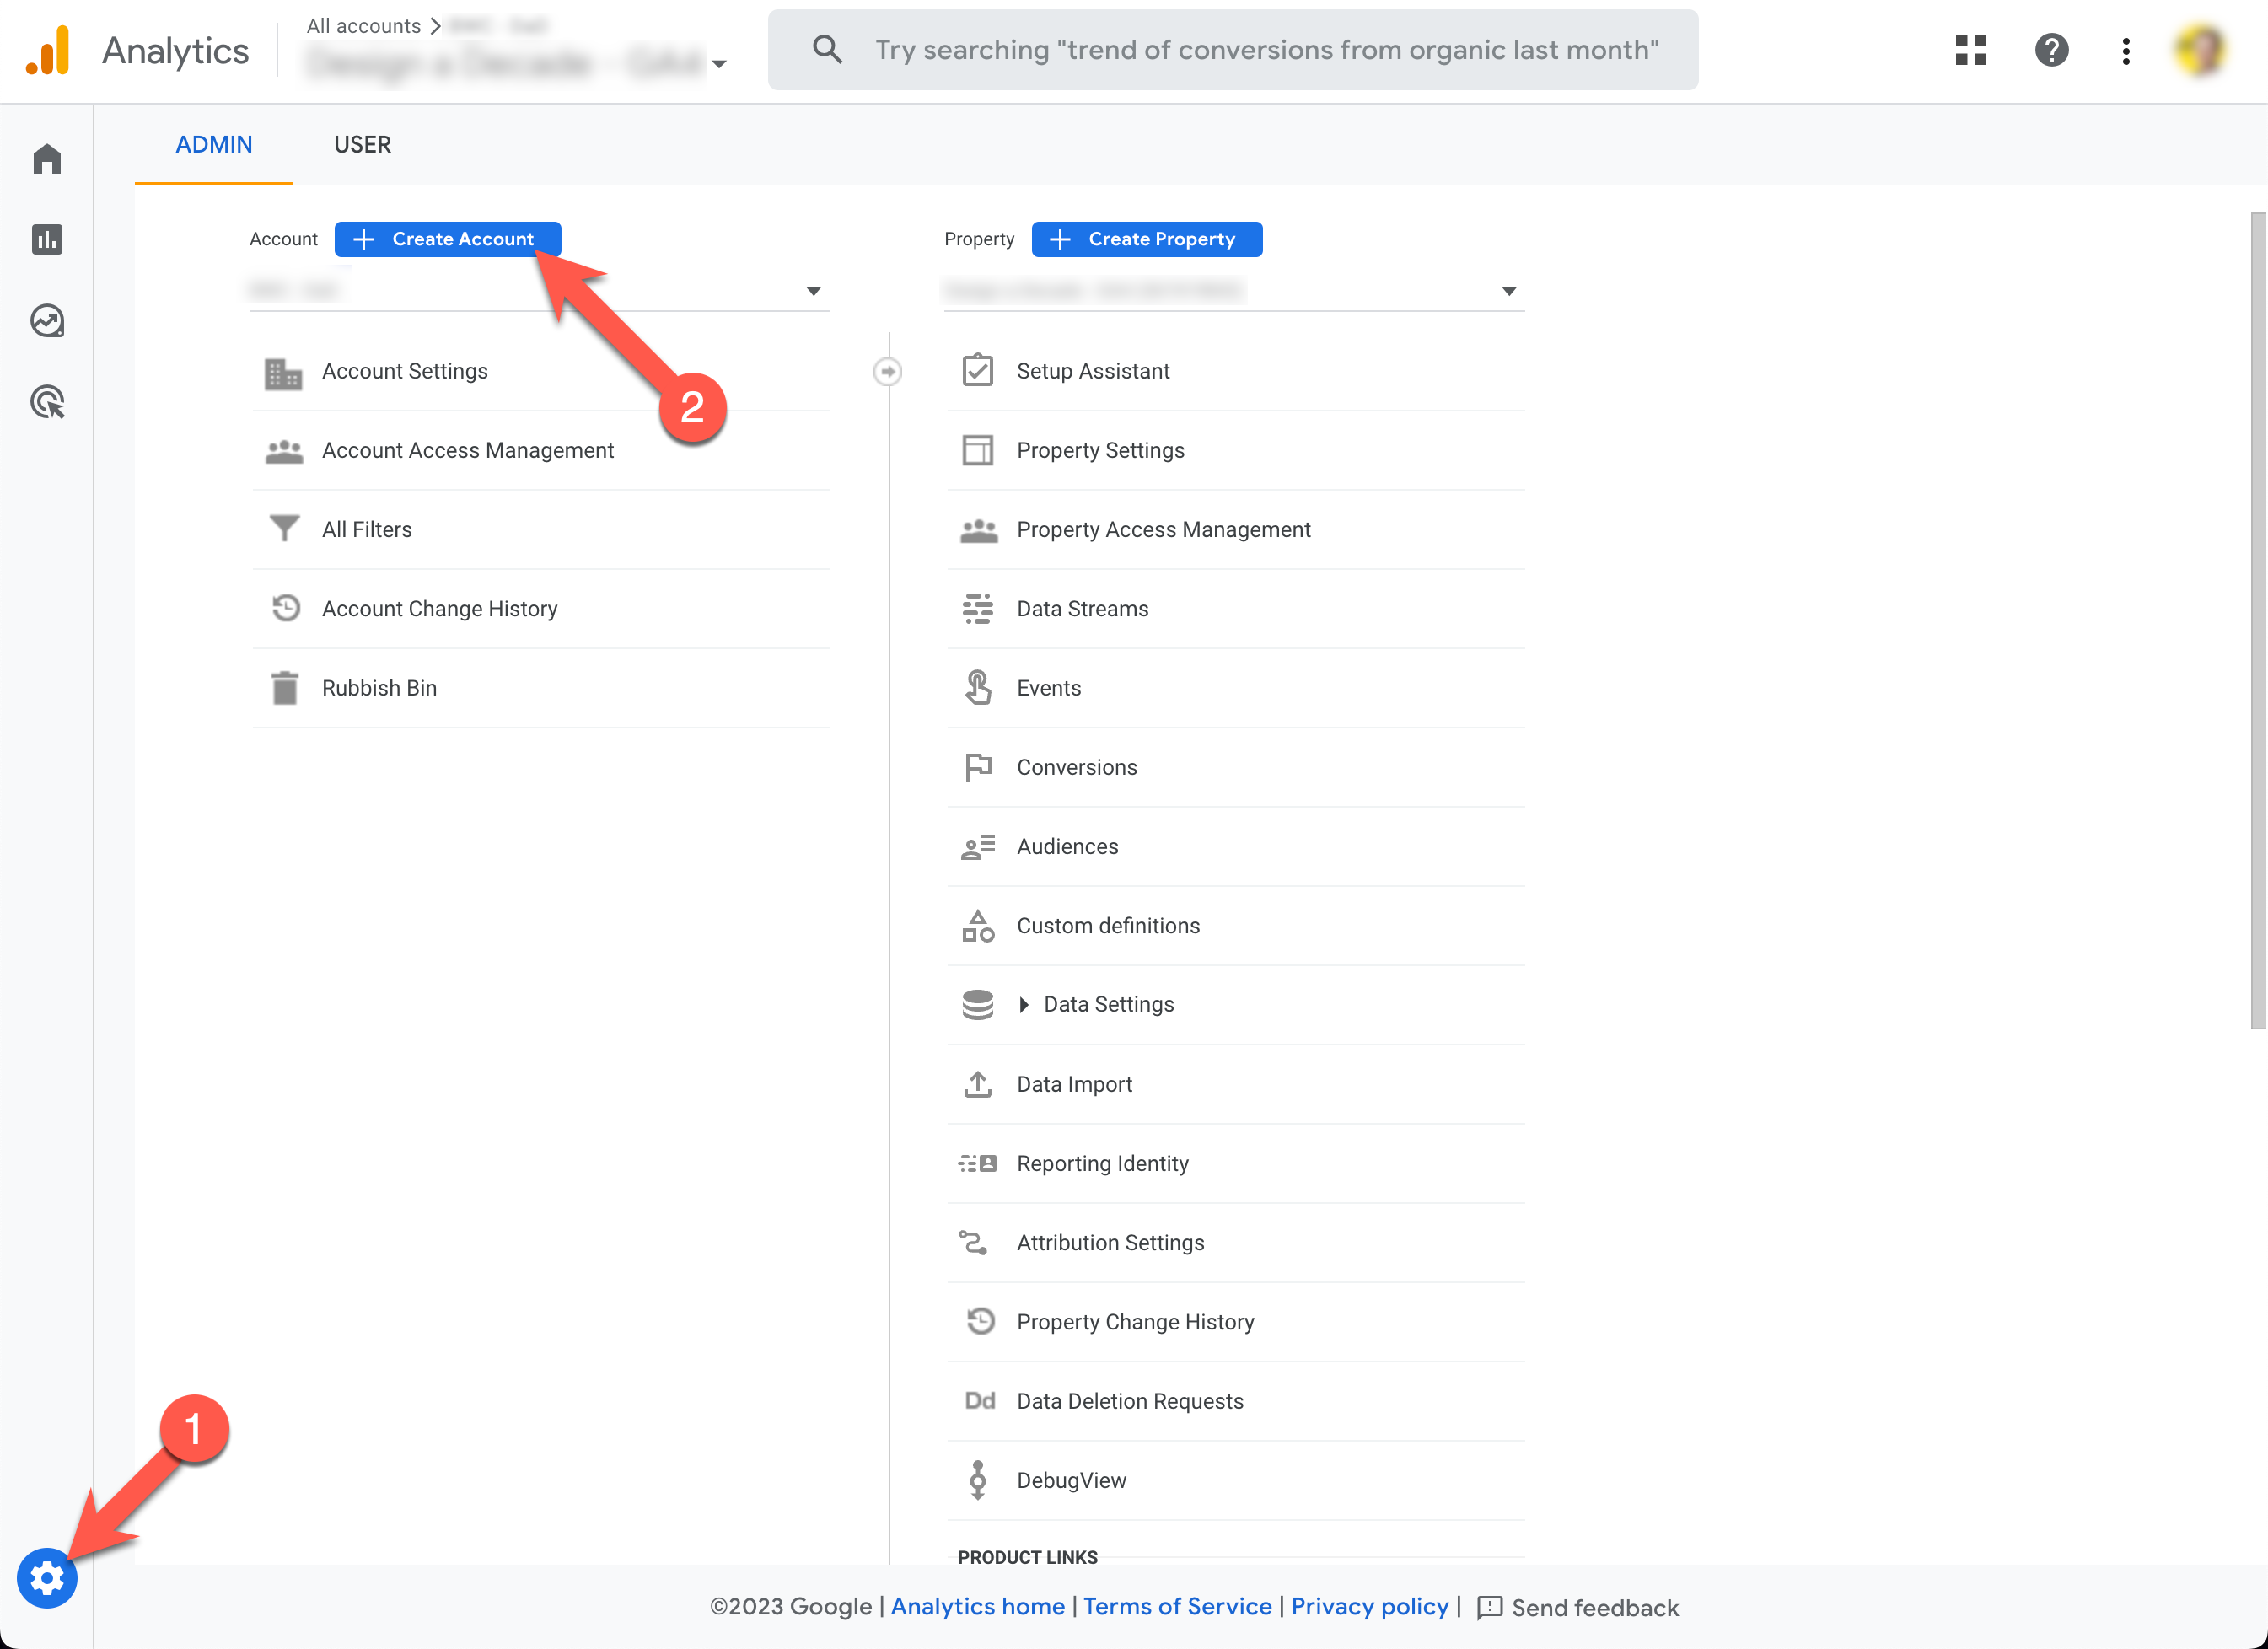
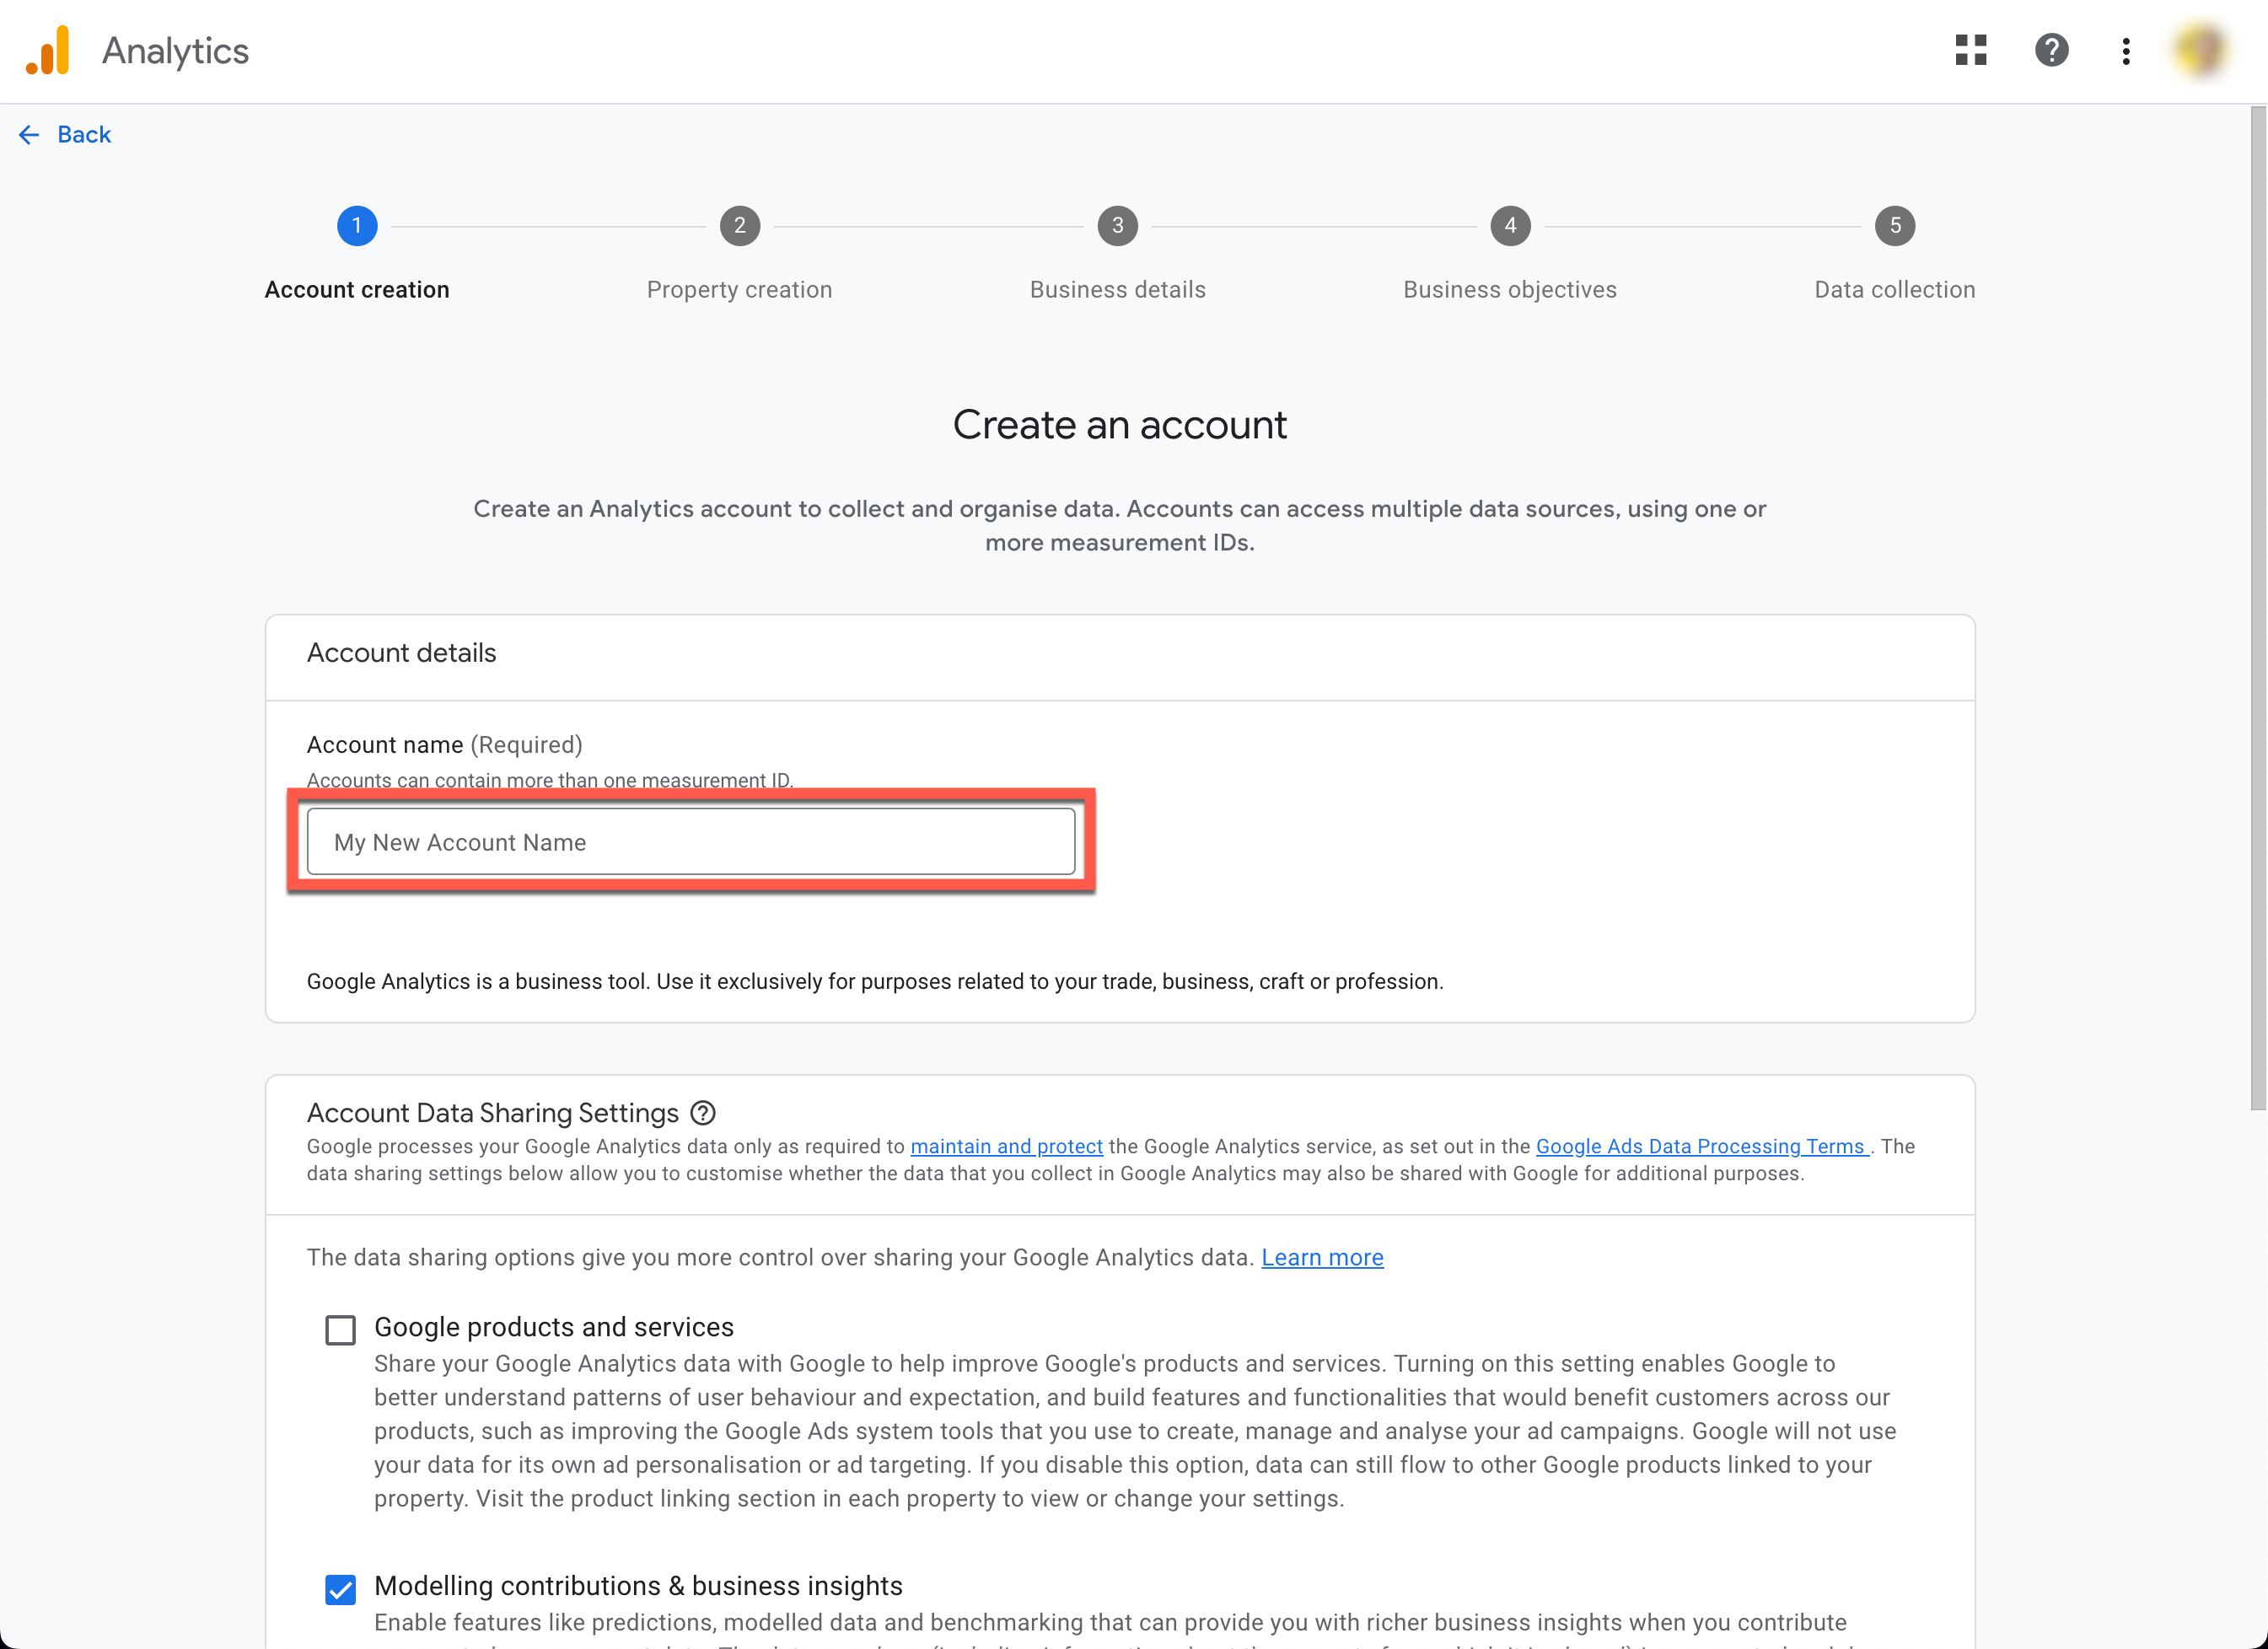
Give your account a name and leave the 'Account Data Sharing Settings' as default (unless you want to change them for your requirements) and click "Next".
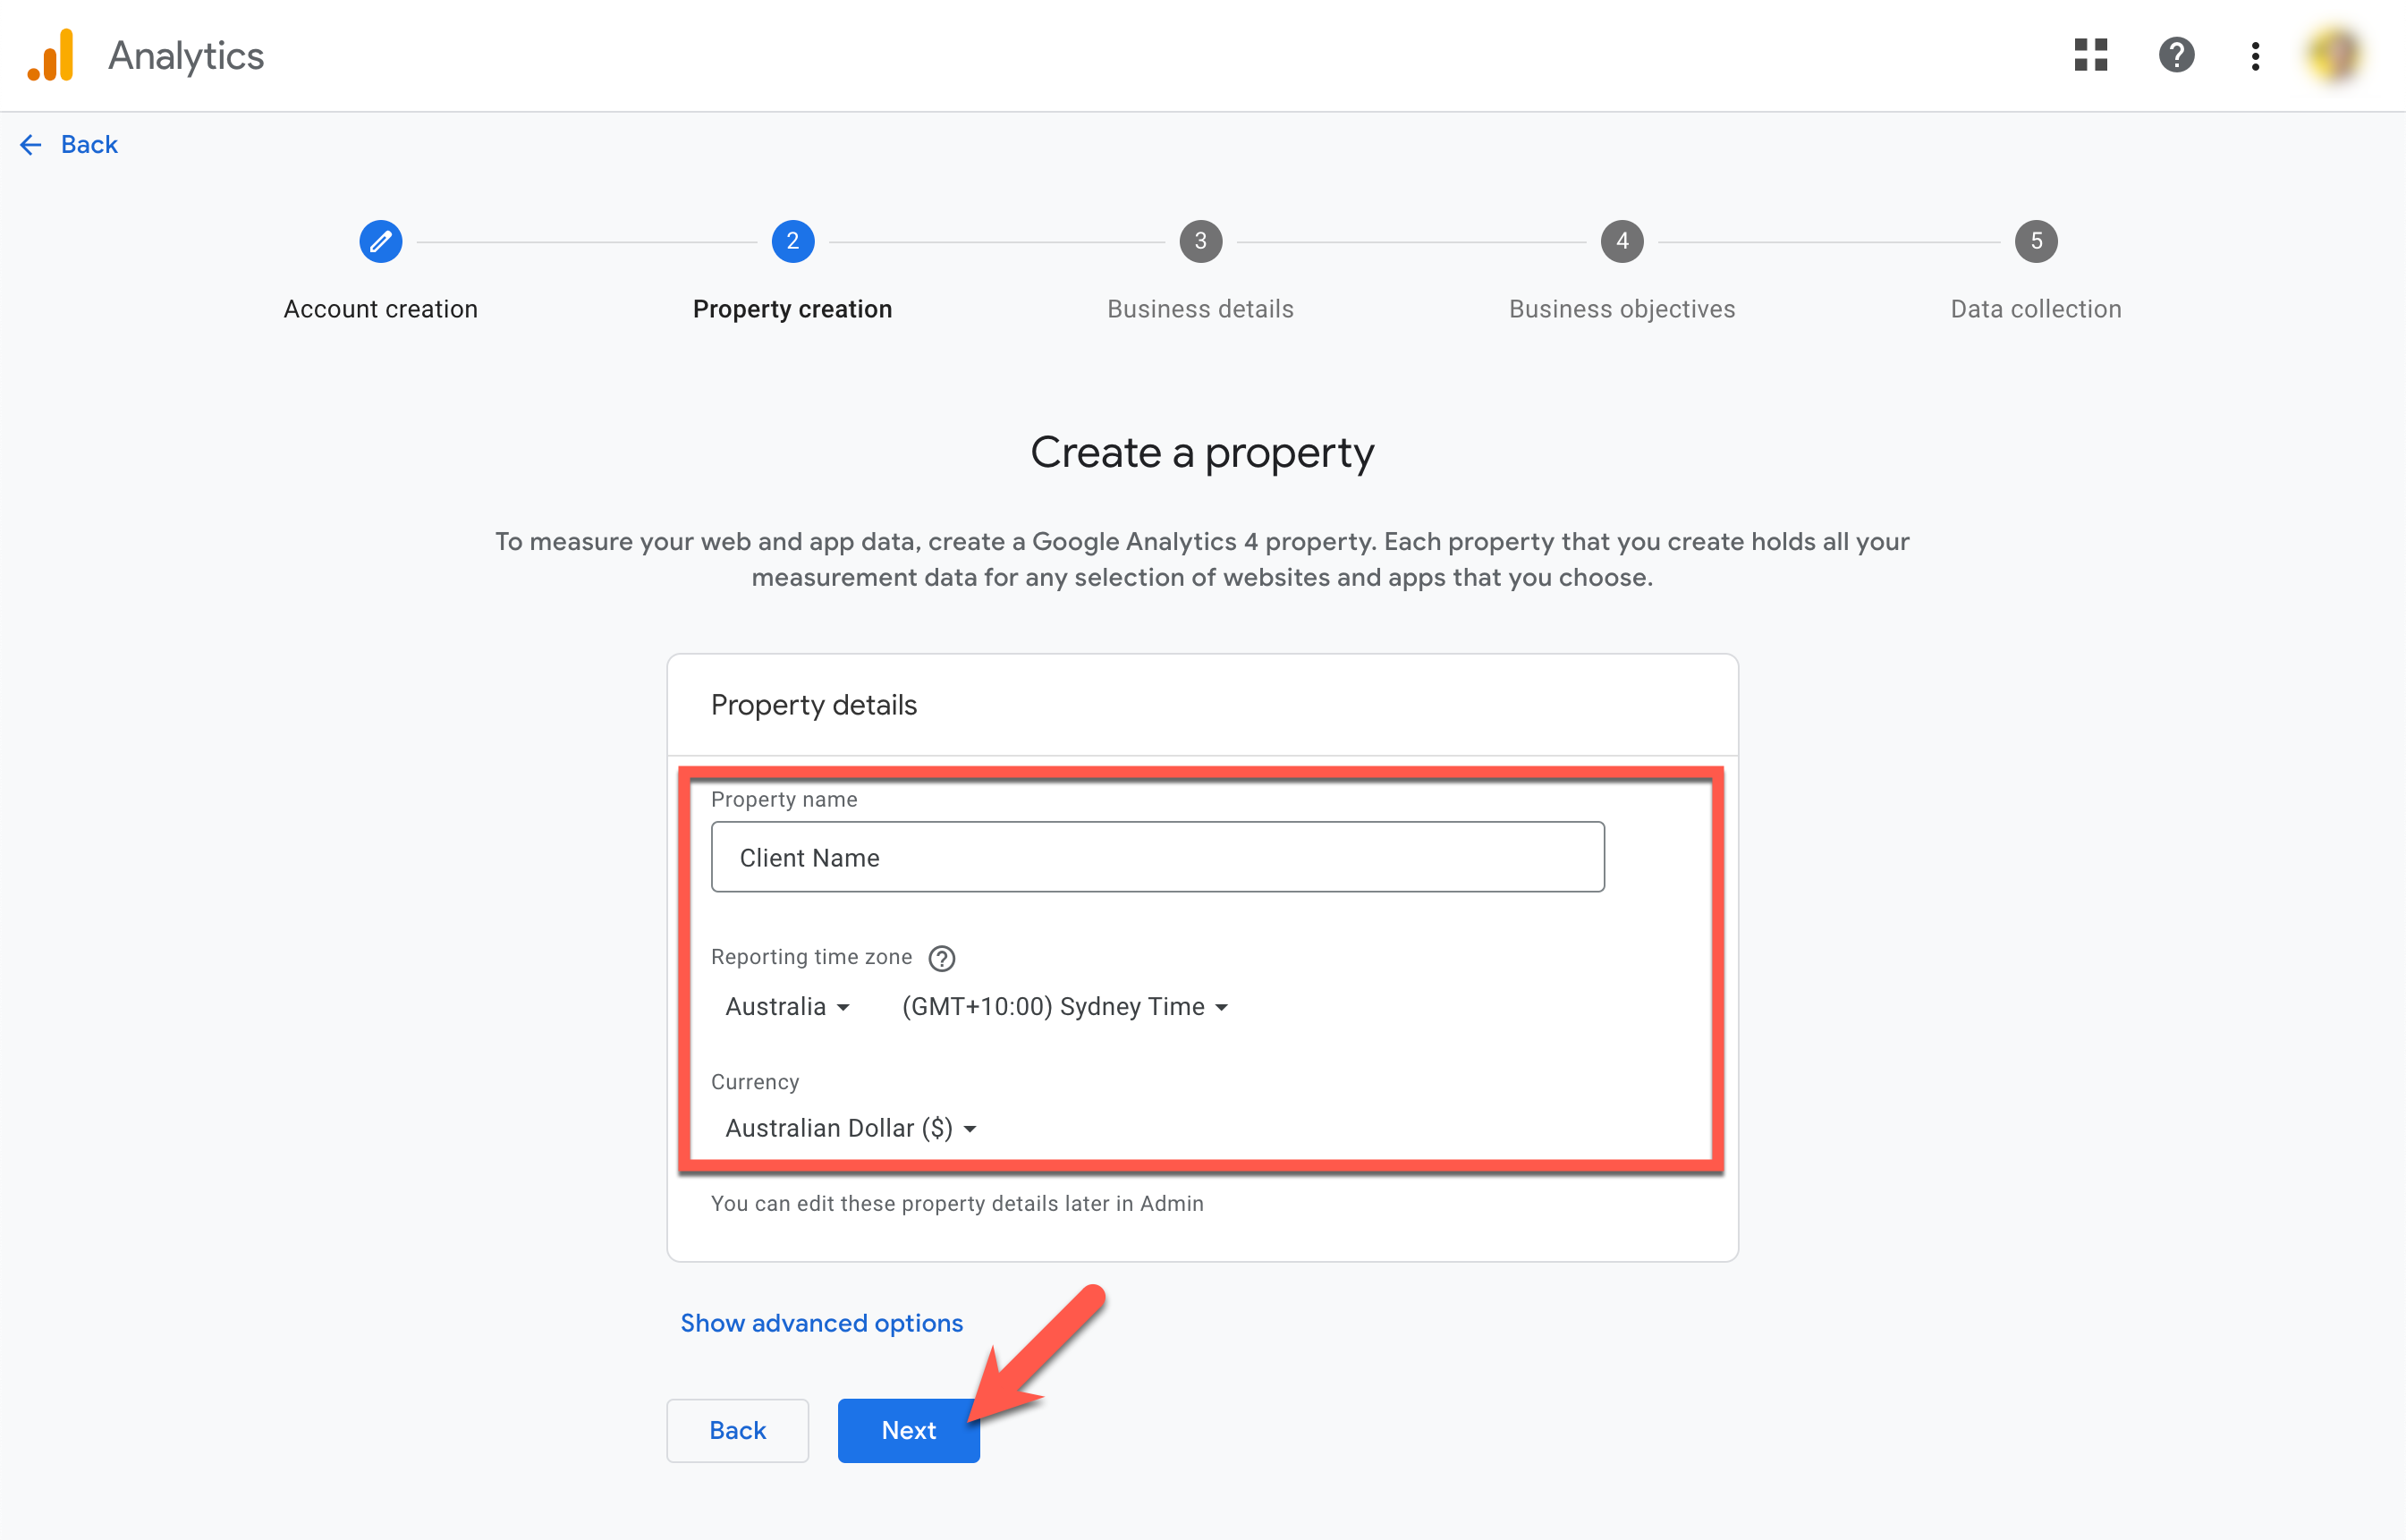
Give your property a name and set the relevant country settings.
Click "Next" and complete the details over the next few steps relevant to the client's site.
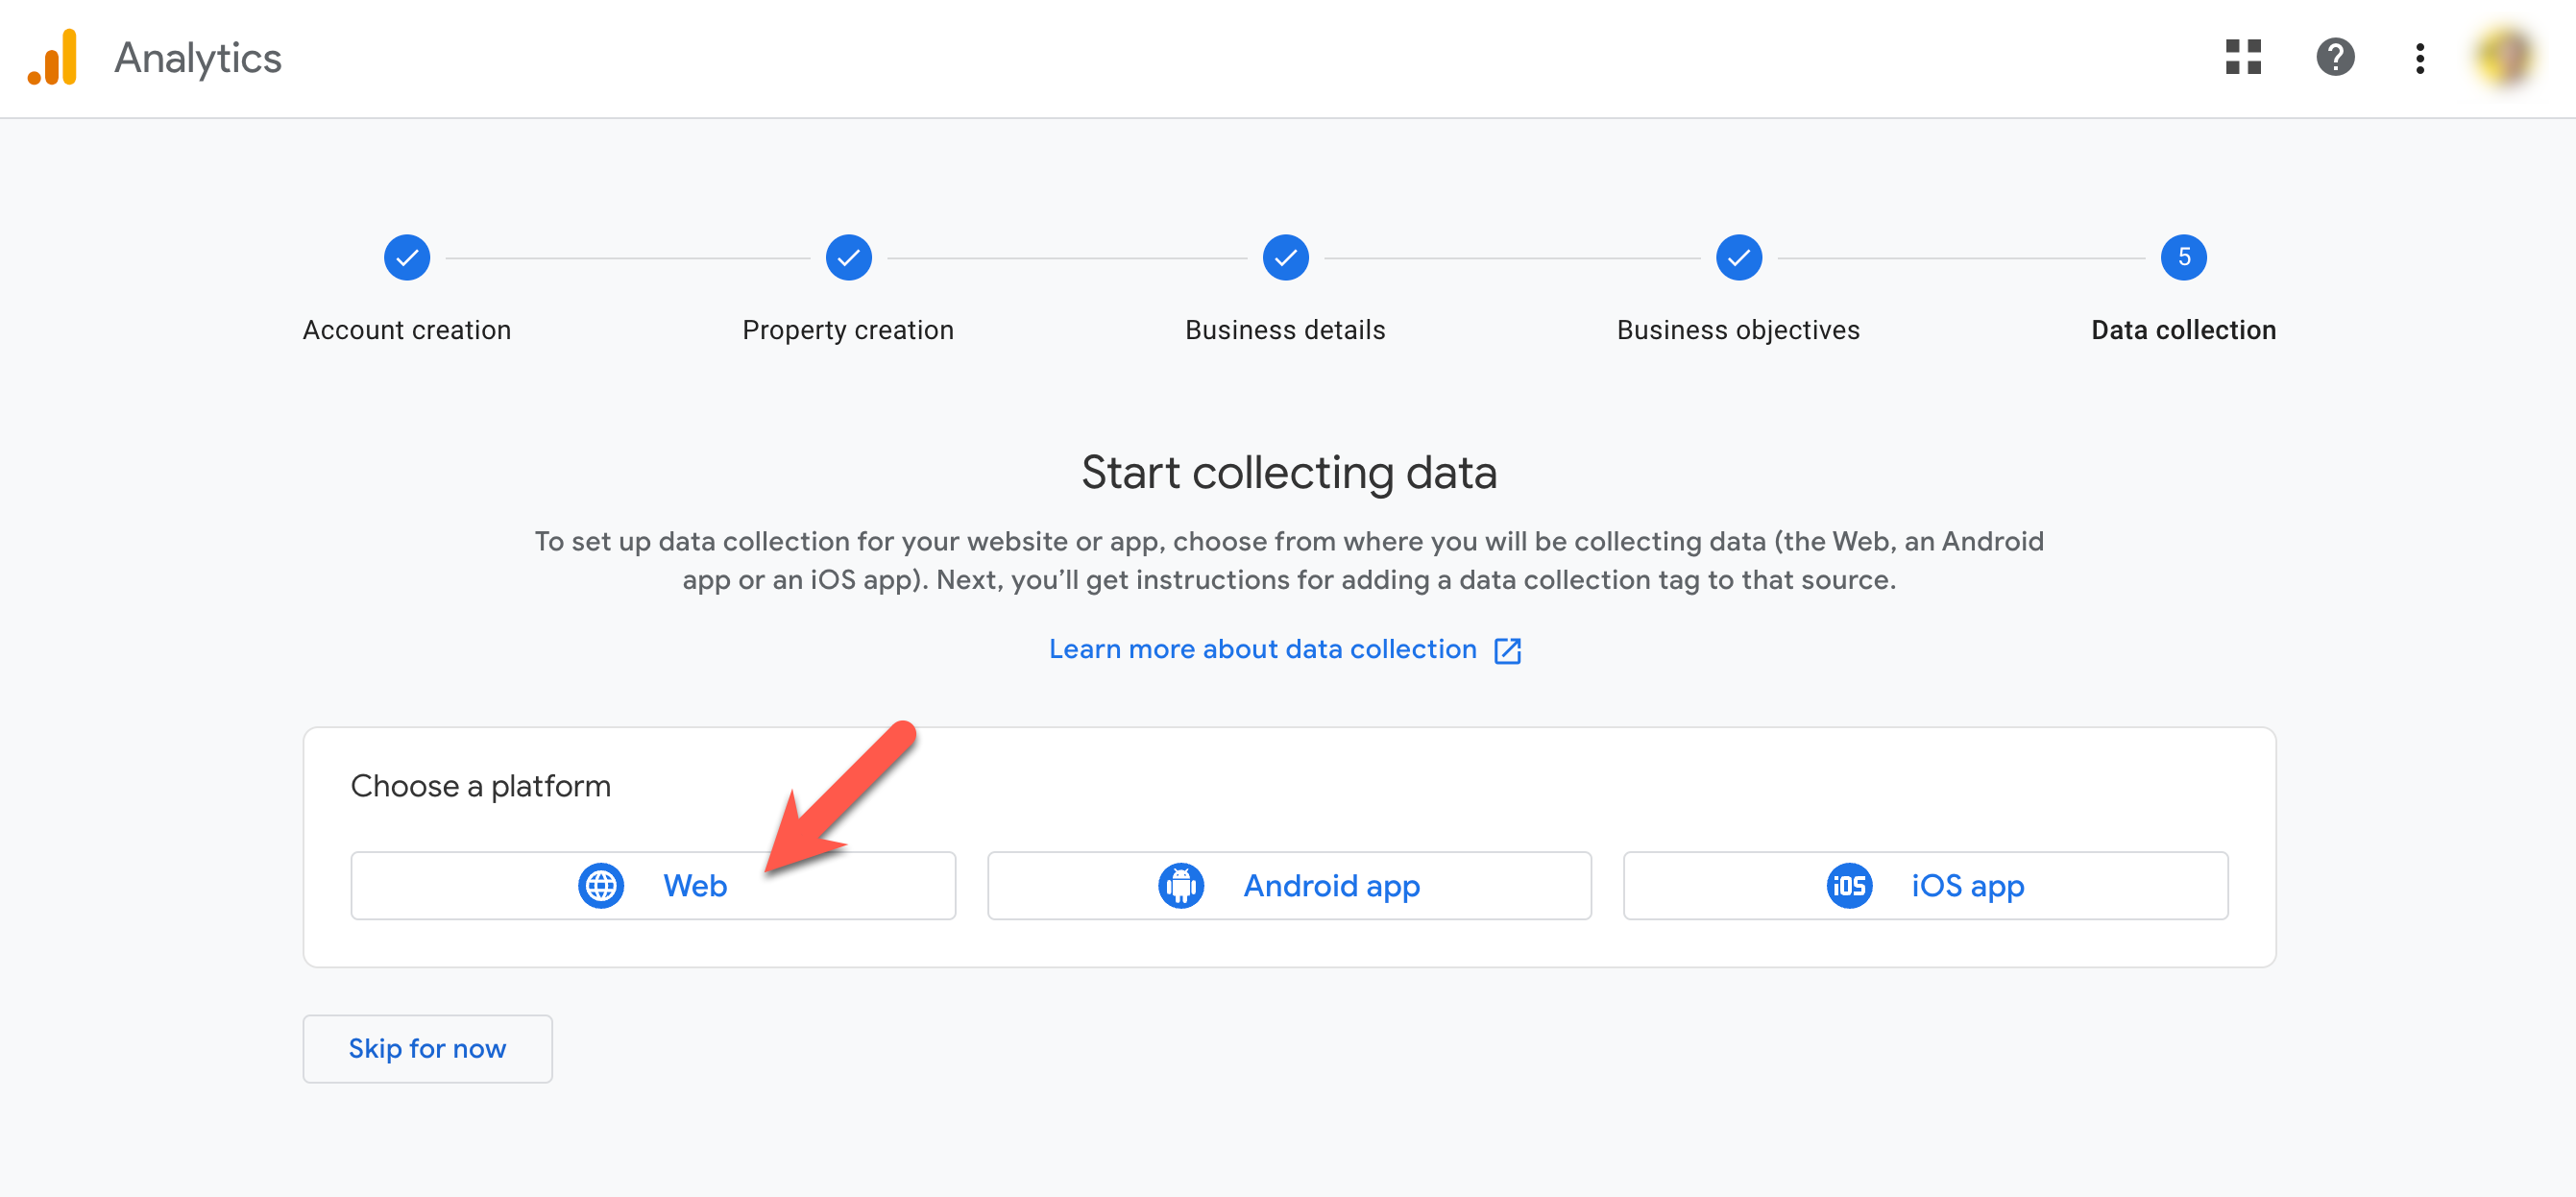
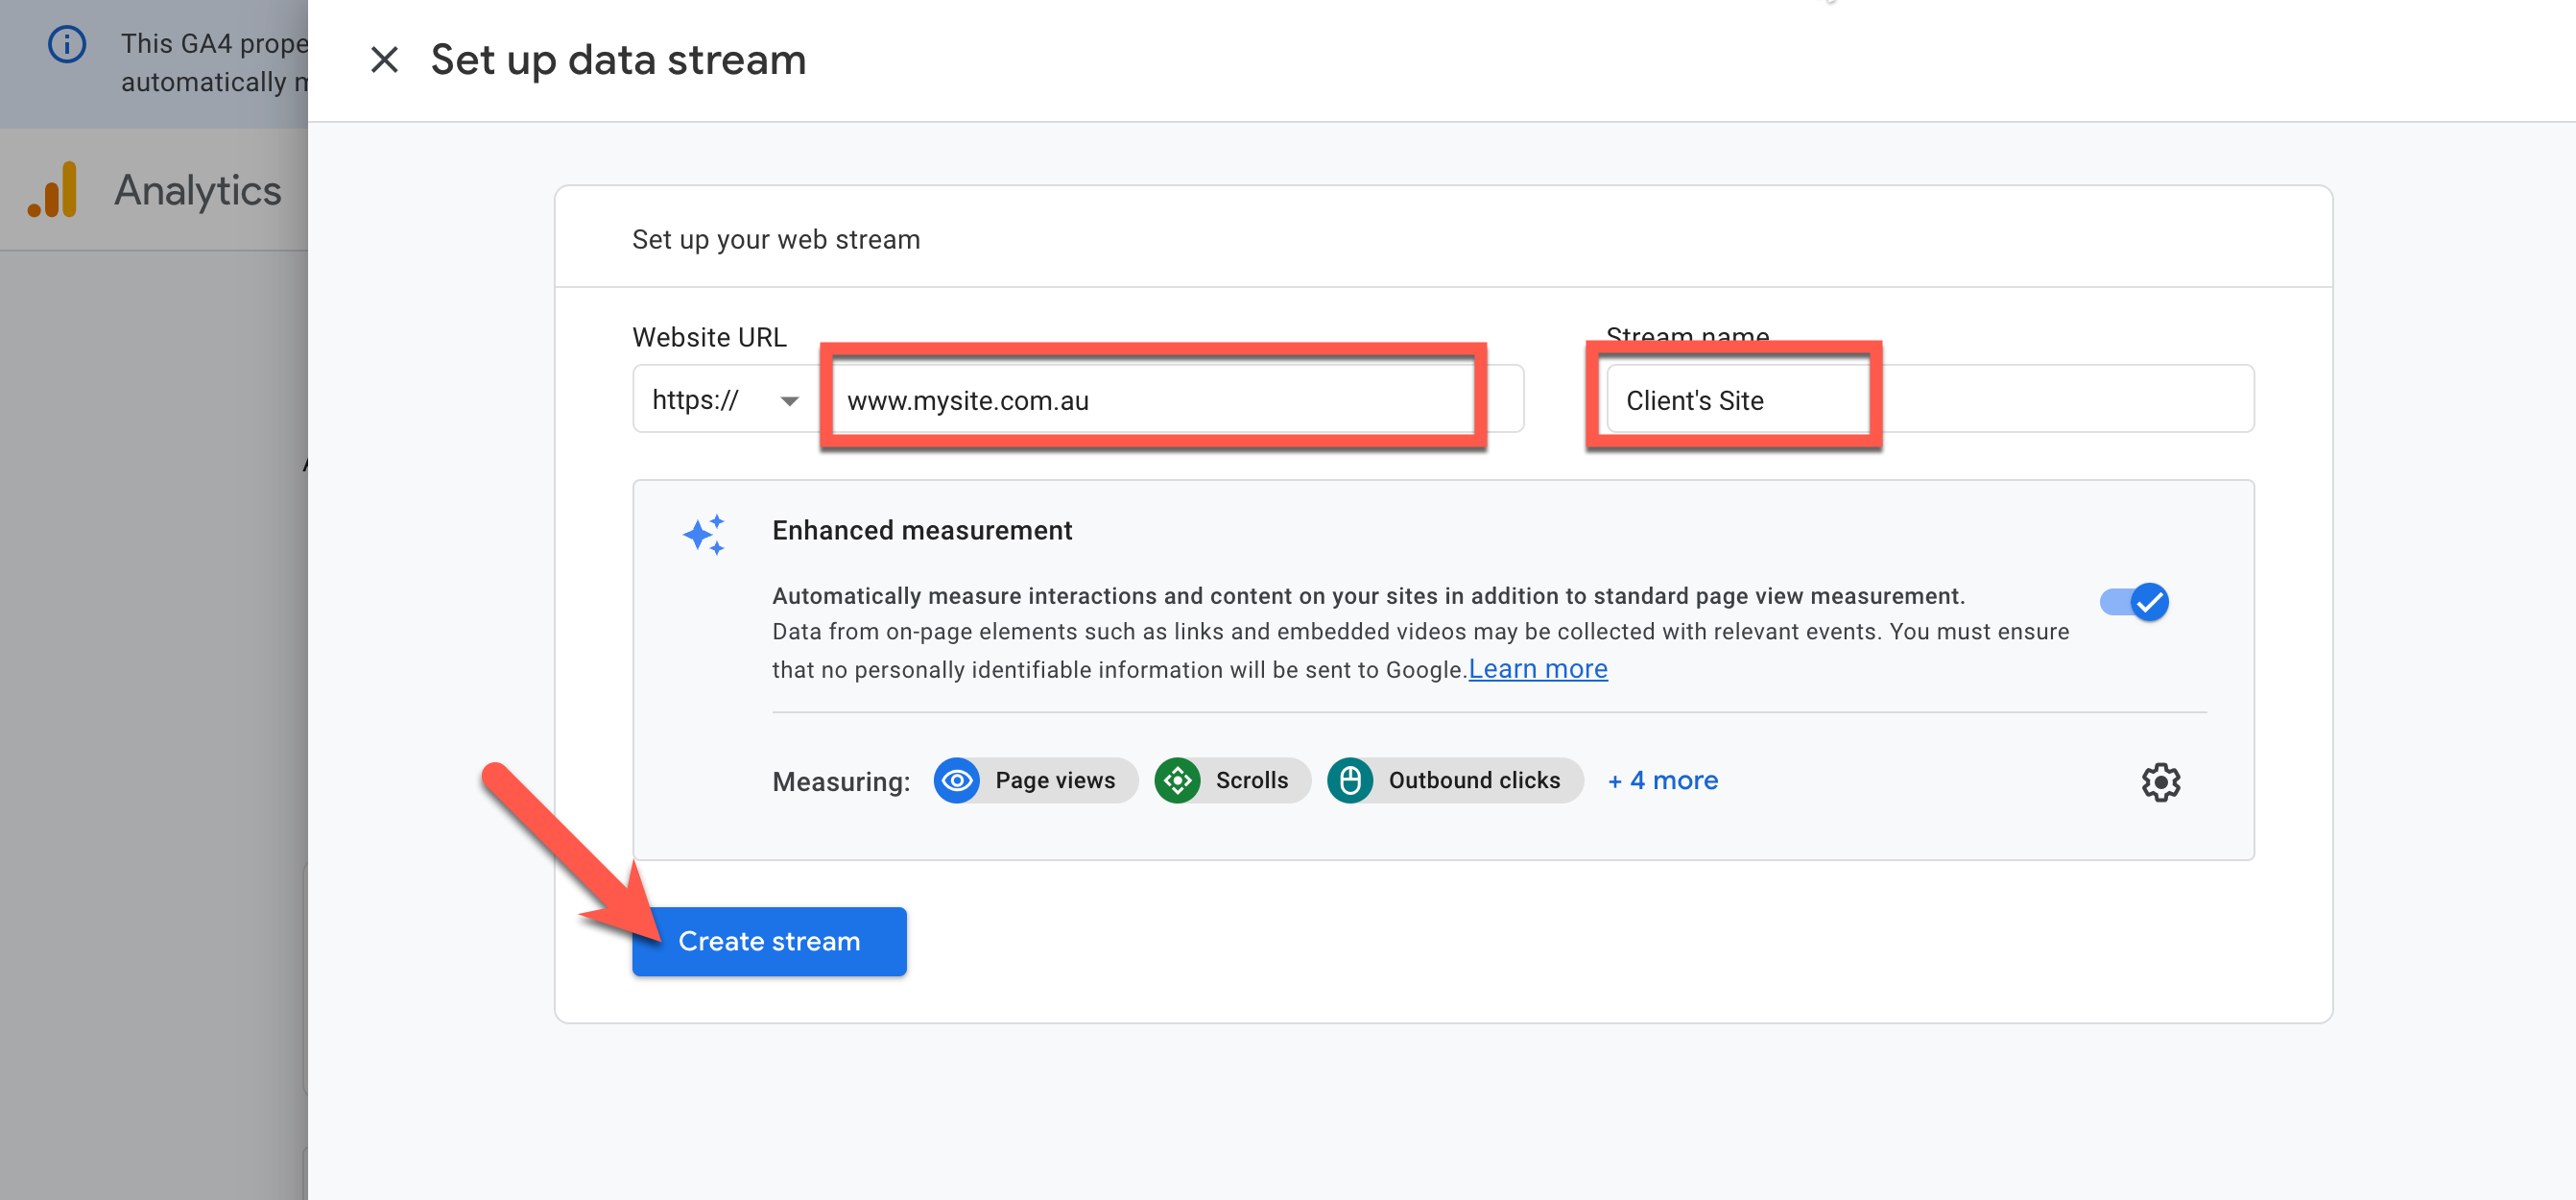
On the last step, 'Data collection', choose "Web" as the platform for collecting data from.
Provide your site's live URL and give the data stream a name and click "Create stream".
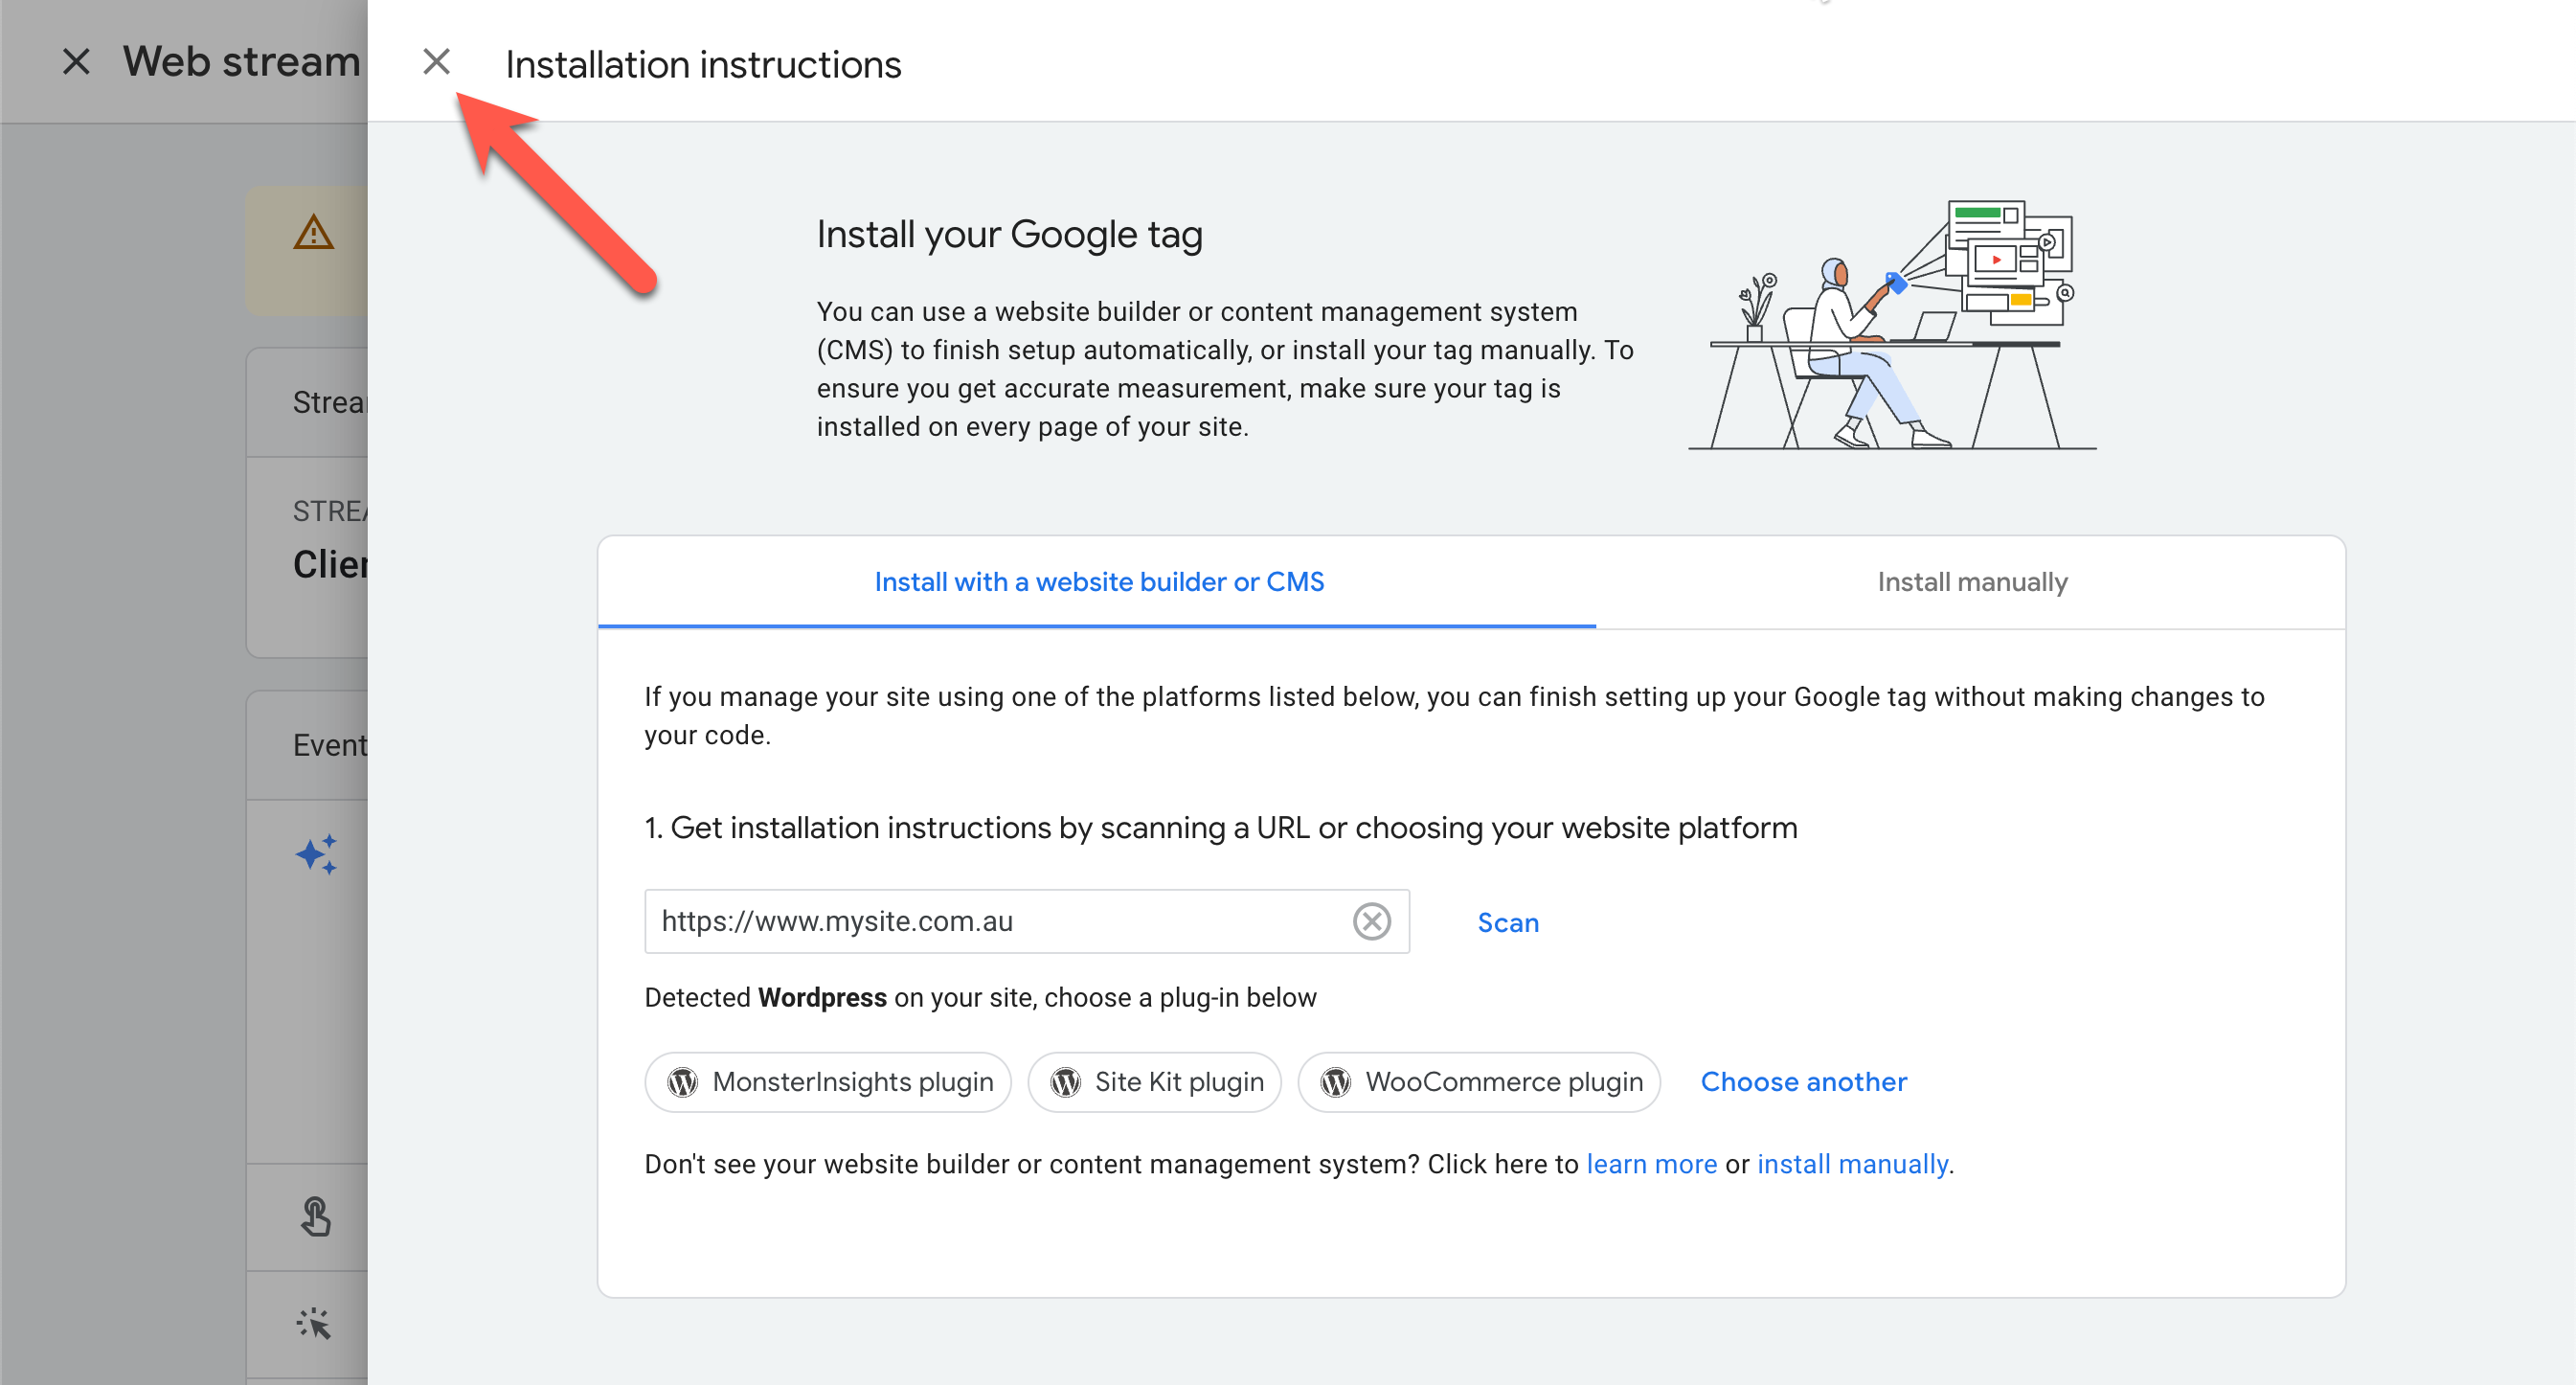
Close the "Installation instructions" panel if it opens (you won't be installing the tag with this method).
Copy the "Measurement ID" and paste it to a blank text document, or somewhere temporary. You'll need this shortly.
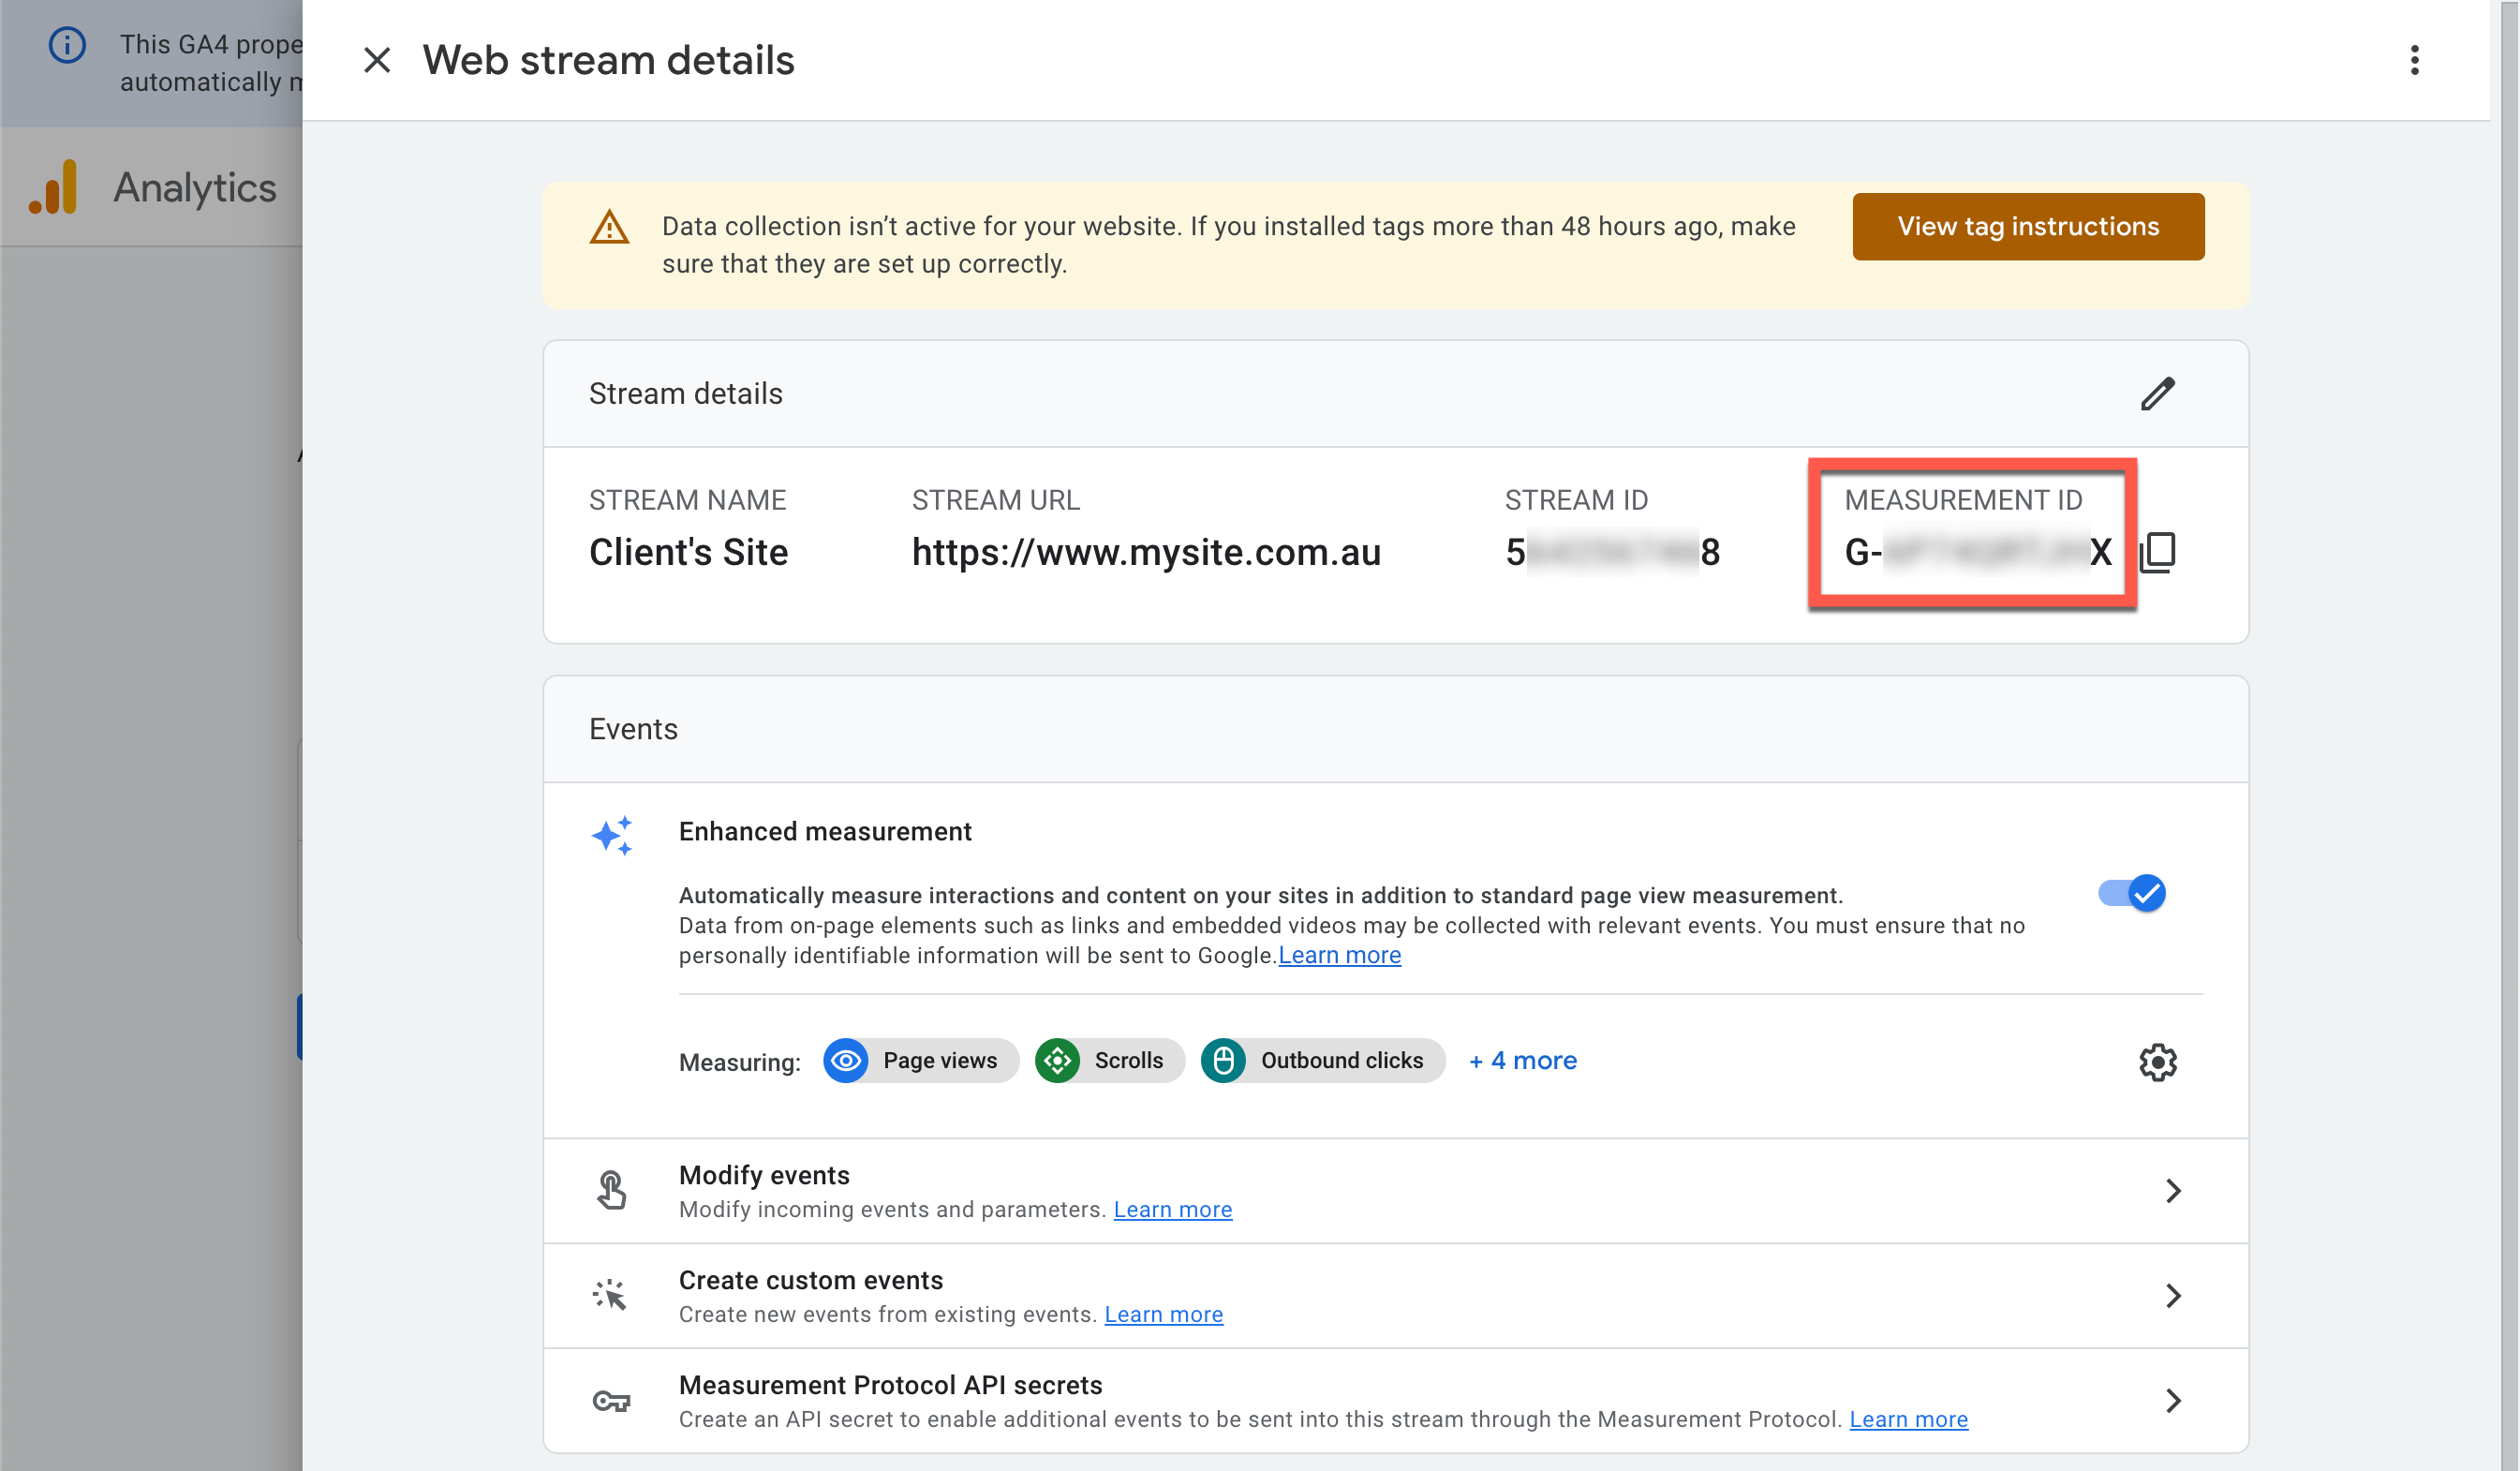
Close the "Web stream details" panel, click "Next" and complete the account setup process by clicking "Continue to Home".
Property Setup
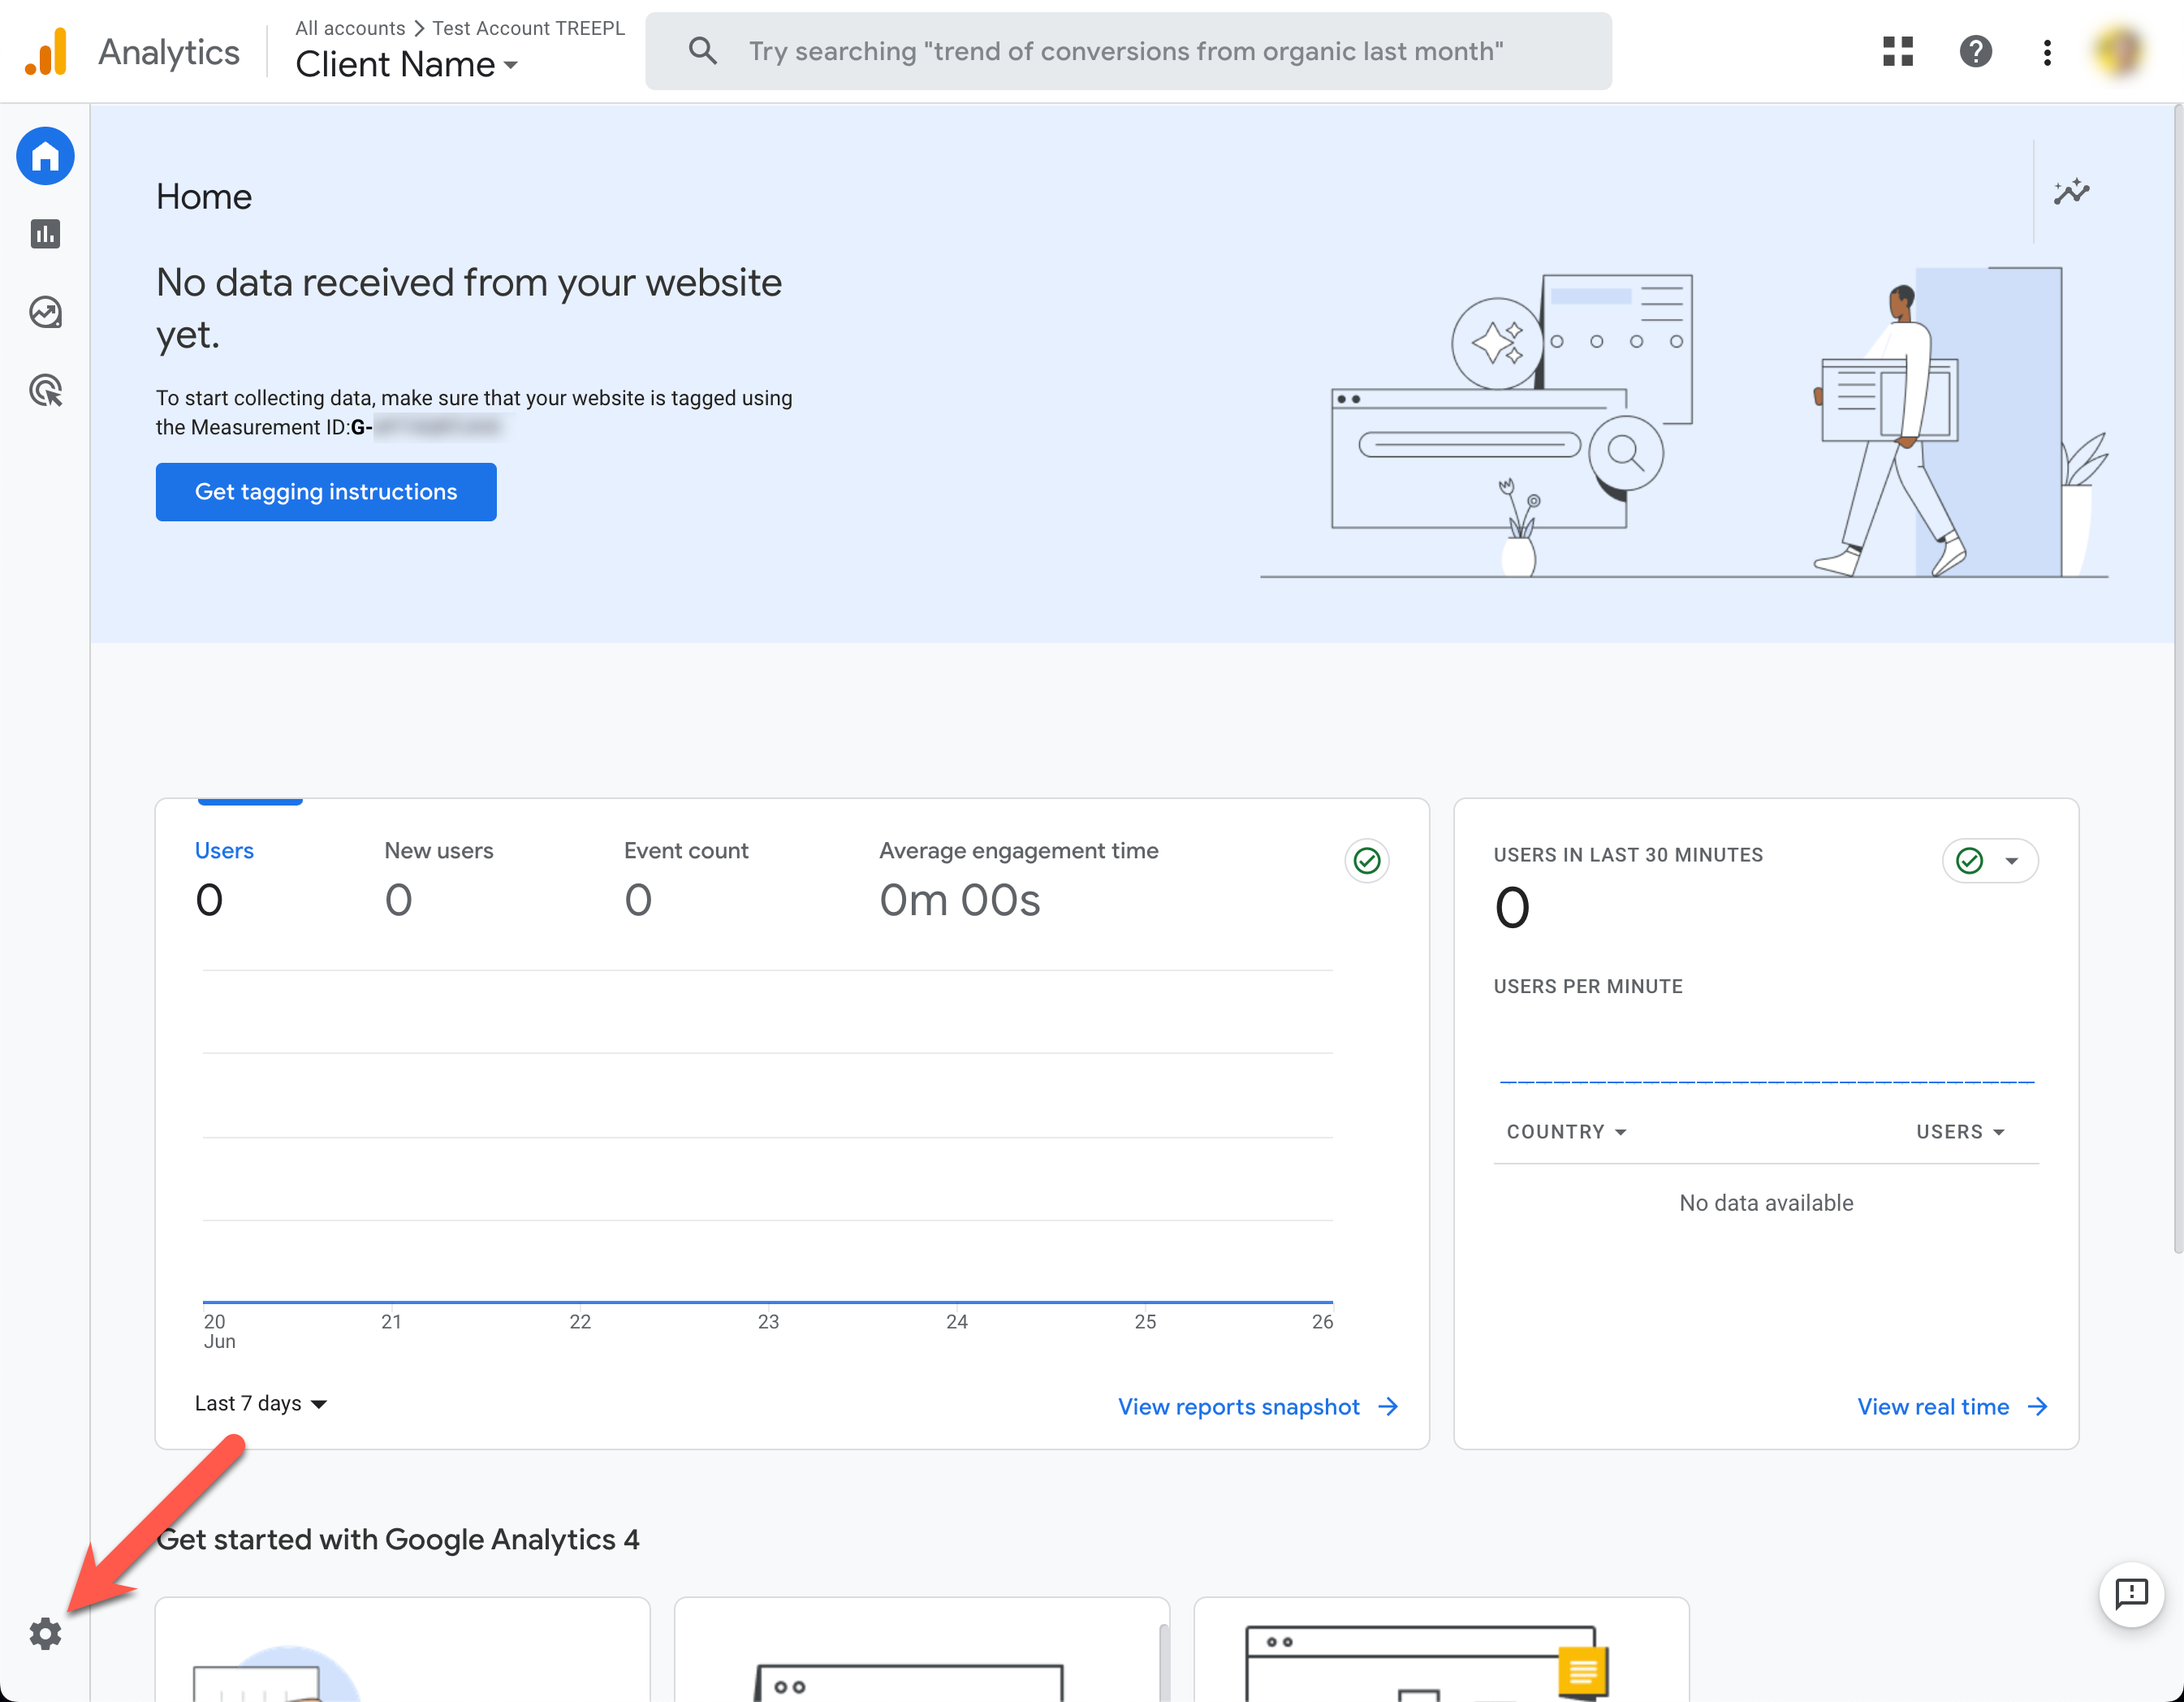
From the account Home screen, click the "Admin (gear icon)" in the bottom left corner.
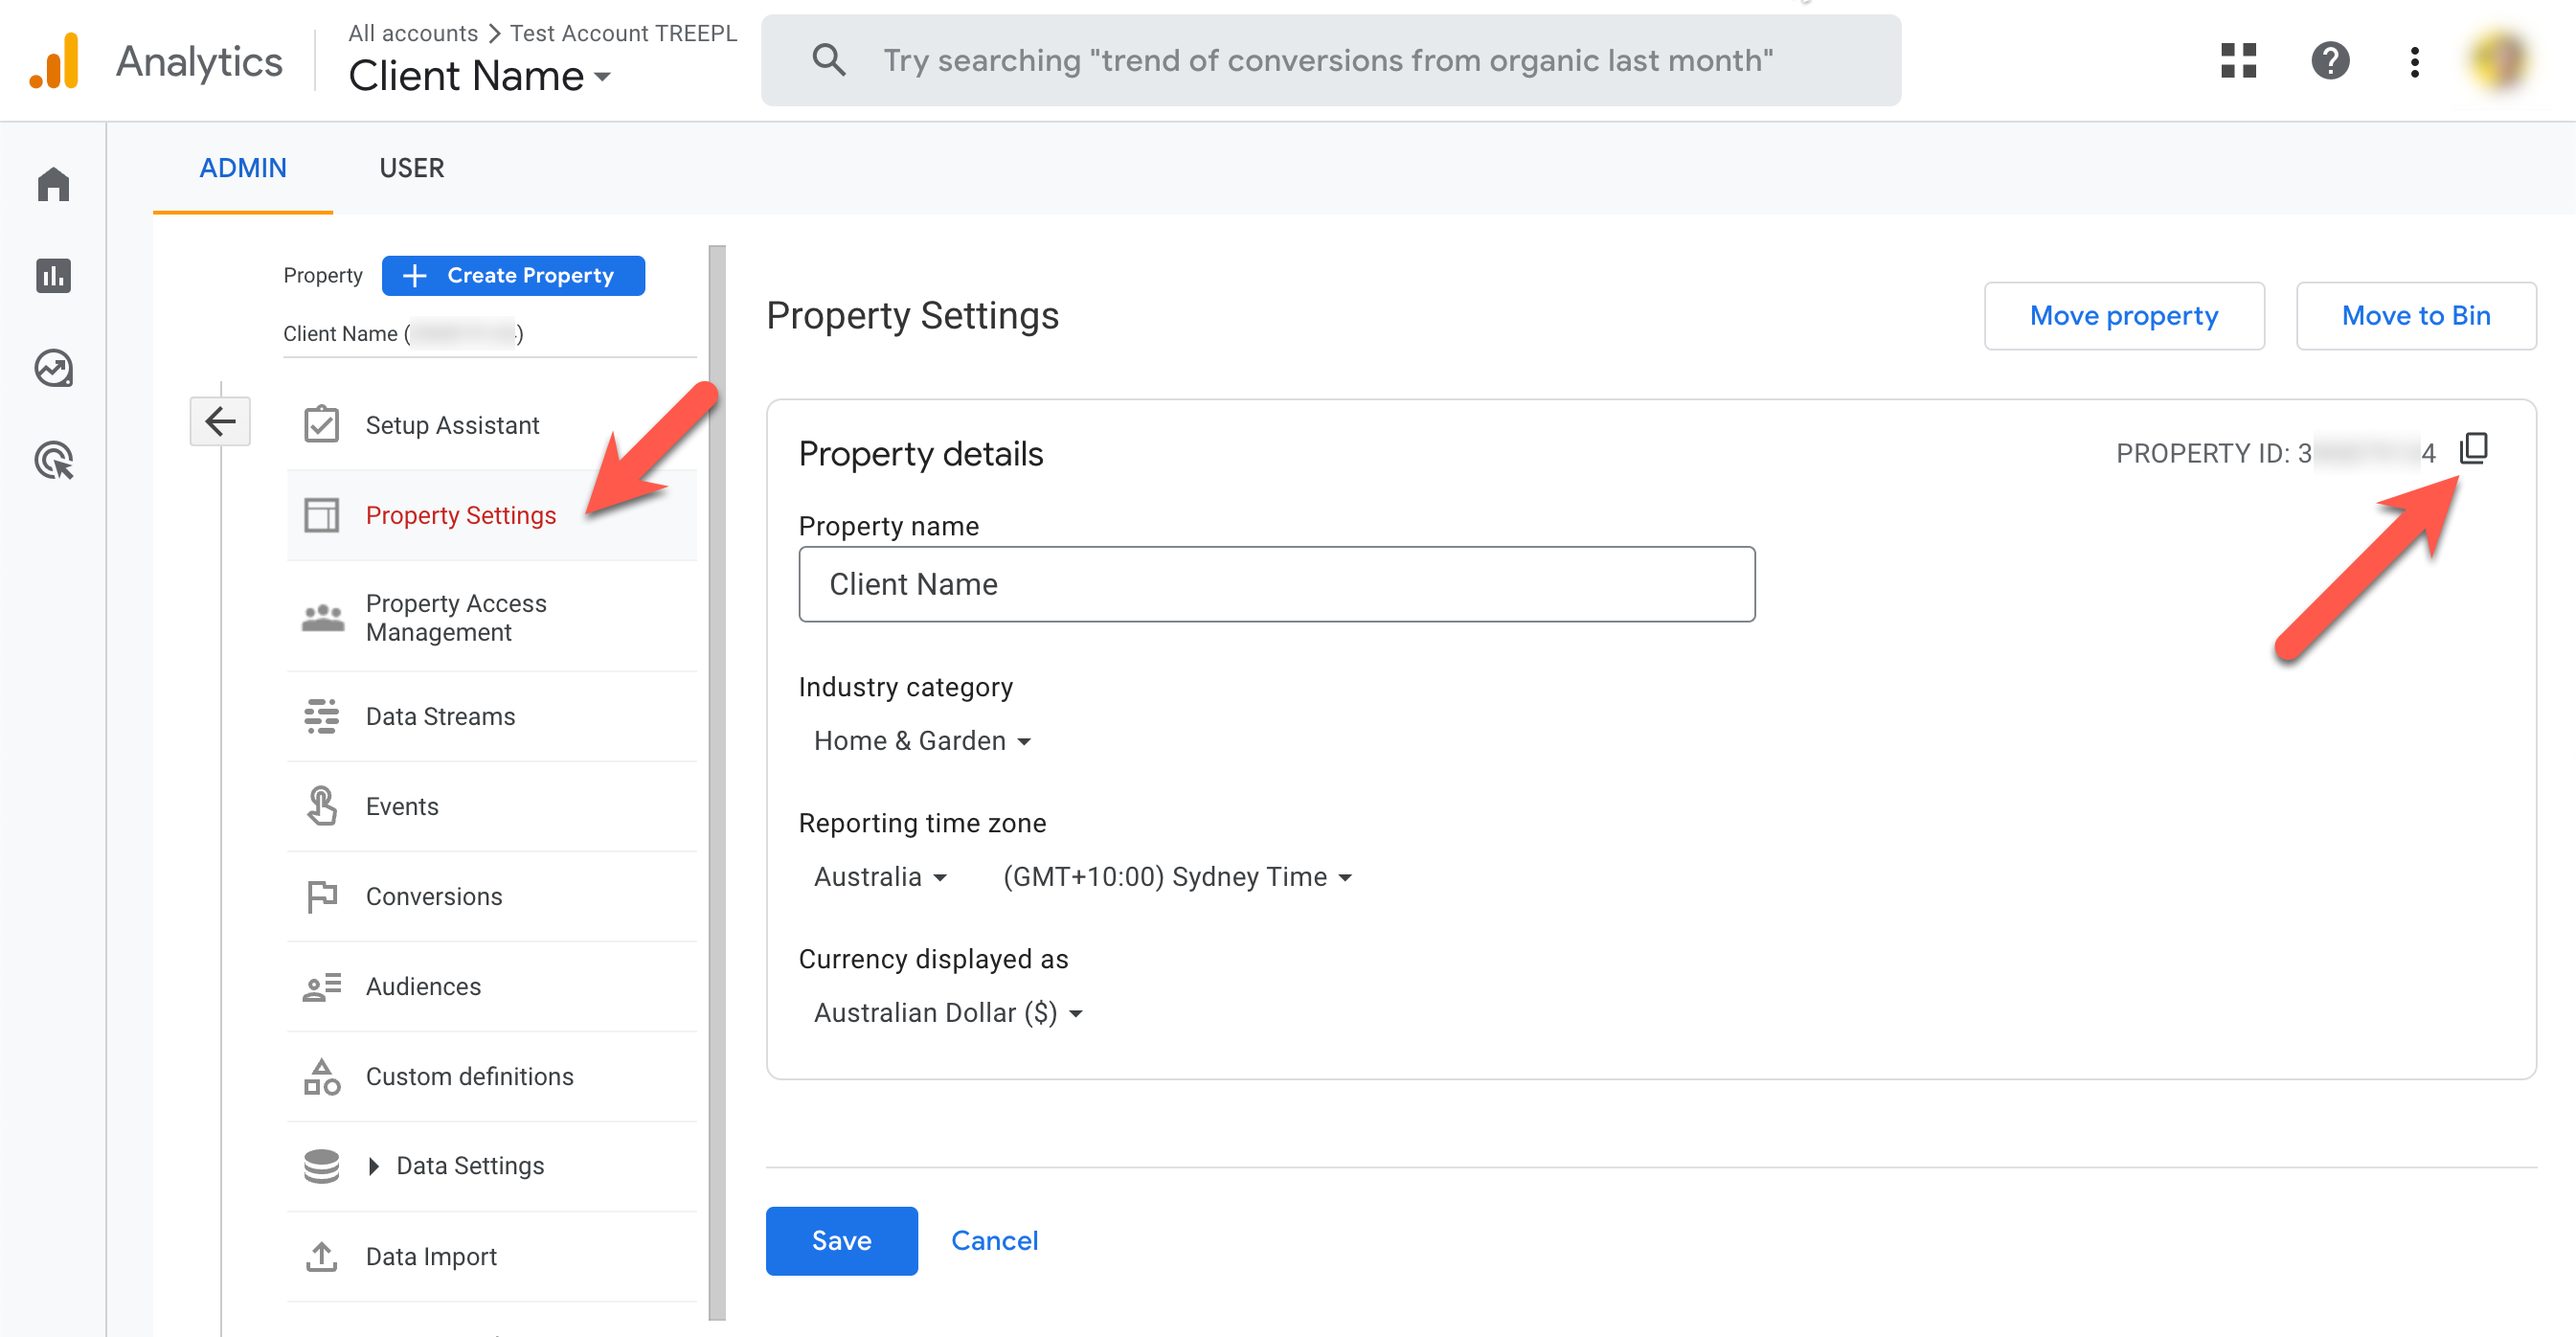
Click on "Property Settings" from the 'Property' column and copy the "PROPERTY ID" and paste it to a blank text document, or somewhere temporary. You'll need this shortly.
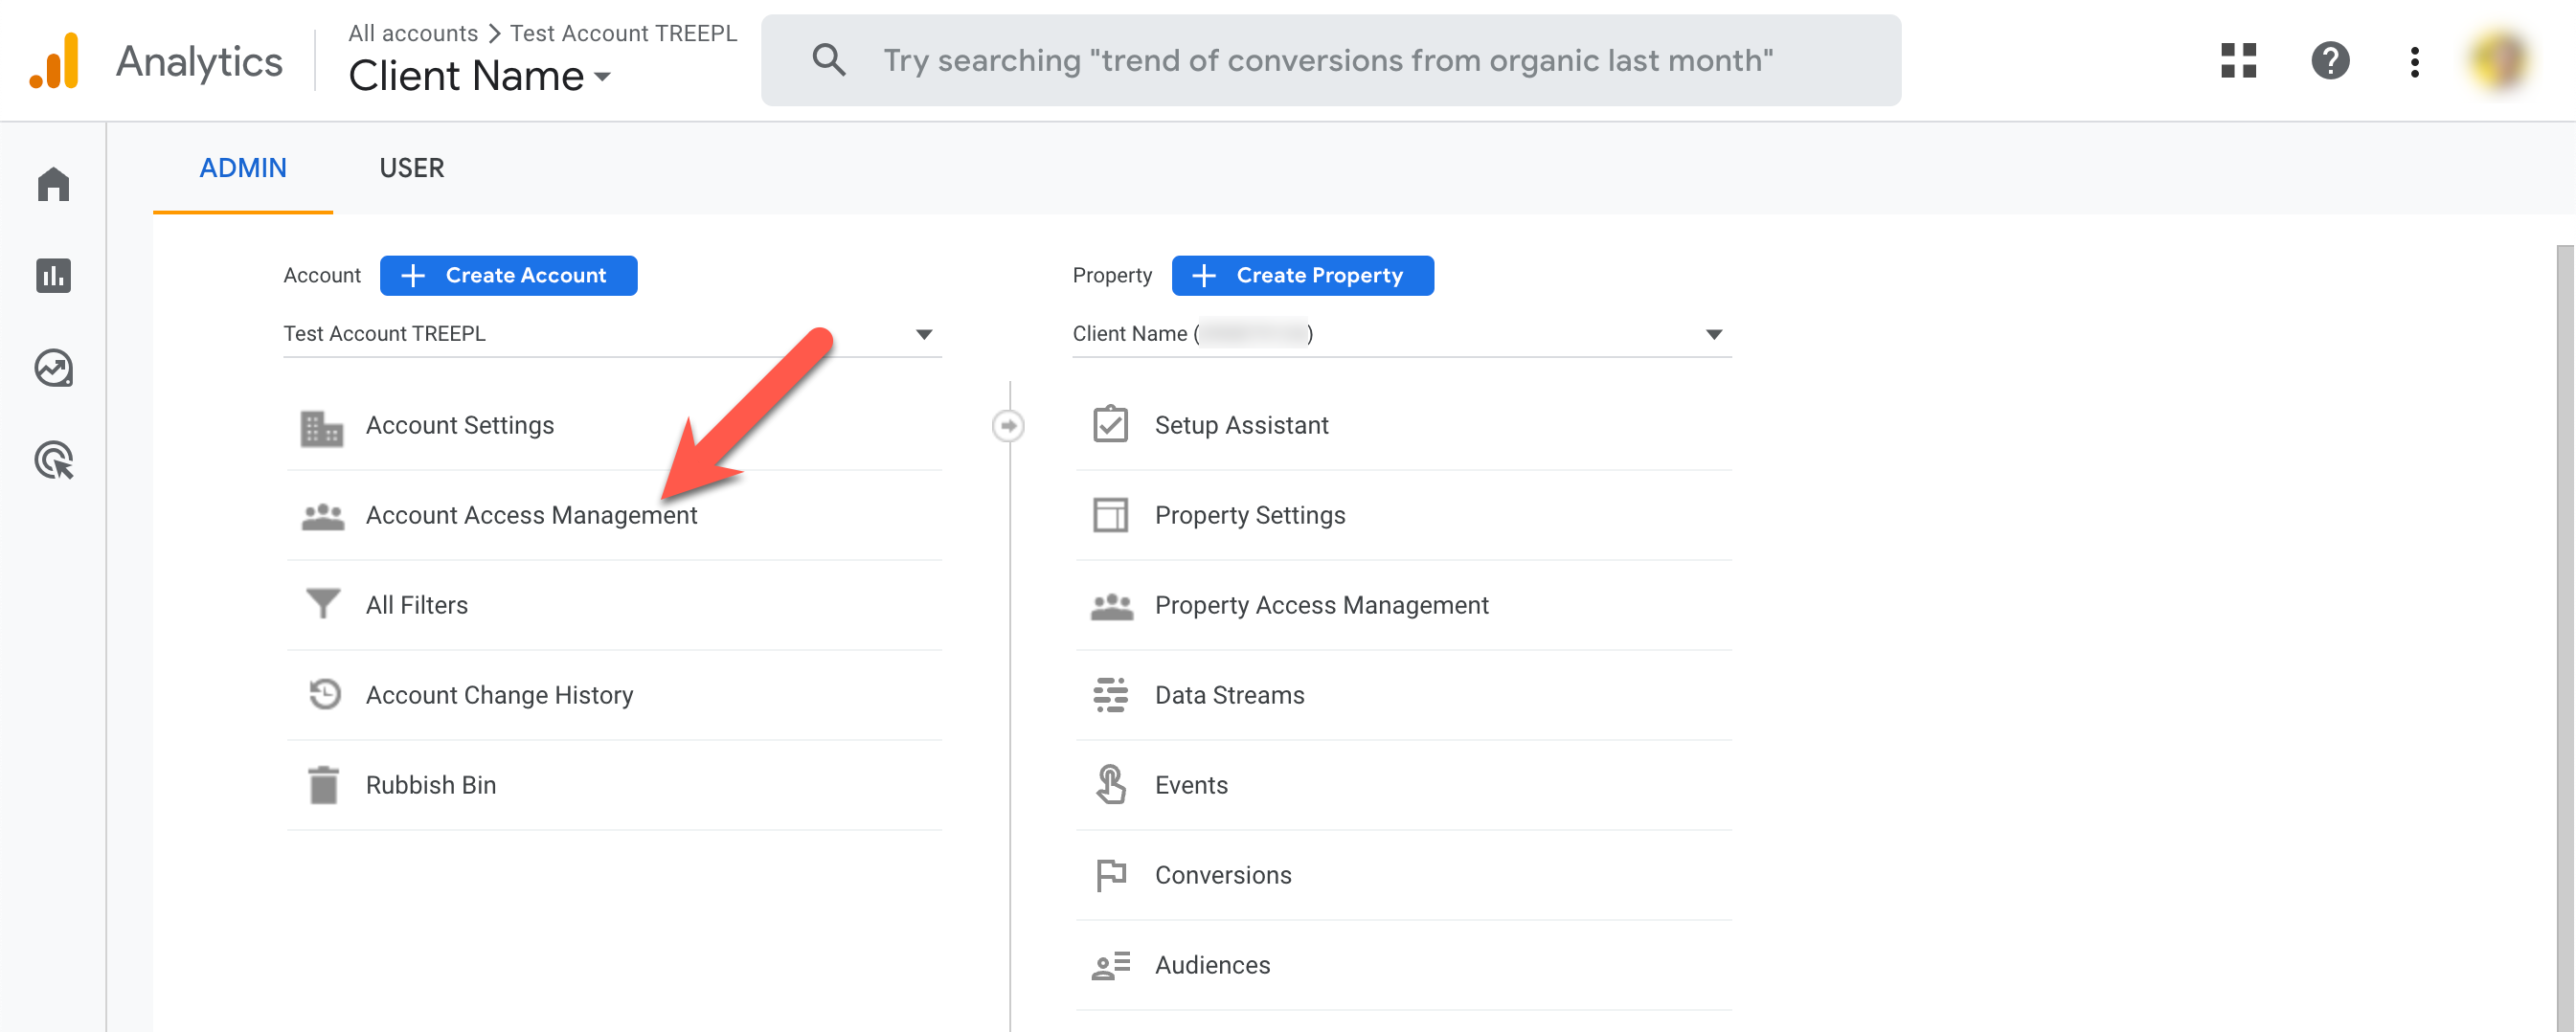
Click on "Account Access Management" from the 'Account' column.
If this is a new account setup, click the plus icon and "Add users" to add the API credentials to the account.
If it's an existing account with the API credentials previously added, simply give the existing API credentials the "Viewer" role from the Account level here, as per the next step.
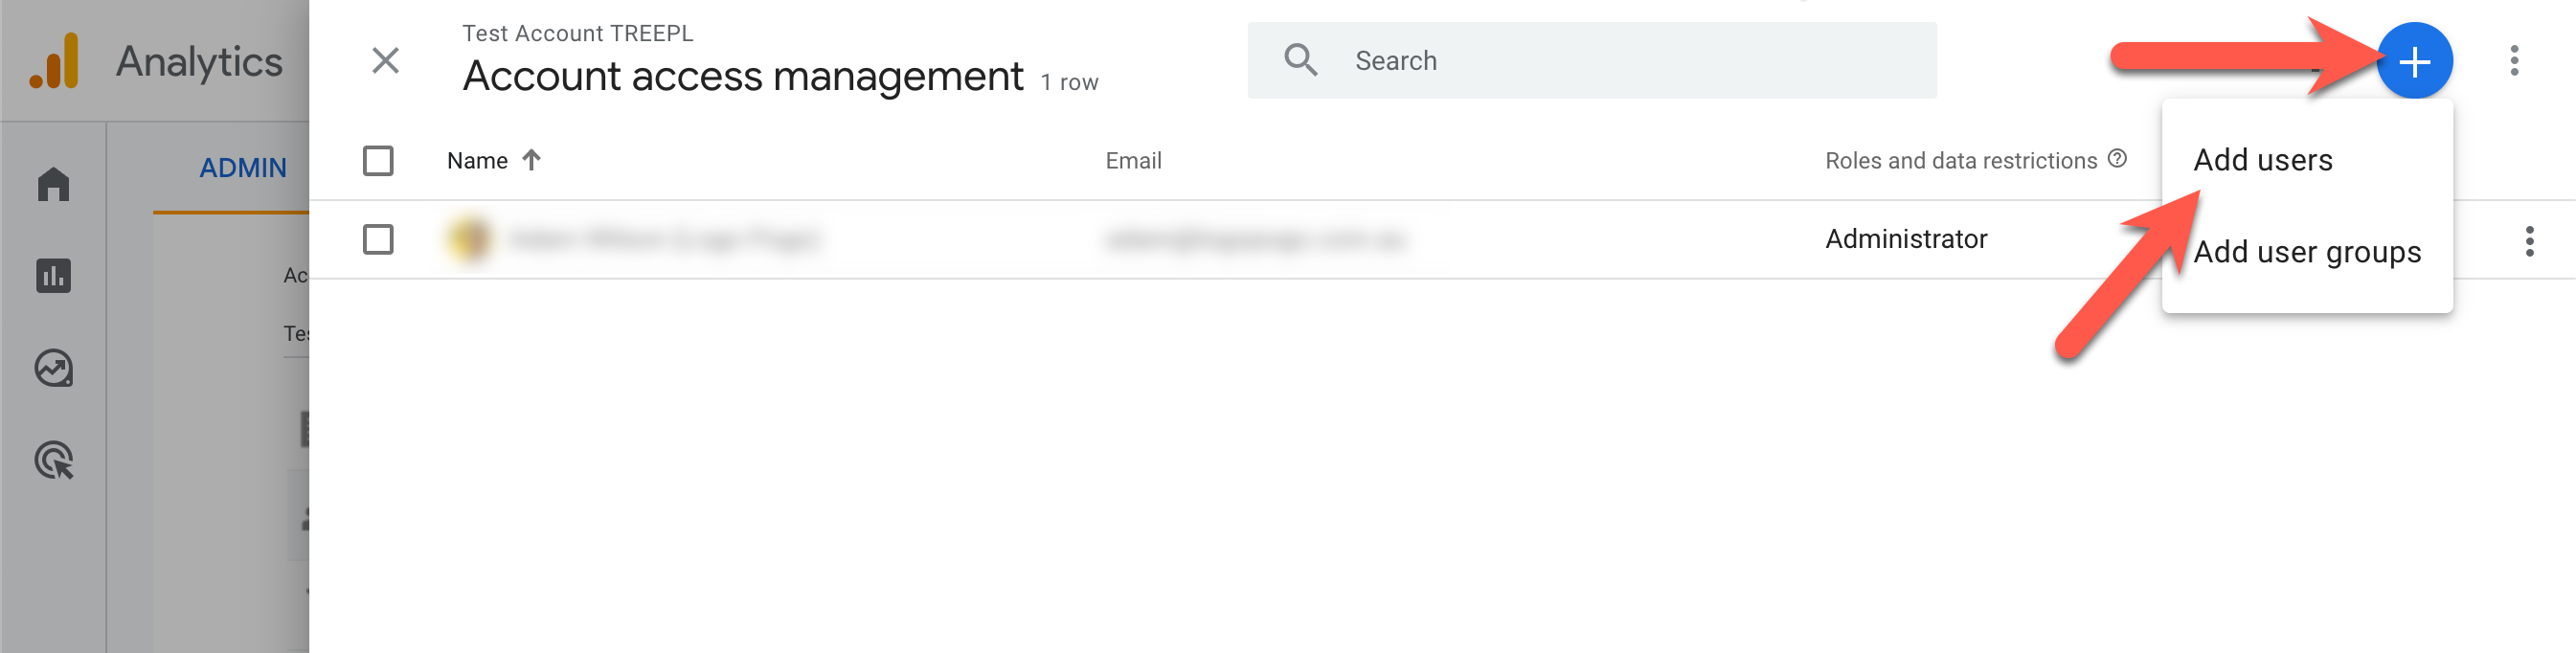
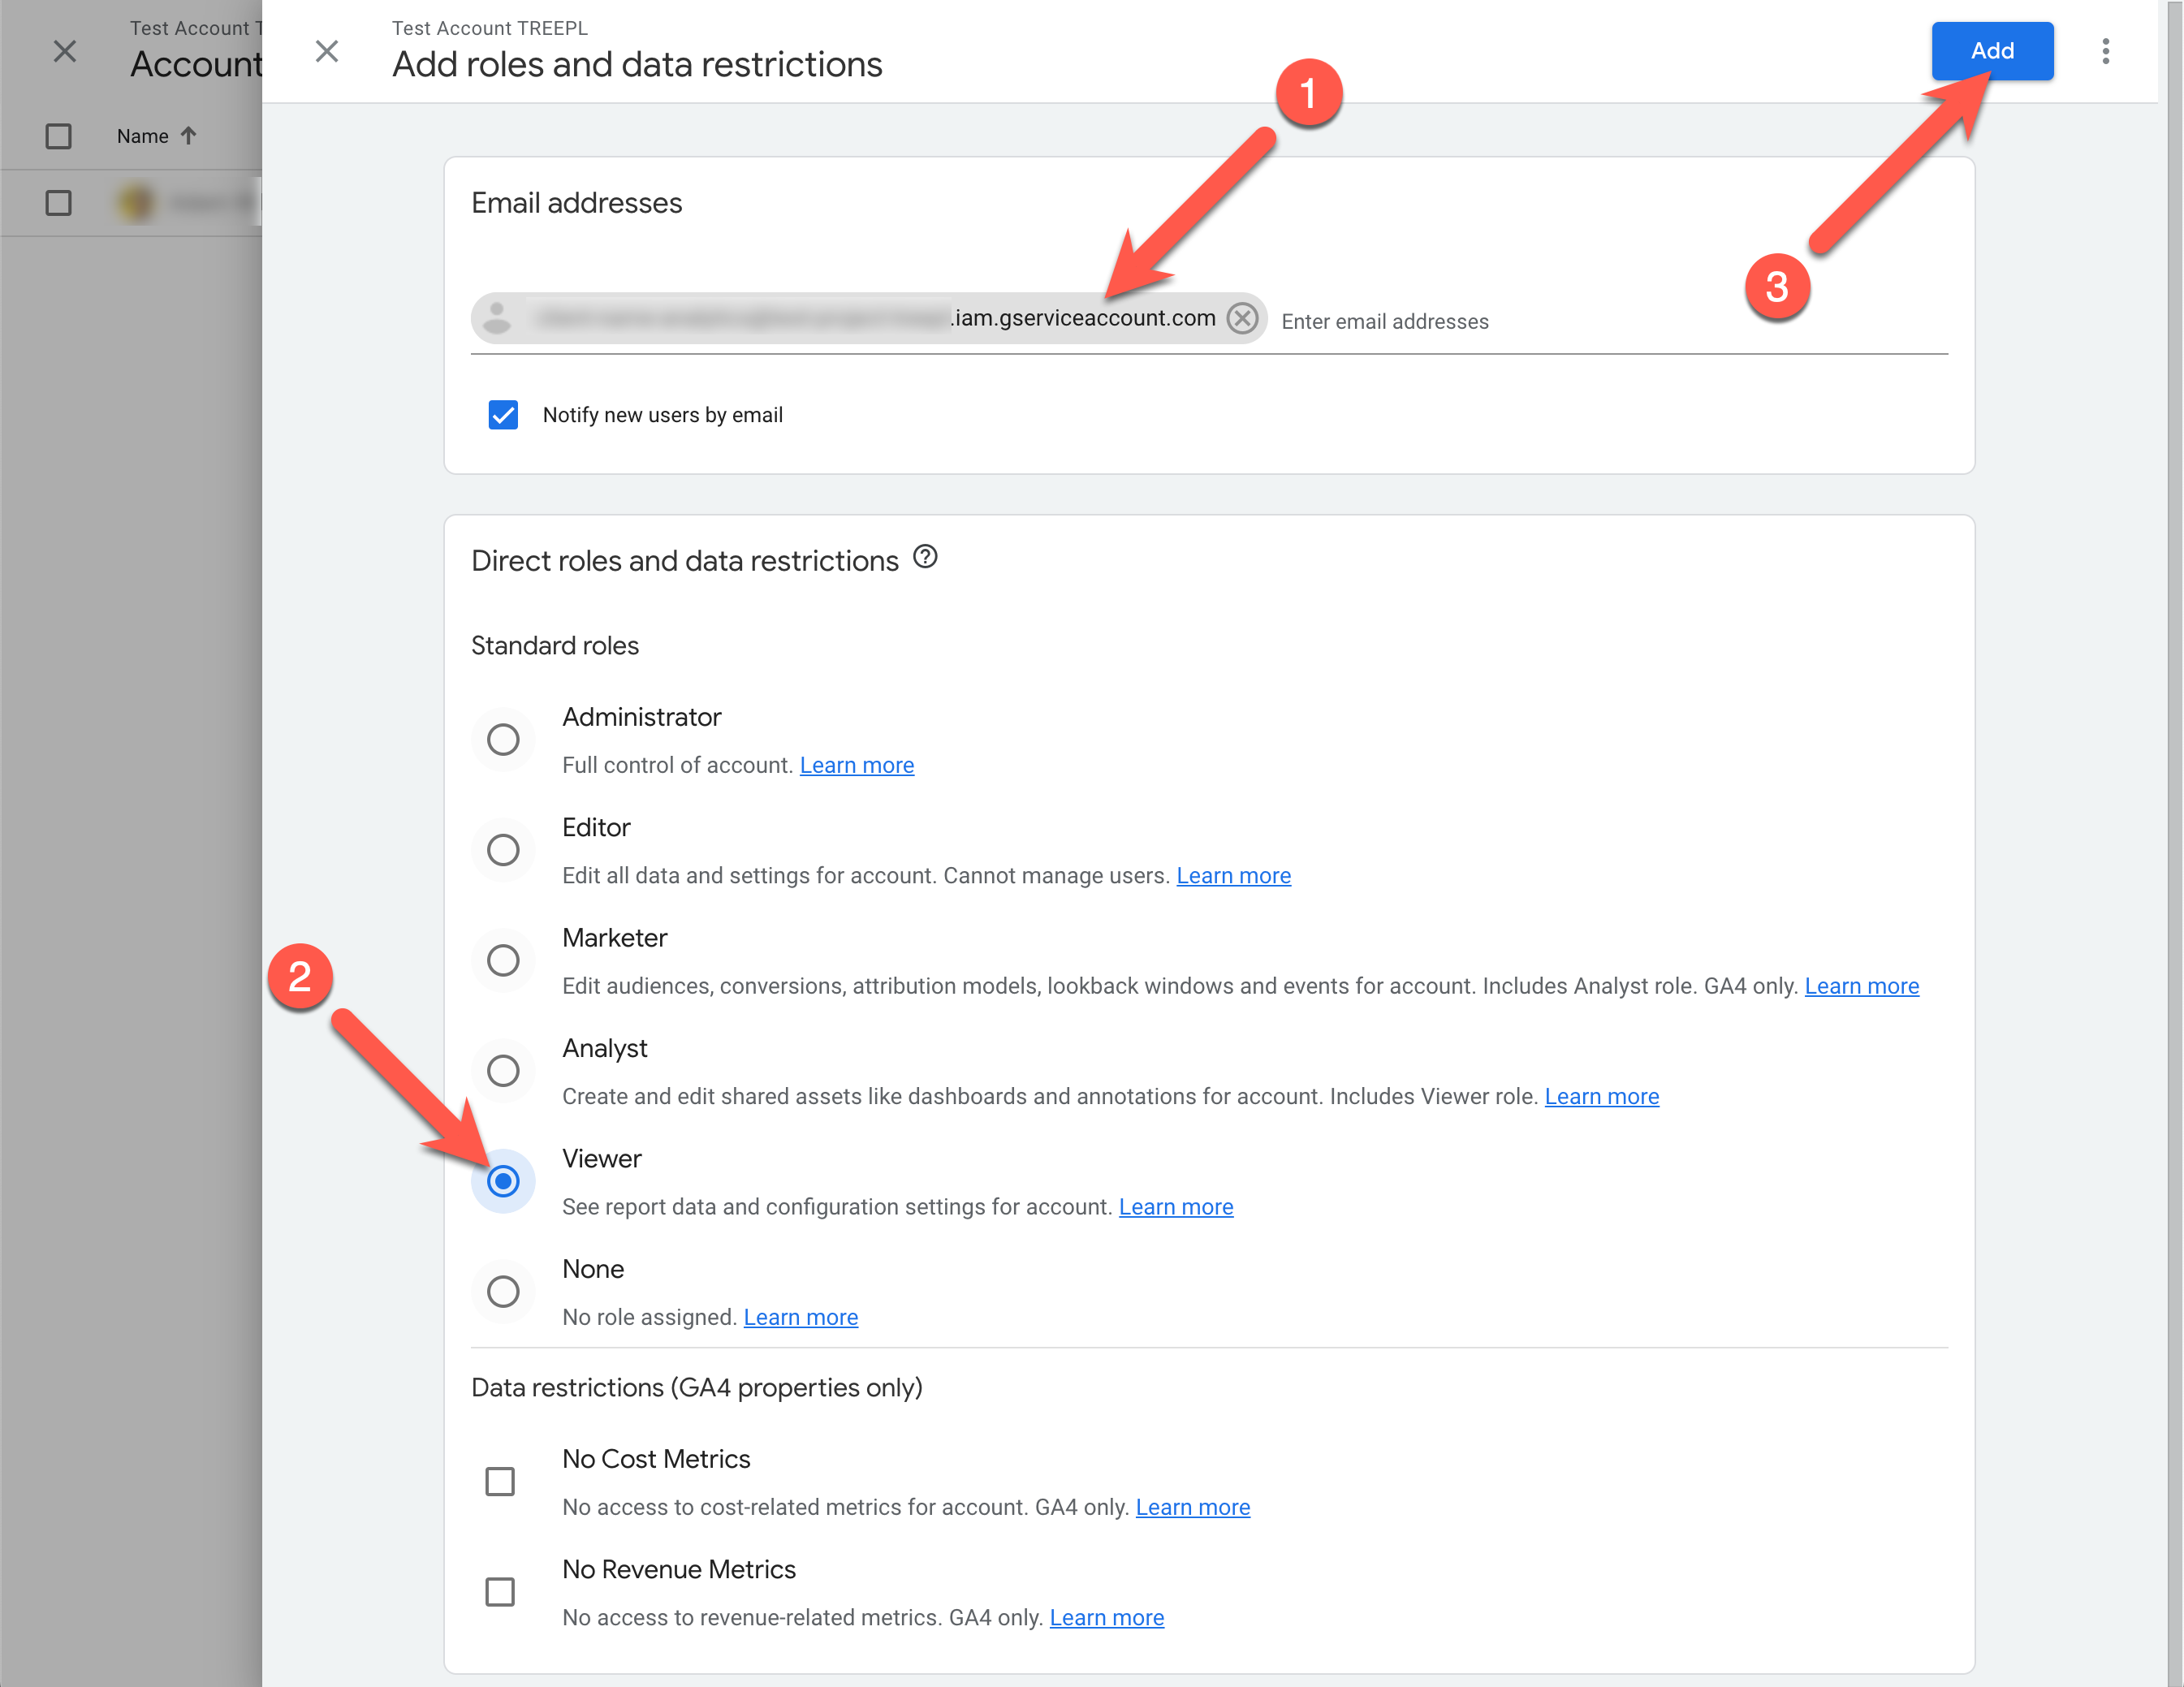
Paste the API credentials email address from the earlier API set up process, select the "Viewer" role and click "Add" to add the API user to the account.
You can now exit the Google Analytics account and proceed to the next stage of setting up the Analytics Dashboard in the site's Treepl CMS admin.
Set up Analytics in Treepl CMS
Go to your site's Treepl CMS admin > 'Settings' > 'Setup Analytics'.
Select the "GA4" option from the first dropdown and complete the remaining fields with the previously copied values:

Required only if wanting to display the analytics dashboard in the site admin.
Your Service Account file may not display in the upload field, or show after saving, however it will still upload and be applied.
If you make any changes to this page you must also upload the Service Account file again.
Troubleshooting Analytics Setup
Typically, the Analytics Dashboard in your Treepl CMS admin will not start display data straight away. It may take several hours for it to display and/or show any activity, showing some errors similar to "Data column(s) for axis #0 cannot be of type string". Allow 24hrs for the data to display.
If after this time you are still not seeing any activity reported, or are seeing other errors, try re-adding the Tracking and View IDs (ensuring no trailing spaces have copied over) and re-upload the Service key file. Then re-save the settings to apply the changes.
If you make any changes to this page you must also upload the Service Account file again.
Additionally, some browser extensions/plug-ins such as Ad Blockers or security tools may stop the dashboard from working correctly. Try disabling any ad-blockers or security related extensions in your browser to test for this scenario.
Google Tag Manager
When adding your Google Analytics Measurement ID to the Analytics setup, Treepl CMS will automatically add the Google tracking script to the included Google Tag Manager script output to your site.
You do not need to manually add the tracking code yourself. However, if you'd prefer to add the tracking code yourself, or need to add a customised version of it, you can simply omit the Measurement ID from the Treepl CMS Analytics setup. The Analytics Dashboard will still display data so long as you've correctly added your custom Data Stream tracking code (gtag.js) to your site.
Related Articles
- Liquid Components
frontend_API
External Resources
There are currently no external resources available.
Please let us know if you have any other contributions or know of any helpful resources you'd like to see added here.
Questions?
We are always happy to help with any questions you may have.
Visit the Treepl Forum for community support and to search previously asked questions or send us a message at support@treepl.co and we will consult you as soon as possible.