Secure Zones
Secure Zones provide a way of creating restricted content on your website that only registered Secure Zone Members are able to access after successfully logging in.
Multiple Secure Zones can be added to create different member’s only areas or tiered membership structures.
Creating Secure Zones
Secure Zones can be found under ‘Content’ > ‘Secure Zones’ where a list of any available Secure Zones will be shown along with the number of Members subscribed to each zone.
You’ll also be able to create, edit or delete Secure Zones - as detailed below.
1Details
Assign a name for your Secure Zone. This name will be used throughout the admin when referencing this Secure Zone and may also be displayed to the site user on the front-end or in Secure Zone related system emails.
Selecting a Page here determines the page to redirect a user to after a Secure Zone signup form submission. If multiple Secure Zones are selected for the signup form, the landing page used will be determined by the last selected Secure Zone in the list. This landing page can be overridden by use of the custom confirmation page method.
Sets the access type to this Secure Zone.
“Free Access” allows subscriptions without requiring payment.
“Paid Access” allows pricing to be assigned to the Secure Zone via subscription forms.
When 'Paid Access' type is applied, this option allows a billing recursion to the Secure Zone.
“Daily” billing recurs every day from initial subscription date.
“Weekly” billing recurs every week from initial subscription date.
“Monthly” billing recurs every month from initial subscription date.
“Yearly” billing recurs every year from initial subscription date.
When using Daily recurence, 5 hours is added to the secure zone expiration date to avoid loss of access while pending notification of successful payment.
When 'Paid Access' type is applied, this option sets the billing currency and price.
The curreny options are defined under 'Settings' > 'Domains' > 'Currency and Format'
Sets the default membership expiry setting when users subscribe to this Secure Zone*.
“Not Specified” sets no default option for membership expiry.
“Custom Date” defines the default expiry date for users subscribing to this Secure Zone*.
“Number of Days” defines the default number of days before expiry for users subscribing to this Secure Zone*.
*Unless alternative expiry date methods are used in the signup form which will override this setting.
2Secure Content
Choose the CMS content type to be listed in the window below (ie: Pages, System and Custom Modules...).
All available items from the selected Content Source will display in the left hand window and can be selected and moved to the right hand window in order to assign those items to this Secure Zone’s protection.
Likewise, protected items on the right can be selected and moved to the left in order to unassign them.
Moving items can be achieved by clicking the single arrow icons (in the direction of the desired move), or by dragging and dropping the items into the desired side.
Multiple items can be selected by holding down Ctrl (on PC) or Command (on MAC) and clicking multiple items.
The double arrows will move all items (regardless of selection) from one side to the other.
To secure Folders/directories and uploaded files, such as PDF’s, Word Docs, etc. see the 'Files and Folders' section below.
3Members
A list of currently subscribed Members will be listed here along with their email address along with the ability to click through to their individual CRM records (by clicking their name or the pencil icon to the right), or removing the Member from the Secure Zone (by clicking the associated trash can icon to the right).
Quick searching the list is also possible via the search field just above the list view.
You can also subscribe existing CRM contacts to the Secure Zone by clicking the “Add New Member” button at the top of the page.
From the ‘Email Address’ field a dropdown list of existing contacts will be presented for selection. Start typing a known email address to filter the list to those matching your search.
The “Send email details to user” checkbox allows you to send the ‘Secure Zone Login Details’ system email to the contact at the same time as subscribing them.
4Files & Folders
This interface allows files and folders, from the website, to be be selected from the left ‘All content’ region and moved into the right ‘Secure content’ region.
After selecting the required items (which will highlight), clicking the lock icon in the middle will list the selected items in the ‘Secure content’ region.
Multiple items can be selected by Ctrl (on PC) or Command (on MAC) clicking subsequent items.
Unsecuring items can be done in the same way but in reverse, removing items by selecting them from the right ‘Secured content’ region and clicking the unlock icon.
The “Clear All” button at the bottom can be used to unsecure all items at once.
Securing a folder will in turn secure all child items, even though they are not explicitly listed as being secured. Likewise, you do not need to secure every individual child item of a folder if that parent folder is secured.
Files and folders can also be assign to Secure Zones via the File Manager.
To secure Pages and Module items see the 'Secure Content' section above.
Editing Secure Zones
From the Secure Zone section (‘Content’ > ‘Secure Zones’) you can edit any existing Secure Zones from the list view by clicking on it’s name or the pencil icon on the right.
Secure Zones can also be deleted by clicking on the trashcan icon.
Adding a Login Form
Secure Zone login forms can be added anywhere within your site and the required form code can be obtained from the Components Manager.
For example, on a standard Page, in the ‘Content’ editor field, open the Components Manager (at the top right of this field), choose ‘Secure Zone’ > ‘Login Form’ and select “Login Form”.
The markup and form code will be copied to your clipboard ready to paste into the ‘Content’ field (or any other content area or layout within your site).
You can customise this markup as needed providing the form and inputs remain in place.
By default, the user will remain on the page they were on upon a successful login form submission, and a URL parameter will be added to the current page address of ?login=success.
However, this behaviour can be overridden by use of the custom confirmation page method, redirecting the user to a defined page, again with the URL parameter ?login=success added to the page address.
For example, you could set the confirmation page so the user is taken into their account page after logging in.
Alternatively, you can instruct the login process to redirect the user to a specific Secure Zone's Landing Page (defined in that Secure Zone's settings) by adding the following hidden input to the form code, replacing [secureZoneID] below with the ID of your Secure Zone:
<input type="hidden" name="secureZoneId" value="[secureZoneID]">
If the user submits incorrect login details, the ‘Forbidden’ (403) system page will be displayed.
If a visit to a secured page/item is attempted while the user is not logged in, the ‘Unauthorised’ (401) system page will be displayed.
These system pages can be customised and are found under ‘Settings’ > ‘System Pages’.
See System Pages documentation for more details.
Logged in users will be logged into all Secure Zones they are subscribed to and will have access to all the secured content corresponding to those Secure Zones.
A logged in session will expire after 24hrs regardless of member activity on the site during that session. Members will be required to log in again after their session has expired if they attempt further access.
Rendering Logged In Member Data
When a user is logged in to a secure zone, the request.currentmember property (part of the request object) will return the logged in member's data. An example is below:
{
"is_logged": true,
"currentmember": {
"id": 162,
"email": "asmith@example.com",
"firstname": "Alex",
"lastname": "Smith",
"address": null,
"city": null,
"state": null,
"zipcode": null,
"country": "Australia",
"site": null,
"phone": null,
"status": "",
"notes": "",
"type": 2,
"stripecustomerportallink": "https://YOUR-SITE.treepl.co/public/api/stripe/create-customer-portal-session",
"isDataUsingAllowed": true,
"createddatetime": "9/11/2019 3:32:23 AM",
"updateddatetime": "3/24/2021 2:44:32 AM",
"securezones": [
{
"id": 2,
"name": "Members Secure Zone",
"landingpageid": 2541,
"createddatetime": "2018-11-21T15:17:23.037",
"updateddatetime": "2018-11-21T15:17:23.037",
"expirydatetime": "9999-12-30T13:00:00"
}
]
}
}
To access data within the securezones array you can use a forloop to loop through each secure zone item.
So we might render a list of available secure zones and their expiry dates, like so:
<ul>
{% for zone in request.currentmember.securezones %}
    <li>{{zone.name}} (Expiry: {{zone.expirydatetime | date}})</li>
{% endfor %}
</ul>
Rendering the following details:
- Members Secure Zone (Expiry: 30-Dec-9999)
For more information about retrieving this Liquid data, see the request object documentation.
Adding a Logout Action
You’ll probably also want to give users the ability to log out of their secured session.
You can do this by generating a logout link from the Component Manager under ‘Secure Zone’ > ‘Logout Action’. Which will copy the following code to your clipboard:
<a href="/public/api/members/logout">Logout</a>You can also add to this link with a redirect parameter if you would like users to be redirected to a specific page upon logout. Add the redirectURL parameter along with your page URL to the link path like so:
<a href="/public/api/members/logout?redirectURL=/YOUR-REDIRECT-PAGE">Logout</a>Adding a Signup Form
If you’d like website users to be able to subscribe themselves to a Secure Zone, or even multiple Secure Zones, you’ll need to create a Form (‘Content’ > ‘Forms’) in order to add the user to the CRM and store their credentials for the Secure Zone/s.
This form can also contain any other fields, subscriptions, payments, etc. so you can customise this for your specific requirements.
The only requirement for the Form to be able to subscribe a user to a Secure Zone is to have a system email address field and a Secure Zone selected from the ‘Settings’ tab. However, additional Secure Zone options can be added such as Secure Zone expiry date/days and set/confirm password fields.
See Forms documentation for more details on form fields and settings.
After a user submits a Secure Zone subscription form they may receive up to three system emails. A first-time subscriber, by default, may receive the ‘Confirm Email Notification’ email, to ensure that they are a valid user (users with confirmed email addresses will not continue to receive this email). Secondly, they will receive the ‘Secure Zone Login Details’ email, providing details about the Secure Zone/s they are now subscribed to. Both of these emails can be customised and are found under ‘Email Notifications’ > ‘System Emails’. And third, they may receive a Auto-response email if one has been configured for the form used.
The email confirmation requirement for subscribing members can be disabled under ‘Settings’ > ‘Misc’ > ‘CRM Settings’. For information can be found here.
See System Emails documentation for more details.
Update Account Form
You can add a system form to a page which will allow a logged in user to edit/update the data in their CRM Contact record (including any Advanced CRM Group fields).
This form code can be generated by going to the Component Manager (top right of most admin WYSIWYG fields), expanding the ‘Secure Zone’ section and selecting “Update Account Form”. The form code will then be copied to your clipboard ready for pasting into your page or code editor.
Only the logged in user can update their own CRM record
Paid Secure Zone Subscriptions
Secure Zones can be configured with paid access requirements allowing you to charge membership to the secure zone on a recurring basis. See above Creating Secure Zones for setting price and renewal rate for the zone.
To initiate billing for a recurring Secure Zone membership you would create a subscription form (as noted above in Adding a Signup Form) and include payment fields to collect payment from the user and for the Treepl CMS to configure the recurring payment profile with the payment gateway (you’ll also need to configure a Payment Gateway that supports recurring billing [/site-settings-and-management/payment-settings]).
Forms collecting payment for paid recurring Secure Zone should be configured with the “Generic” form type.
If your Secure Zone only requires an initial, one-off payment you would not configure the Secure Zone with a recurring payment rate and instead, simply collect an arbitrary payment upon initial signup.
To set the price in your signup form you can add a price parameter to your form component tag when adding the form to your page, like so:
{% component type: "form", alias: "my_paid_zone", price: "30" %}You can also use the Component Manager to configure your form component tag and calculate the required price based on the form settings. In the Component Manager, under ‘Secure Zones’, select “Sell Memberships Forms” and select the payment form from the available list of forms.
Only forms correctly configured with a Secure Zone assignment and payment method will display in this list.
If subscribing users to multiple paid Secure Zones the price will need to be the total of both zones.
The calculated total must match the price being collected else the form submission will produce an error. However, you can apply discount codes and/or gift vouchers to reduce the charged amount (providing your site plan allows discount codes and gift vouchers).
If using discount codes to reduce a Secure Zone subscription amount, there are settings that you can configure if the discounted amount applies only for the initial transaction or for the recurring transactions as well - found under ‘eCommerce’ > ‘Settings’ > ‘Recurring Settings’.
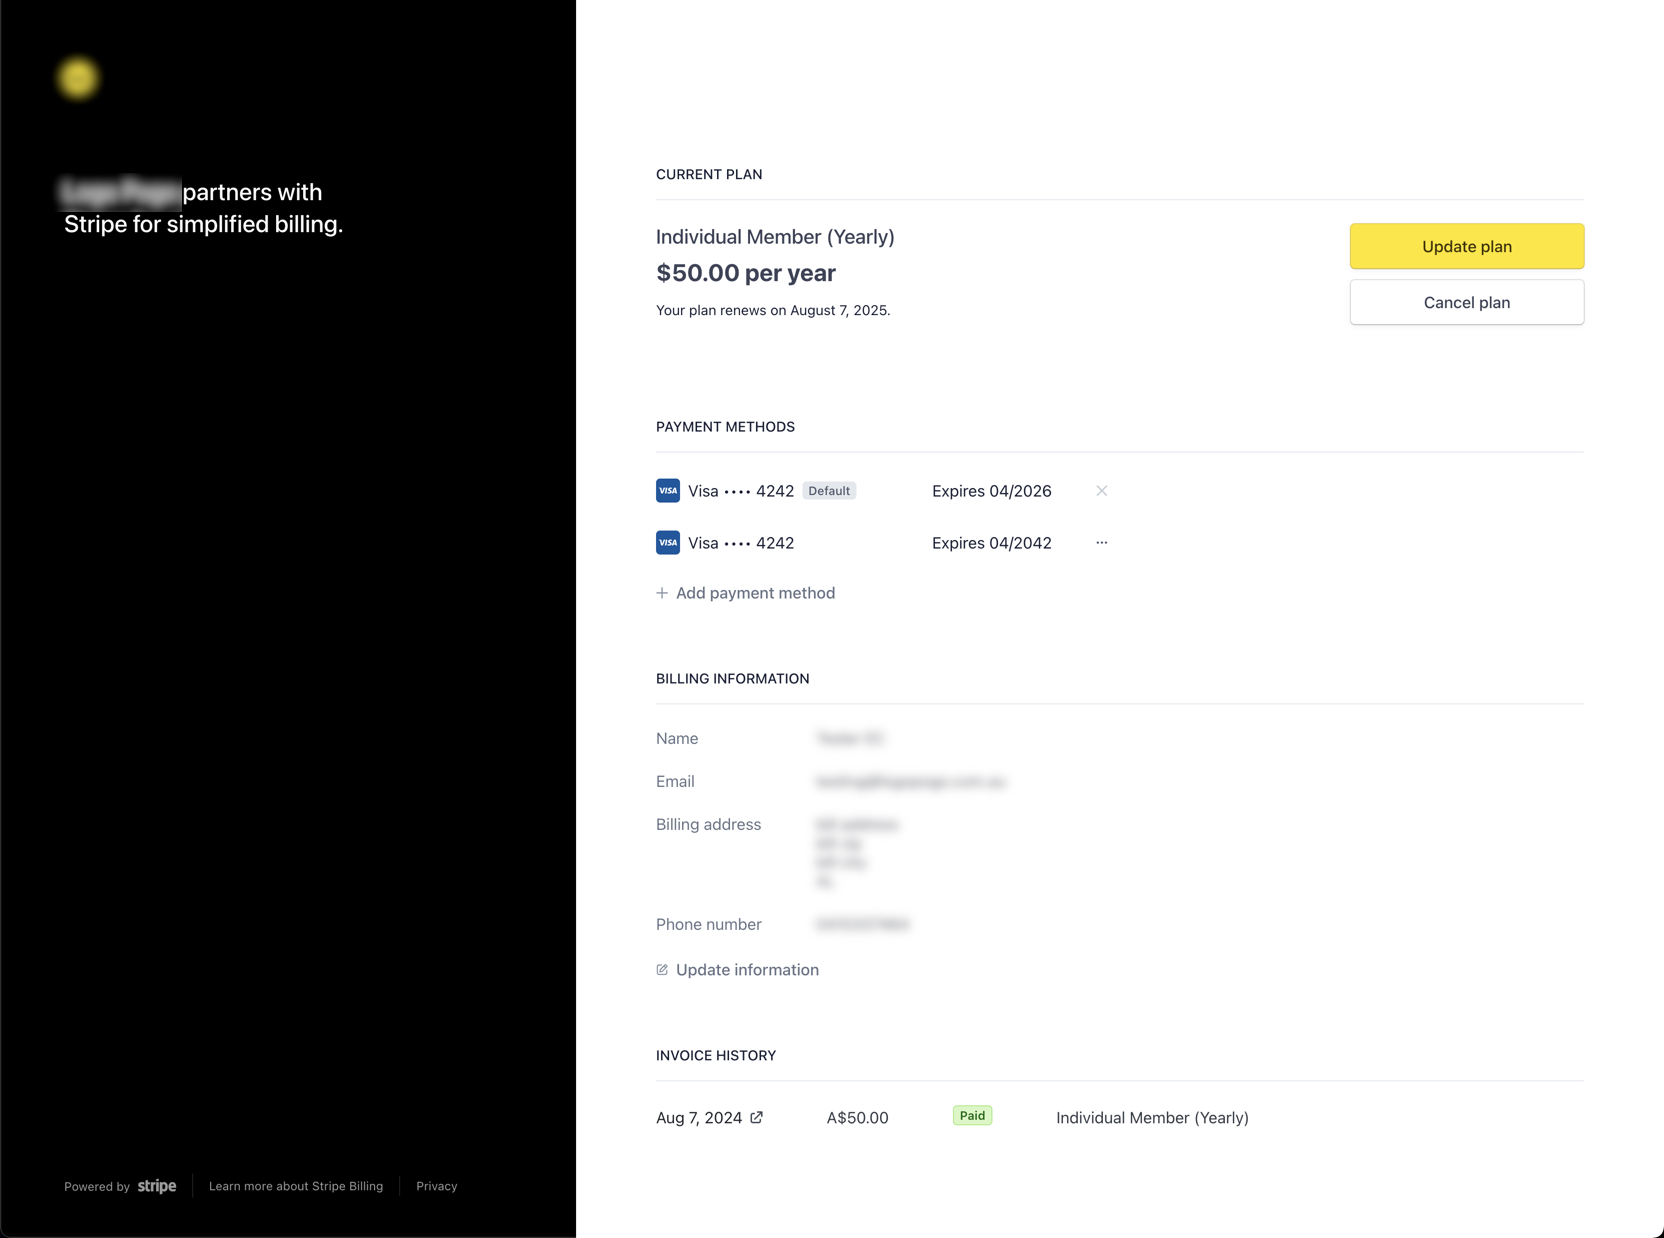
Stripe Customer Portal
The Stripe Customer Portal provides a self-service area for paid secure zone customers to view and manage aspects of their billing. Such as customer information, invoices, subscription status and billing methods.
Activating
If you are using Stripe as a payment option in Treepl CMS for your paid secure zone subscriptions, then the Stripe Customer Portal will be automatically available for use (and based on your Stripe Customer Portal settings configured in your Stripe account).
Member Access
Connections are made to the Stripe Customer Portal via temporary sessions. Treepl CMS securely creates a customer’s session with Stripe via the following API endpoint:
https://SYSTEM-URL-HERE/public/api/stripe/create-customer-portal-session
If a logged-in member, who has a valid secure zone order, visits this URL, Treepl CMS will authenticate them with Stripe and redirect them to their Stripe Customer Portal session.
This URL can also be dynamically added to a member’s page or relevant email notification via the `request.currentmember` Liquid object, eg:
request.currentmember.stripecustomerportallink
If a non logged-in user visits this URL, a 401 (Unauthorised) system page will be displayed.
Likewise, if a logged-in member who doesn’t have a valid secure zone order visits this URL, a 403 (Forbidden) system page will be displayed.
Features
The following actions can be taken by the customer within the Stripe Customer Portal and these will synchronise with Treepl CMS.
Cancel Recurring Subscription:
The member can cancel their recurring billing and subscription from the Stripe Customer Portal and this will also cancel their secure zone renewal within Treepl CMS (on the subscription renewal date).
You can adjust your Stripe settings to turn off, or adjust, cancellation options.
Change Subscription (that contains only one Plan):
The member can change the subscription plan and/or quantity from the Stripe Customer Portal and this can change their subscription in Treepl CMS, provided that you have added the corresponding subscription products to the Customer Portal settings in Stripe, allowing customers to select those products. These products will be created in Stripe after an order via the website has been placed. This can be a purchase via Stripe’s test mode, but the created product/s will then need to be copied from test mode to live mode within Stripe’s product dashboard for use in production.
You can adjust your Stripe settings to turn off, or adjust, change of subscription options.
Change Email Address:
The member can change their email address from the Stripe Customer Portal and this will initiate a change request for the email address in Treepl CMS. A confirmation email will be triggered to the member and must be actioned for the email address in Treepl CMS to update, otherwise it will remain the same.
You can adjust your Stripe settings to turn off, or adjust, customer information options.
Change Billing Address:
The member can change their billing address from the Stripe Customer Portal and this will change their billing address in Treepl CMS.
You can adjust your Stripe settings to turn off, or adjust, customer information options.
Change Phone Number:
The member can change their phone number from the Stripe Customer Portal and this will change their phone number in Treepl CMS.
You can adjust your Stripe settings to turn off, or adjust, customer information options.
Stripe Documentation
For further information at Stripe see the links below:
Manually Subscribing Contacts
Adding Contacts to a Secure Zone during creation of the Secure Zone or while editing a Secure Zone is one way of subscribing Contacts, as noted in the above Creating Secure Zones section. However, you can also subscribe Contacts directly from their CRM record.
Locate the Contact in the CRM and navigate to the ‘Subscriptions’ tab. Here you find options to select from available Secure Zones, set the subscription expiry dates, or send password recovery or login details system emails to the Contact.
Manually Approve Secure Zone Subscribers
If you’d like to allow users to create their accounts via the front-end of the website but not be able to log in until an admin users has approved them, you would configure the sign up form with your desired fields (and likely the password fields), but you would not select a secure zone to be assigned upon submission, under the forms ‘Settings’ tab.
After reviewing the account request, the admin user would simply subscribe the Contact to the appropriate Secure Zone/s and, if needed, send out either the Password Recovery email and/or the Login Details email. Or otherwise inform the user that their request has been approved.
When a first-time user submits a form with password fields present, they will receive the ‘Confirm Email Notification’ system email and will need to follow the validation link and confirm their email address before they are able to log in.
Resetting Password
A password reset workflow can be initiated either by the site user, from the front-end of the site (if made available), or by an admin user from the site admin area.
On the front-end, providing a link has been made available to the site’s ‘Request Reset Password’ system page (usually a link is included with the login form), the Member can submit the form on this page to trigger the password reset workflow. This workflow will send the Member an email with a unique, temporary link to the ‘Reset Password’ system page where they’ll be able to create a new password.
Upon submitting the password reset, the user will be directed to the ‘Request Reset Password Result’ system page.
All of these system pages can be customised and are found under ‘Settings’ > ‘System Pages’.
See System Pages documentation for more details.
From the site admin, an admin user can also initiate the same password reset workflow for an individual Contact.
First, locate the Contact in the CRM, or from the list of members in the Secure Zones section. Once in the Contact’s record, navigate to the ‘Subscriptions’ tab and click the “Send Password Recovery E-mail” button.
The temporary link for a password reset is valid for 24hrs.
Email Domain Sender Verification
As the Secure Zone module requires various system emails be sent out to website users, it’s strongly recommended to review your ‘From’ email domains that you’re using for these outbound system emails.
By default, the ‘trustedemail.co’ domain is set as the ‘From’ address for system emails and as such is already verified. However, if you are personalising these emails with your own email addresses, ensure you have the relevant SPF records in place for those domains and that you’ve added the domain to the verified senders list under ‘Settings’ > ‘Domains’ > ‘Email Domains’ tab.
Failing to configure these settings for custom sending addresses may result in lower deliverability rates.
Related Articles
- Site Settings & Management
System Pages
System Pages, under 'Settings', is where you’ll find all those pages required by certain system... - Reports
Custom Reports
Custom reports can be used to bring CRM data together, as a spreadsheet, based on your requirements. - Liquid Components
form
This component outputs data relating to a specific Form. {% component type: "form", alias: "<form_alias>"... - CRM
Form Submissions
Form Submissions store the captured data from any form submission made on your website (from a form created under ‘Content’ > ‘Forms’). - OpenAPI (Admin)
CRM Cases API
Create, Retrieve, Update and Delete CRM Cases via the public API endpoint using "where" filtering. - Email Notifications
System Emails
System emails are emails that are sent when a particular action is carried out on the website and/or via the admin. - Liquid Objects & Usage
{{ formSubmissionData }} object
This liquid object will output the submission details of a Form. - CRM
Advanced CRM Groups
Advanced CRM Groups allow you to extend the data fields within multiple areas of the CRM, either globally or on a per-record basis. - Liquid Objects & Usage
{{ workflow }} object
This liquid object will output the Workflow details of a submitted Form. You can use... - Content Modules
Forms
Forms are an essential part of collecting user information on your website.
Treepl CMS makes managing forms easy and powerful - Liquid Objects & Usage
{{ order }} object
This liquid object will output the order details of a submitted payment. {{ this.order }}... - OpenAPI (Admin)
Forms API
Retrieve Forms via the public API endpoint using "where" filtering. - eCommerce
Payment Form Javascript
Options for controlling and further customising payment form submissions are available via javascript events. - Extras
ReCaptcha Styling
Treepl CMS supports Google reCAPTCHA v2 and v3 implementations. Below are some additional options you...
External Resources
- Best Practices: Secure Zone Login
Tips and tricks from the community when setting up Secure Zones.
Please let us know if you have any other contributions or know of any helpful resources you'd like to see added here.
Questions?
We are always happy to help with any questions you may have.
Visit the Treepl Forum for community support and to search previously asked questions or send us a message at support@treepl.co and we will consult you as soon as possible.