Migrating to Advanced Payment Flow
This article describes differences and possible required actions for migrating to the Advanced Payment Gateway flow.
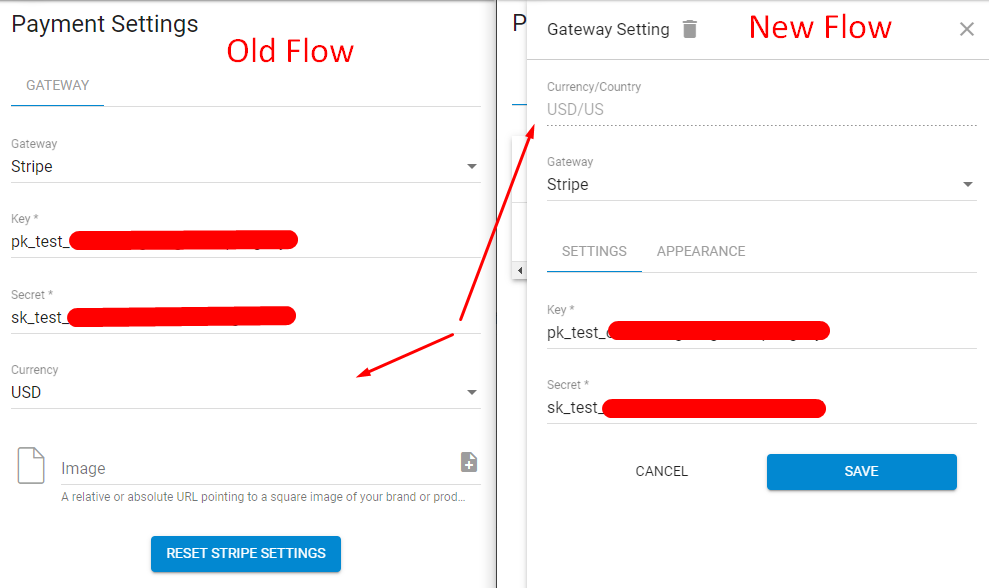
Difference #1: Payment Gateway And Domain Settings
Currency is no longer selectable for payment gateway when Advanced Payment Flow is enabled.
Instead of a full currencies list you will be provided with the currency/country pairs that are taken from domain settings of all your domains.
In order to setup/change currency you should go to the domain settings and choose (or create first) a culture that contains desired currency.
When Advanced Payment Flow is enabled you have an ability to setup several stripe (or any other) payment gateways.
One gateway per one unique currency/country pair.
Required Actions
Once feature enabled this change requires you to check if your domains have proper countries and format settings selected. And apply proper once if not.
Example:
You have AUD currency selected for stripe.
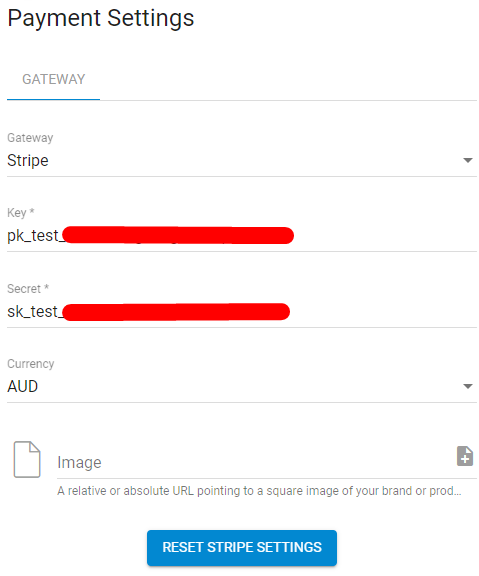
Once the flag is enabled your Payment Settings page will be changed from this:
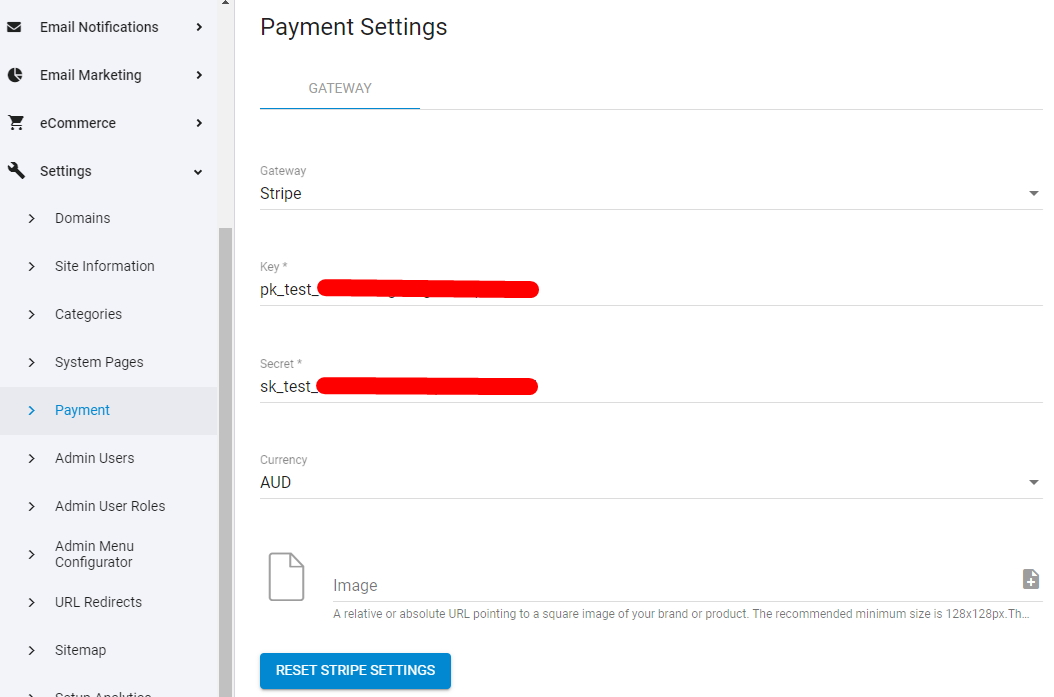
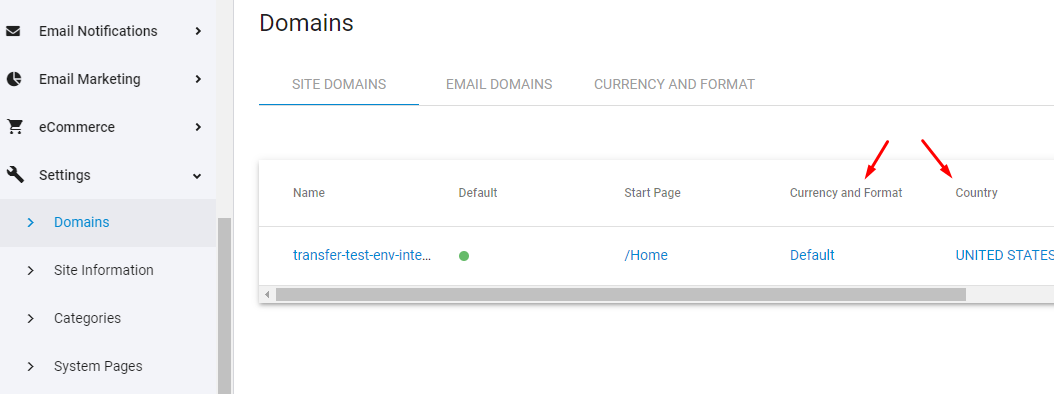
To this:
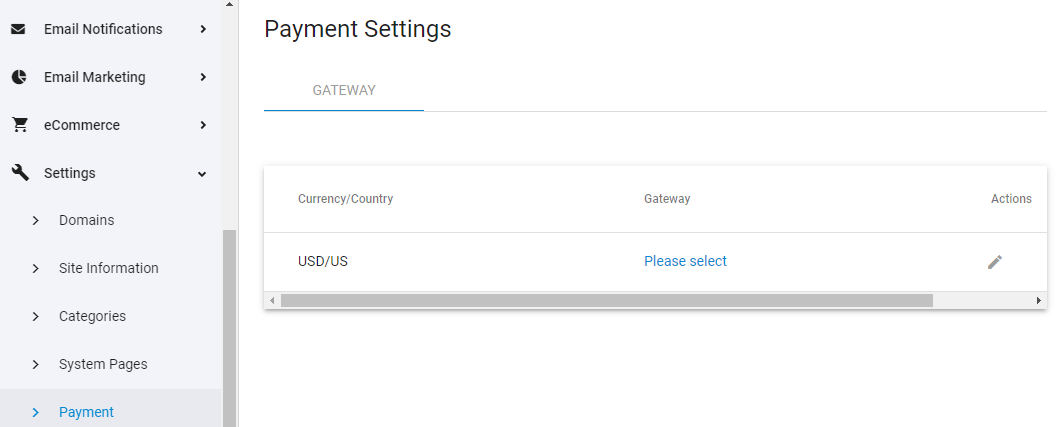
You can see that Gateway now is not selected. That’s because the system set default country to UNITED STATES and format setting to Default (that contains USD currency) by default.
In order to see and/or change these settings you should go to the domains page. You can see all your domains and their countries and format settings.
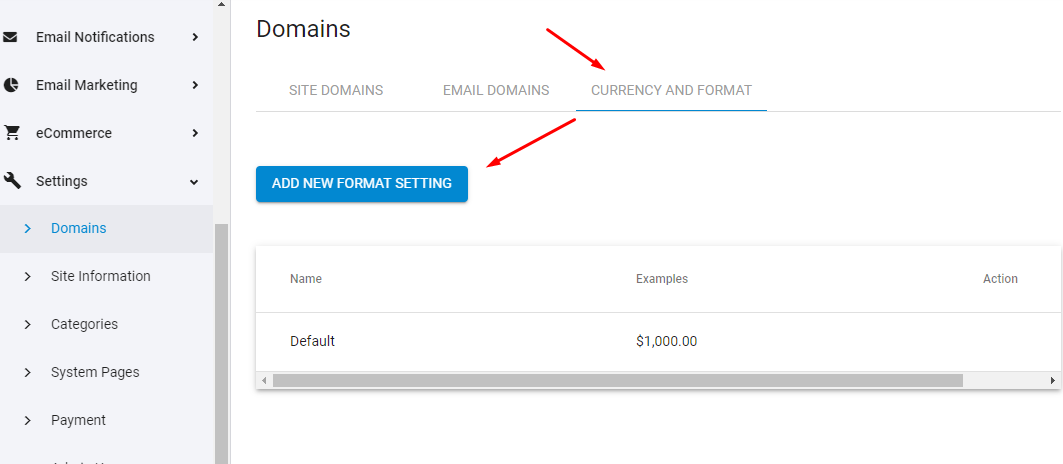
If your site is not configured for UNITED STATES and USD currency then you need to go to the CURRENCY AND FORMAT tab first and create your format setting.
Let's name it AUD and select appropriate currency and culture and click save.
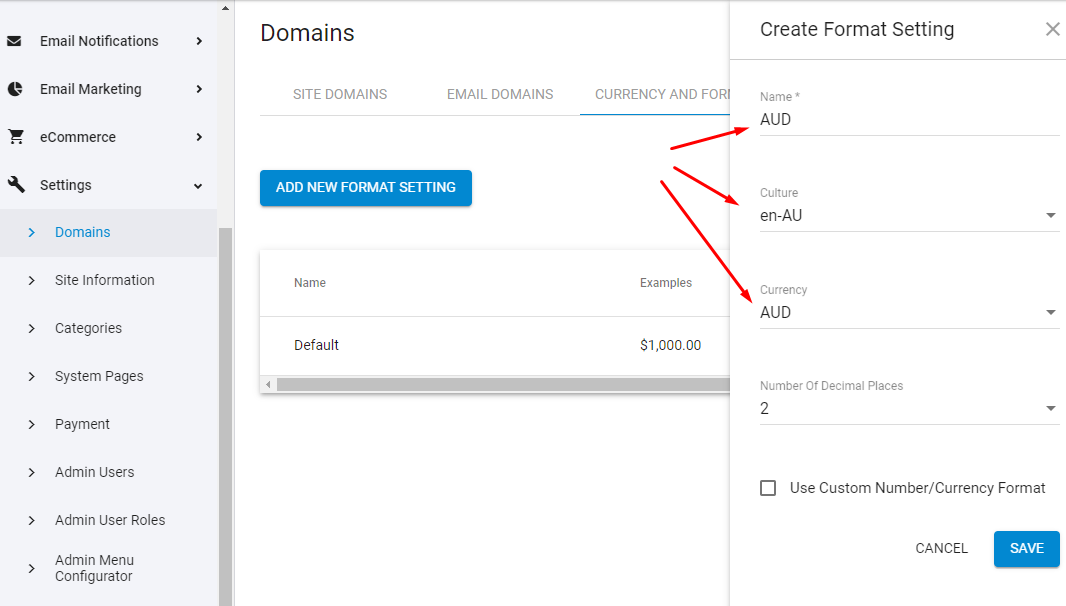
Your format setting should appear in the list of format settings.
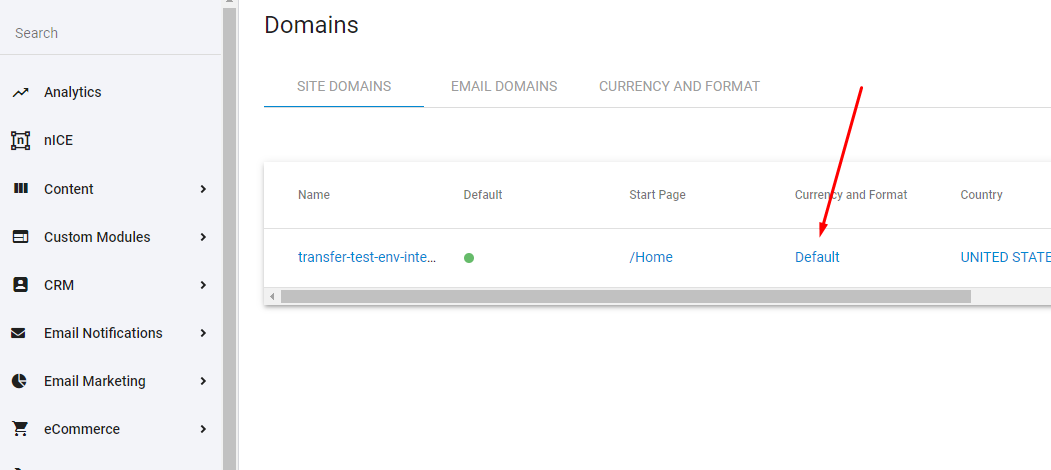
Now we go back to the SITE DOMAINS tab and for each domain just choose AUD format setting.
Due to the background transition that was applied once this flag was added - your payment gateway setting, secure zone recurring prices and event prices were converted to the following:
Currency was attached based on payment gateway settings (all is good here)
Unfortunately, the country that was attached as the default one is UNITED STATES.
This means that in order to save consistency you should not change the domain country. Otherwise you would have to reset all secure zone recurring prices and event prices.
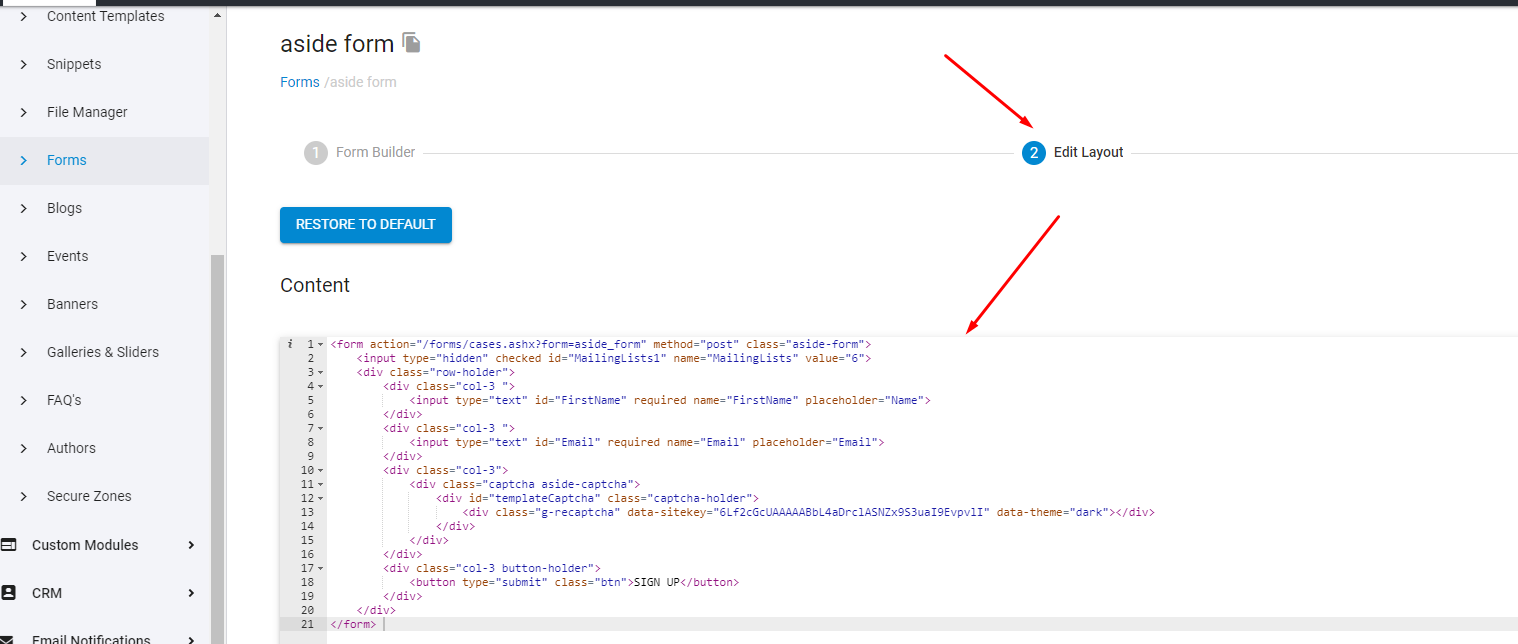
Difference #2: General Payment Forms.
HTML layout of the form should be changed.
Then use the following required actions.
Required Actions
Go to the Edit Layout section of the form.
Remove data attributes for order name and description.
They will be set on the backend by the internal rules.
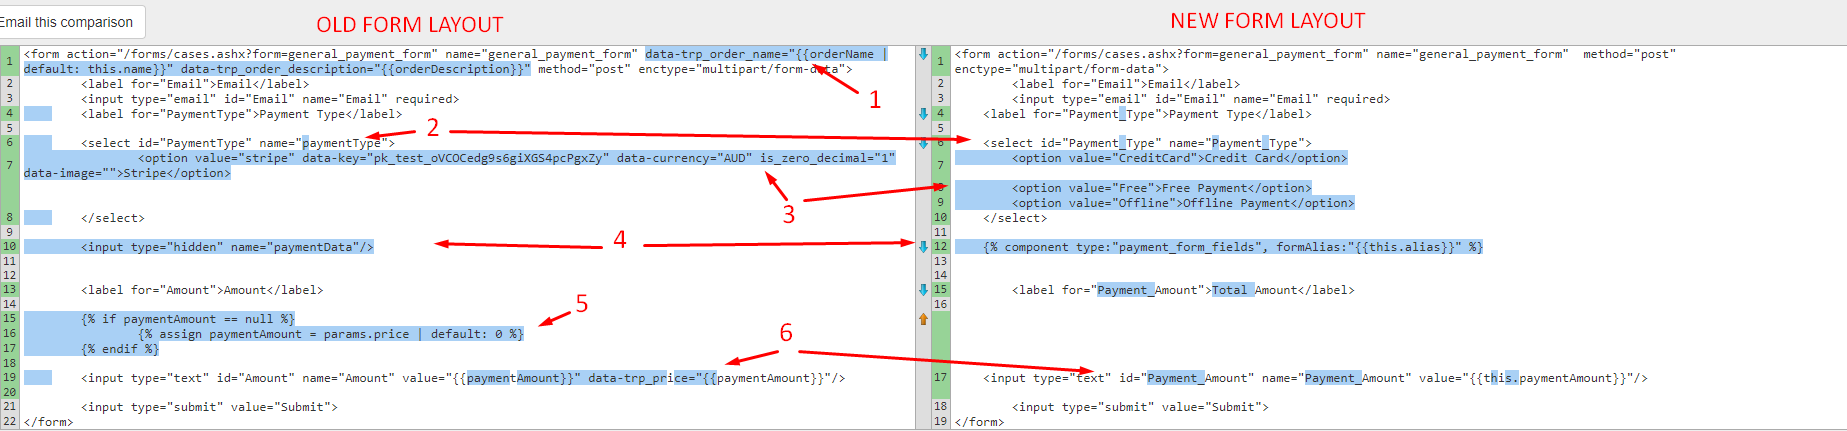
PaymentType field was reworked to accept payment types not payment gateway as it wrongly did before.
Rename select field name attribute to Payment_Type
Replace stripe option to the CreditCard option.
Advanced Payment flow allows you to have following options:
CreditCard
Replacement of the old stripe type. Gateway will be determined by the current domain instead.
Stripe key, currency and other gateway staff now passed via get params of the payment gateway js that is automatically attached to the head of the page if page contains at least one component type form with selected accept payment field
Free
Option that is accepted only if the submitted amount is equals to 0. Submitting such a form still creates an order-form_submission pair.
Offline
Option that allows creating order in Awaiting Payment state. So you will be capable to add offline payment on order -> Payments tab that will change order state to Success
Replace
<input type="hidden" name="paymentData" value="">
with the
{% component type:"payment_form_fields", formAlias:"{{this.alias}}" %}
Remove this liquid code. It’s not needed any more.
Amount field was transformed to Payment_Amount field.
Value of the this.paymentAmount will be set based on price param if form does not contain any secure zone with paid recurring subscriptions.
If the form contains such a secure zone then price value will be overridden by sum of all paid subscriptions.
Difference #3: Recurring Subscriptions to Secure Zones
HTML layout of the form should be changed.
Then use the following required actions.
Required Actions
Replicate all actions that are described in the Difference #2.
Go to all your recurring secure zones and verify that prices were migrated to the new payment model correctly.
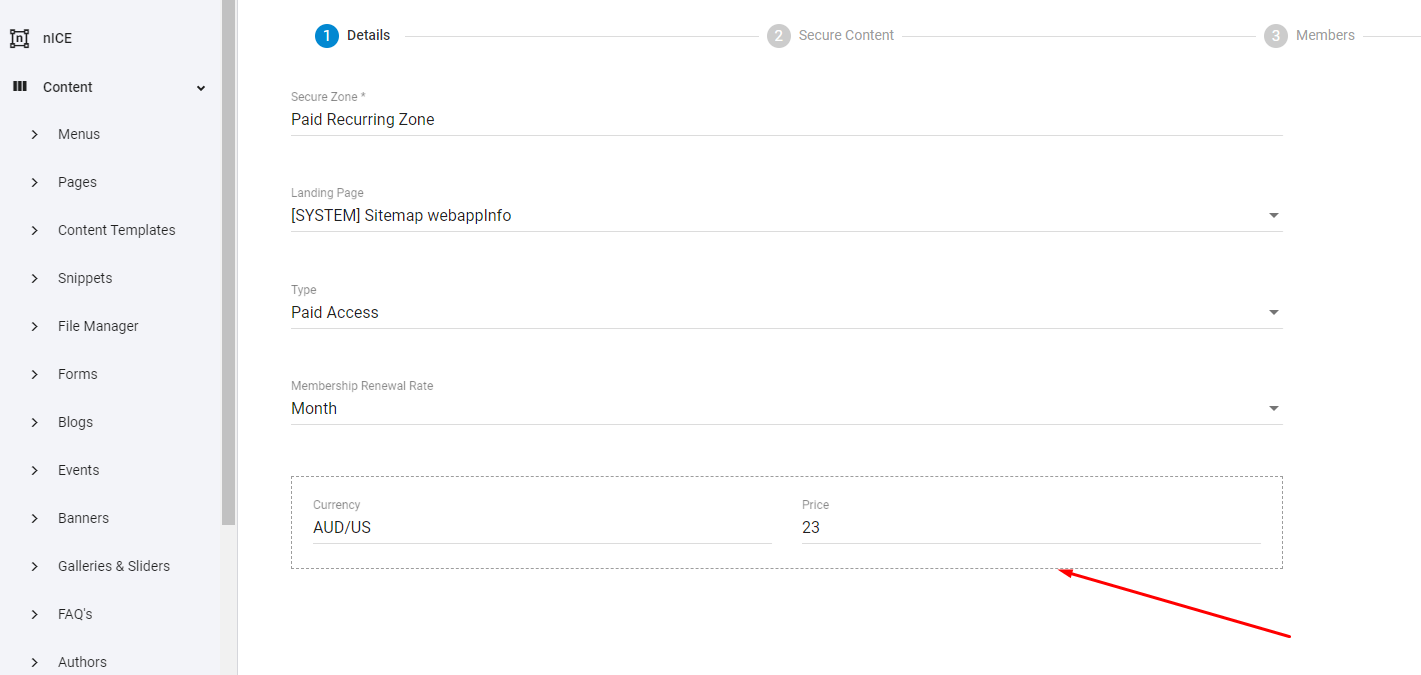
If it is empty then there are several possible reasons for that:
You have not set country and format settings for your domains.
In this case please follow the actions described in the Difference #1.
You set a country for the domain that is not UNITED STATES. In this case either return the country back to UNITED STATES or set and save the price manually.
Price wasn’t migrated correctly to the new model. The price should be set and saved manually.
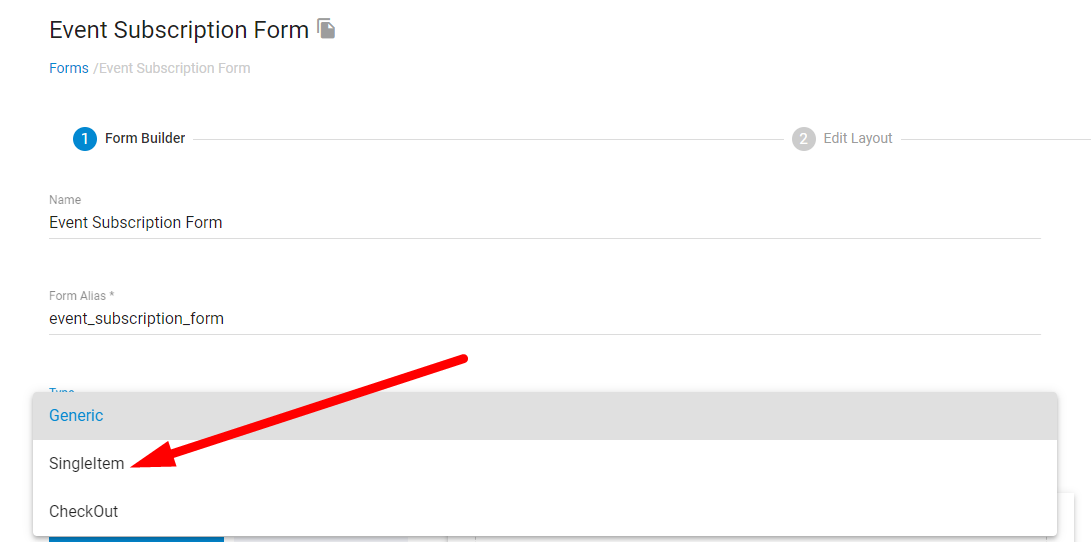
Difference #4: Event Subscription forms (with and without payment)
HTML layout of the form, AND the Form Type, should be changed.
Then use the following required actions.
Required Actions
Go to the Form Builder section of the form and change form type from Generic to SingleItem and click save.
Then follow the guide below for the event subscription form without payment.
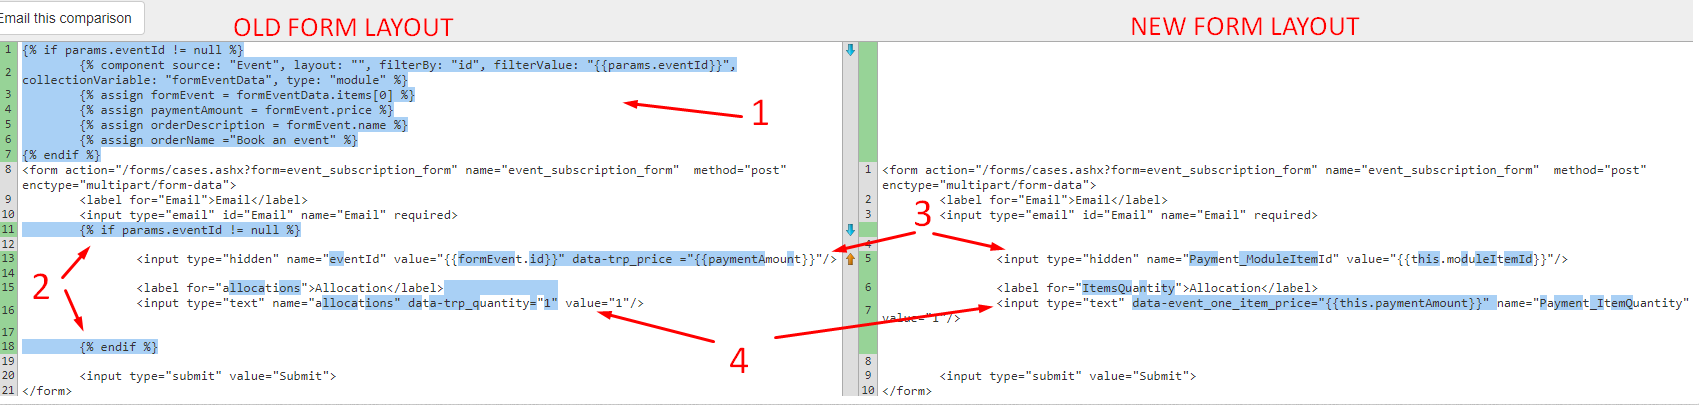
Go to the Edit Layout section of the form. Remove this liquid code since this is now unnecessary.
Ifliquid code is unnecessary. Remove it.eventIdfield should be renamed toPayment_ModuleItemId.Value should be changed to
{{this.moduleItemId}}.allocationsfield should be renamed toPayment_ItemQuantityAdd
data-event_one_item_price="{{this.paymentAmount}}"data attribute to the field so it will be calculated by CMS payment js.If your event subscription form also accepts payments then follow the actions described in the Difference #2 additionally.
Related Articles
- Site Settings & Management
Domains
The Treepl CMS Domain settings allow you to control default domain, landing pages, domain authentication for system emails along with country and cultural settings like number and currency formatting. - Site Settings & Management
Payment Settings
Integrate various payment gateways, for multiple countries and currencies, into Treepl CMS for form payments, subscriptions and eCommerce workflows. - CRM
Orders
Orders store accounts of any payments made via the website and provide management for additional payments, invoices, order statuses, tracking info, the products purchased within the order and the details of the form submission used to take the order. - CRM
Advanced CRM Groups
Advanced CRM Groups allow you to extend the data fields within multiple areas of the CRM, either globally or on a per-record basis. - Liquid Objects & Usage
{{ order }} object
This liquid object will output the order details of a submitted payment. ... - Liquid Components
module (Catalogs)
This module component fetches data relating to eCommerce Catalogs and can be used to render Catalog structures and Products within them. - Liquid Components
module (Products)
This module component fetches data relating to eCommerce Products and can be used to render Product information. - Liquid Components
ecommerce_add_to_cart
This component renders an anchor element allowing the javascript function to add the item to the shopping cart. - Liquid Components
ecommerce_buy_now
This component renders an anchor element allowing the javascript function to add the item to the shopping cart and then proceeding directly to the shopping cart page. - Liquid Components
ecommerce_item_quantity
This component renders a form input element allowing a quantity to be set for when the source item is added to the shopping cart. - Liquid Components
item_attributes
This component fetches all attributes/options for a specified product. By default, each attribute group is rendered, with its options and any prices, according to their specified form inputs. - Liquid Components
related_items
This component fetches related items of a specific source item, such as a Product that has had Related Products assign to it. - Liquid Components
grouped_items
This component fetches grouped items of a specific source item, such as a Product that has been Grouped with other Products and allows the ability to navigate between grouped items. - Liquid Components
currencies
This component renders a form select element of all currency names, codes and symbols by default, and can also be used to output currency data to a Liquid collection. - Liquid Components
shopping_cart
This component fetches data relating to the shopping cart, such as any products added, order totals, tax, shipping, etc. - Liquid Components
shipping_options
This component renders a form select element of all shipping options configured on the site, and can also be used to output shipping option data to a Liquid collection. - Liquid Components
shippingProviderFields
This component provides a placeholder for populating additional Shipping Provider options to the user. - Liquid Components
tax_codes
This component renders a form select element of all tax codes configured on the site, and can also be used to output tax code data to a Liquid collection. - Liquid Components
payment_form_fields
This component is used to render payment fields, and payment related validation errors, within a form using the capabilities provided by your configured payment gateway. - Liquid Components
orders
This component fetches Orders from the CRM, either owned by the logged-in user or for all customer Orders. - eCommerce
Getting Started
To get started with the eCommerce module there are some overall settings to configure that provide eCommerce with further context in order to function appropriately for your situation. - eCommerce
Products
Products are one of the most powerful and flexible modules in Treepl CMS. Create customised product schemas with multiple price points, catalogs, inventory tracked attributes/variables, SEO optimisation and more. - eCommerce
Catalogs
When organising any eCommerce store, Catalogs are crucial to your Products structure and browserbility. Easily create and customise unlimited product catalogs for your online store. - eCommerce
Discount codes
Provide discount code functionality for your Treepl CMS shopping cart. Ideal for promotions, customer loyalty and conversions or to help move more stock. - eCommerce
Gift vouchers
Gift vouchers can be issued to your customers or purchased by them online via the shopping cart. - eCommerce
Taxes
Create any number of required tax codes specific to the shipping country selected in your Treepl CMS shopping cart. - Liquid Components
countries
This component renders a form select element of all country names and country codes by default, and can also be used to output country codes/names to a Liquid collection. - Liquid Components
domain_settings
This module component retrieves settings associated with the current domain, or optionally from another specified domain configured in the site instance. - eCommerce
Shipping Options
Treepl CMS provides the ability to configure both custom shipping options and integrated shipping providers based on a variety of conditions during the shopping cart stage. - eCommerce
Settings
These various eCommerce settings allow you to further control and customise the way your website functions, both in the admin and on the front-end, in terms of eCommerce functionality. - eCommerce
eCommerce Javascript
This is the provided javascript options for further controlling/customising the ecommerce javascript provided by the CMS. - Extensions
Abandoned Cart Recovery
With Abandoned Cart Recovery functionality, you can automatically send email reminders to customers who add products to their cart (while logged in) and leave without completing the order. - Public API
CRM Orders
Return or update Order item/s via the public API endpoint.
External Resources
There are currently no external resources available.
Please let us know if you have any other contributions or know of any helpful resources you'd like to see added here.
Questions?
We are always happy to help with any questions you may have.
Visit the Treepl Forum for community support and to search previously asked questions or send us a message at support@treepl.co and we will consult you as soon as possible.